If you’ve been using Notion for a while, chances are you’ve come across this situation: you want to move a page or database from one account to another. Maybe you’ve changed your email, or you’re switching content from a team account to your personal one.
While Notion doesn’t offer a built-in “one-click transfer” feature, there’s a simple workaround—share the page, then move it. This method preserves your original structure, content, and formatting, and it only takes a few quick steps.
To make it even easier, we’ve put together a free interactive walkthrough where you can follow along step-by-step.
🛠️ This demo was made with Snapdemo. It’s easy to use, no coding needed — try it free, no credit card required.
🟢 Step 1: Open the page you want to transfer and click “Share” in the top-right corner
Go to the page you’d like to move and click the Share button in the upper right.

🟢 Step 2: Enter the email address of the other account
In the sharing window, type in the email of the account you want to move the page to.
You can add multiple emails if you want to give access to more than one account.

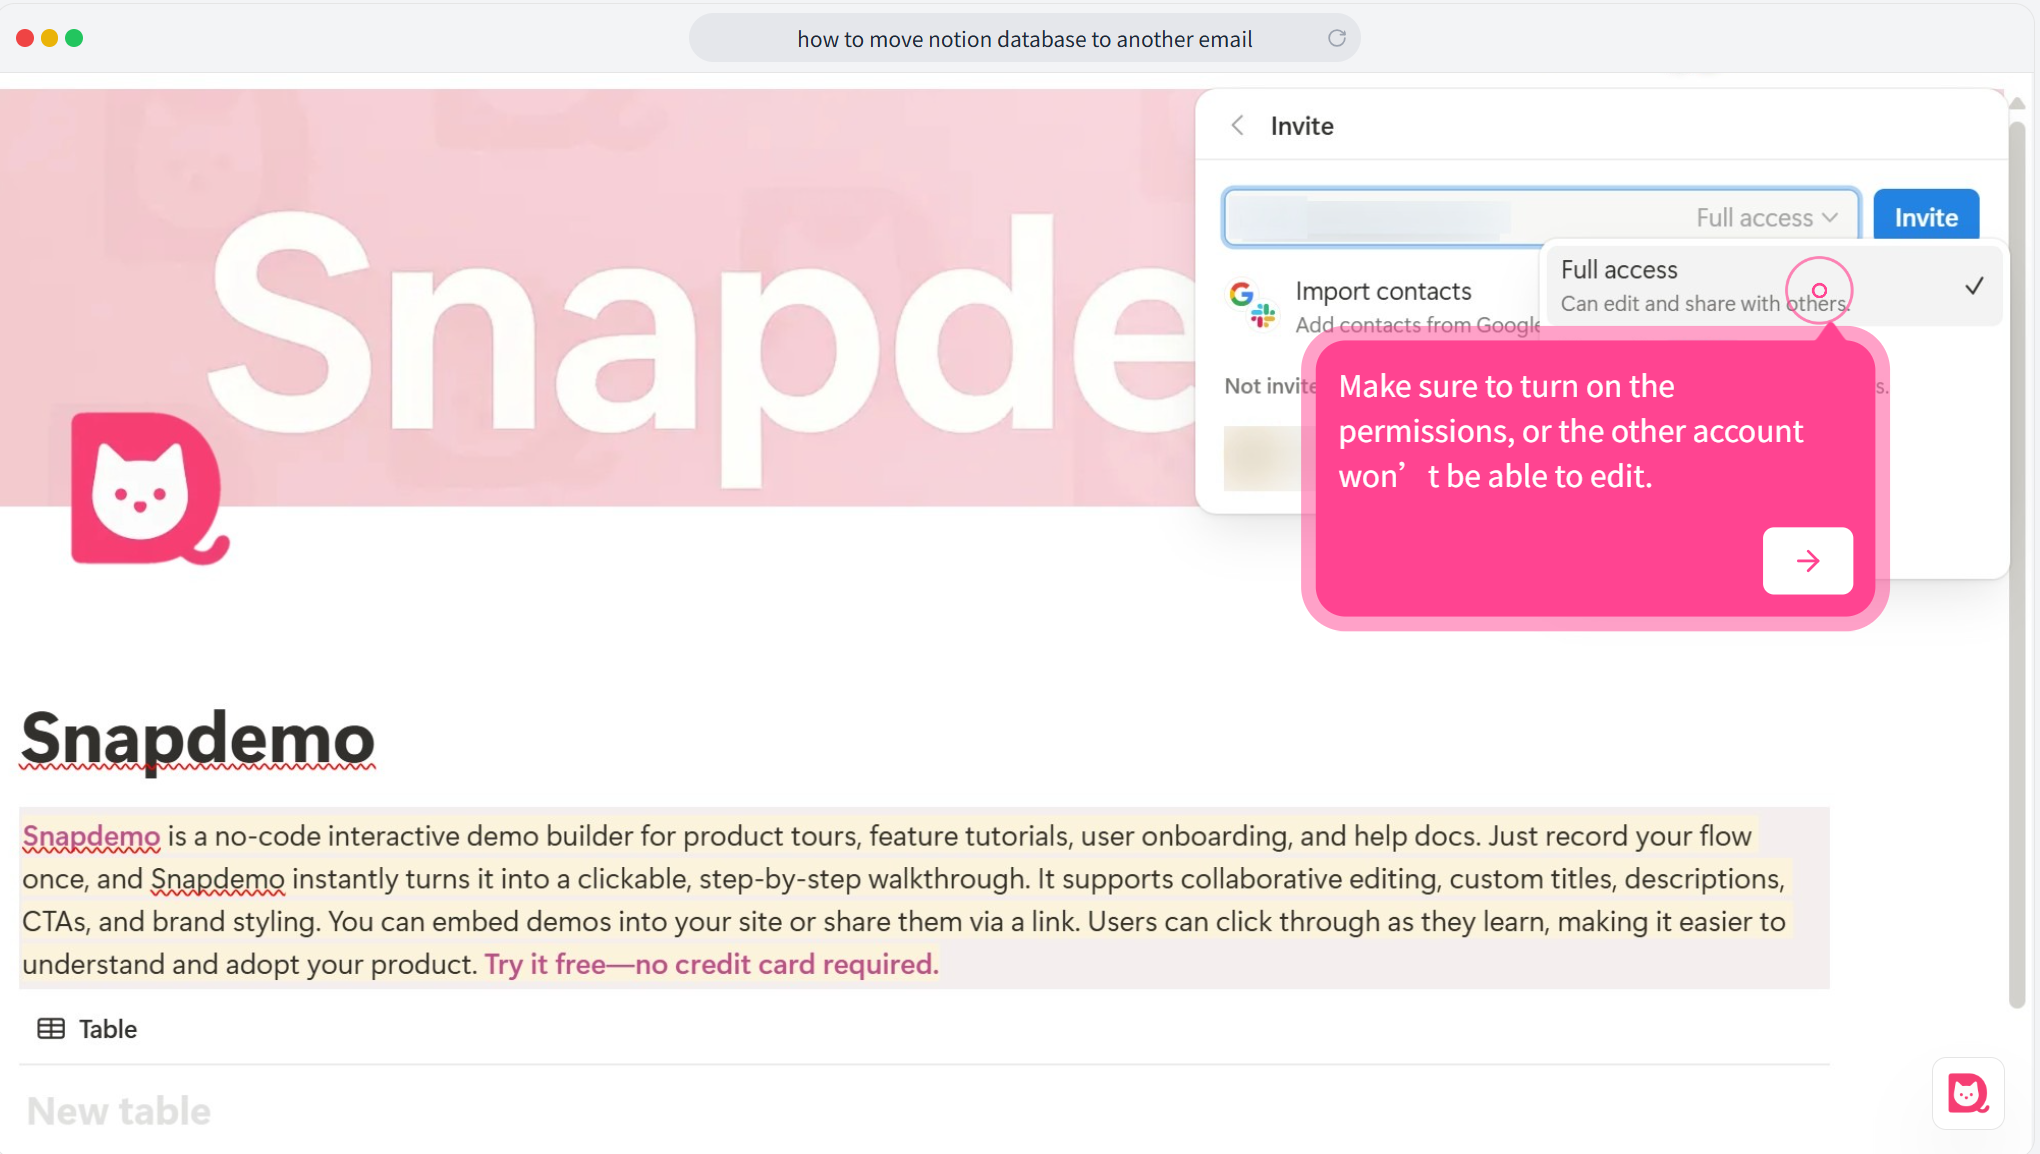
🟢 Step 3: Set the permission to Full access
Make sure the access level is set to Full access.
Without this, the other account won’t be able to edit, move, or duplicate the page.
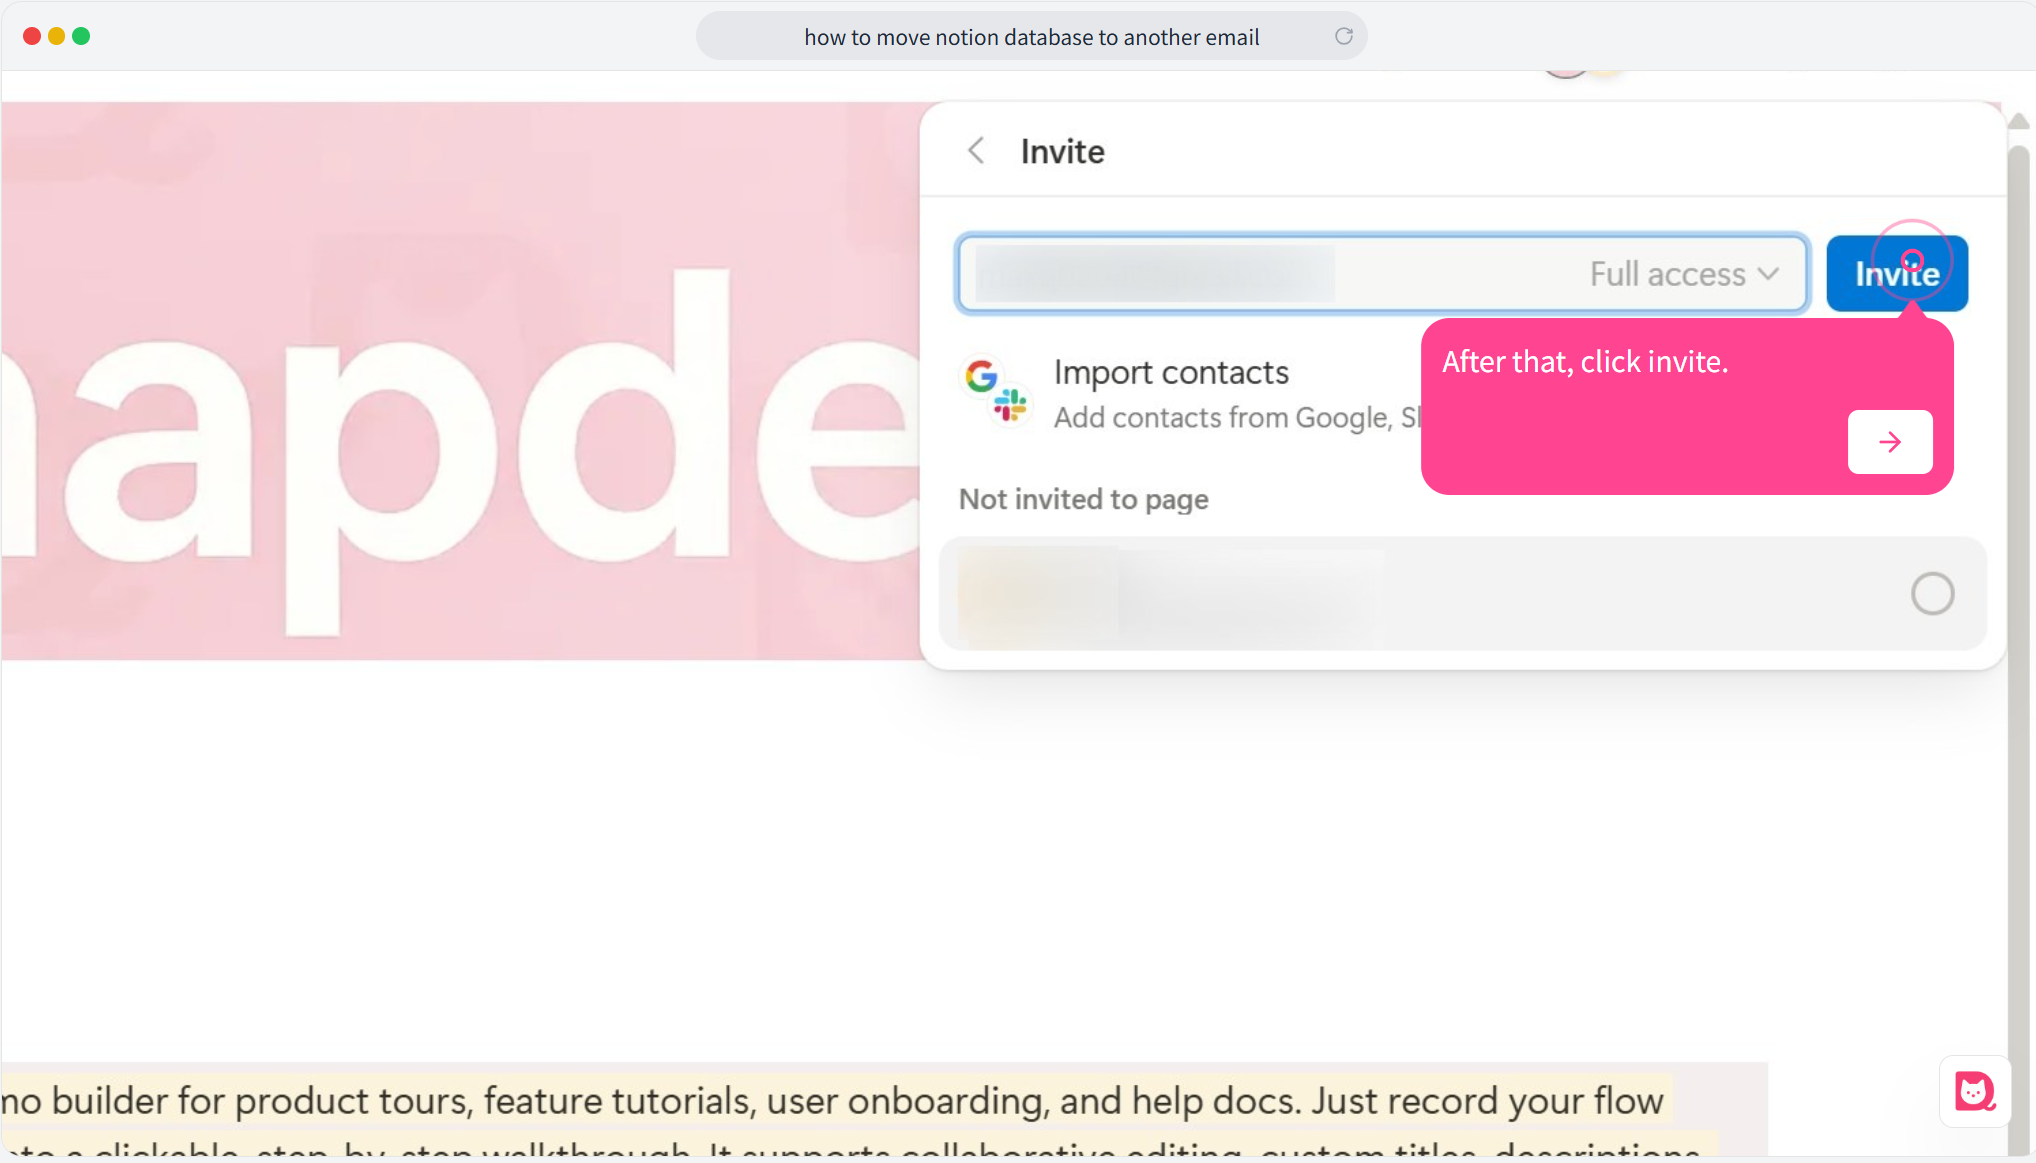
🟢 Step 4: Click “Invite”
Once everything looks good, click Invite to share the page with the other account.
🔁 Step 5: Log into your other Notion account
Switch to the second account, click your avatar in the top-left corner, and you should see the shared page listed.
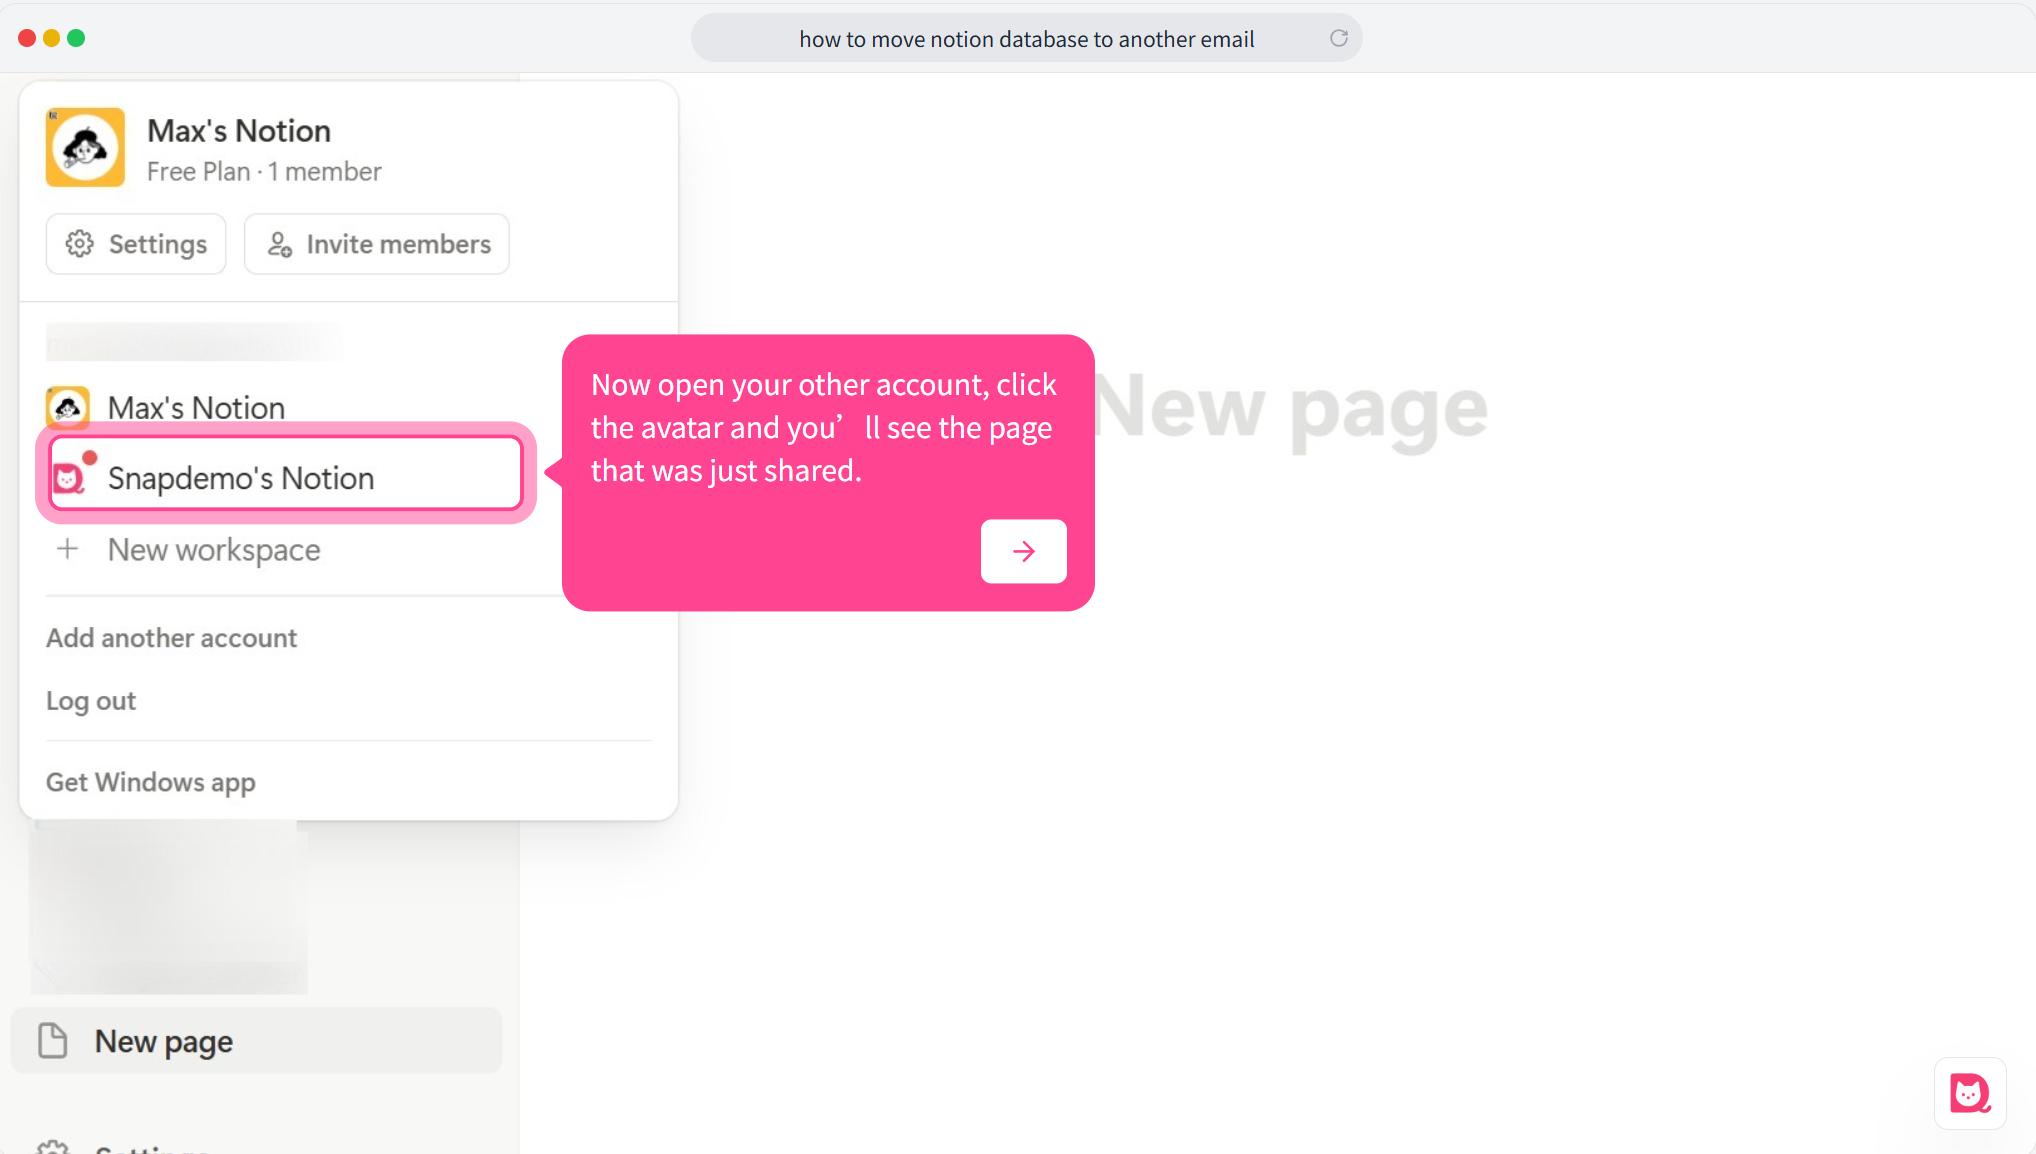
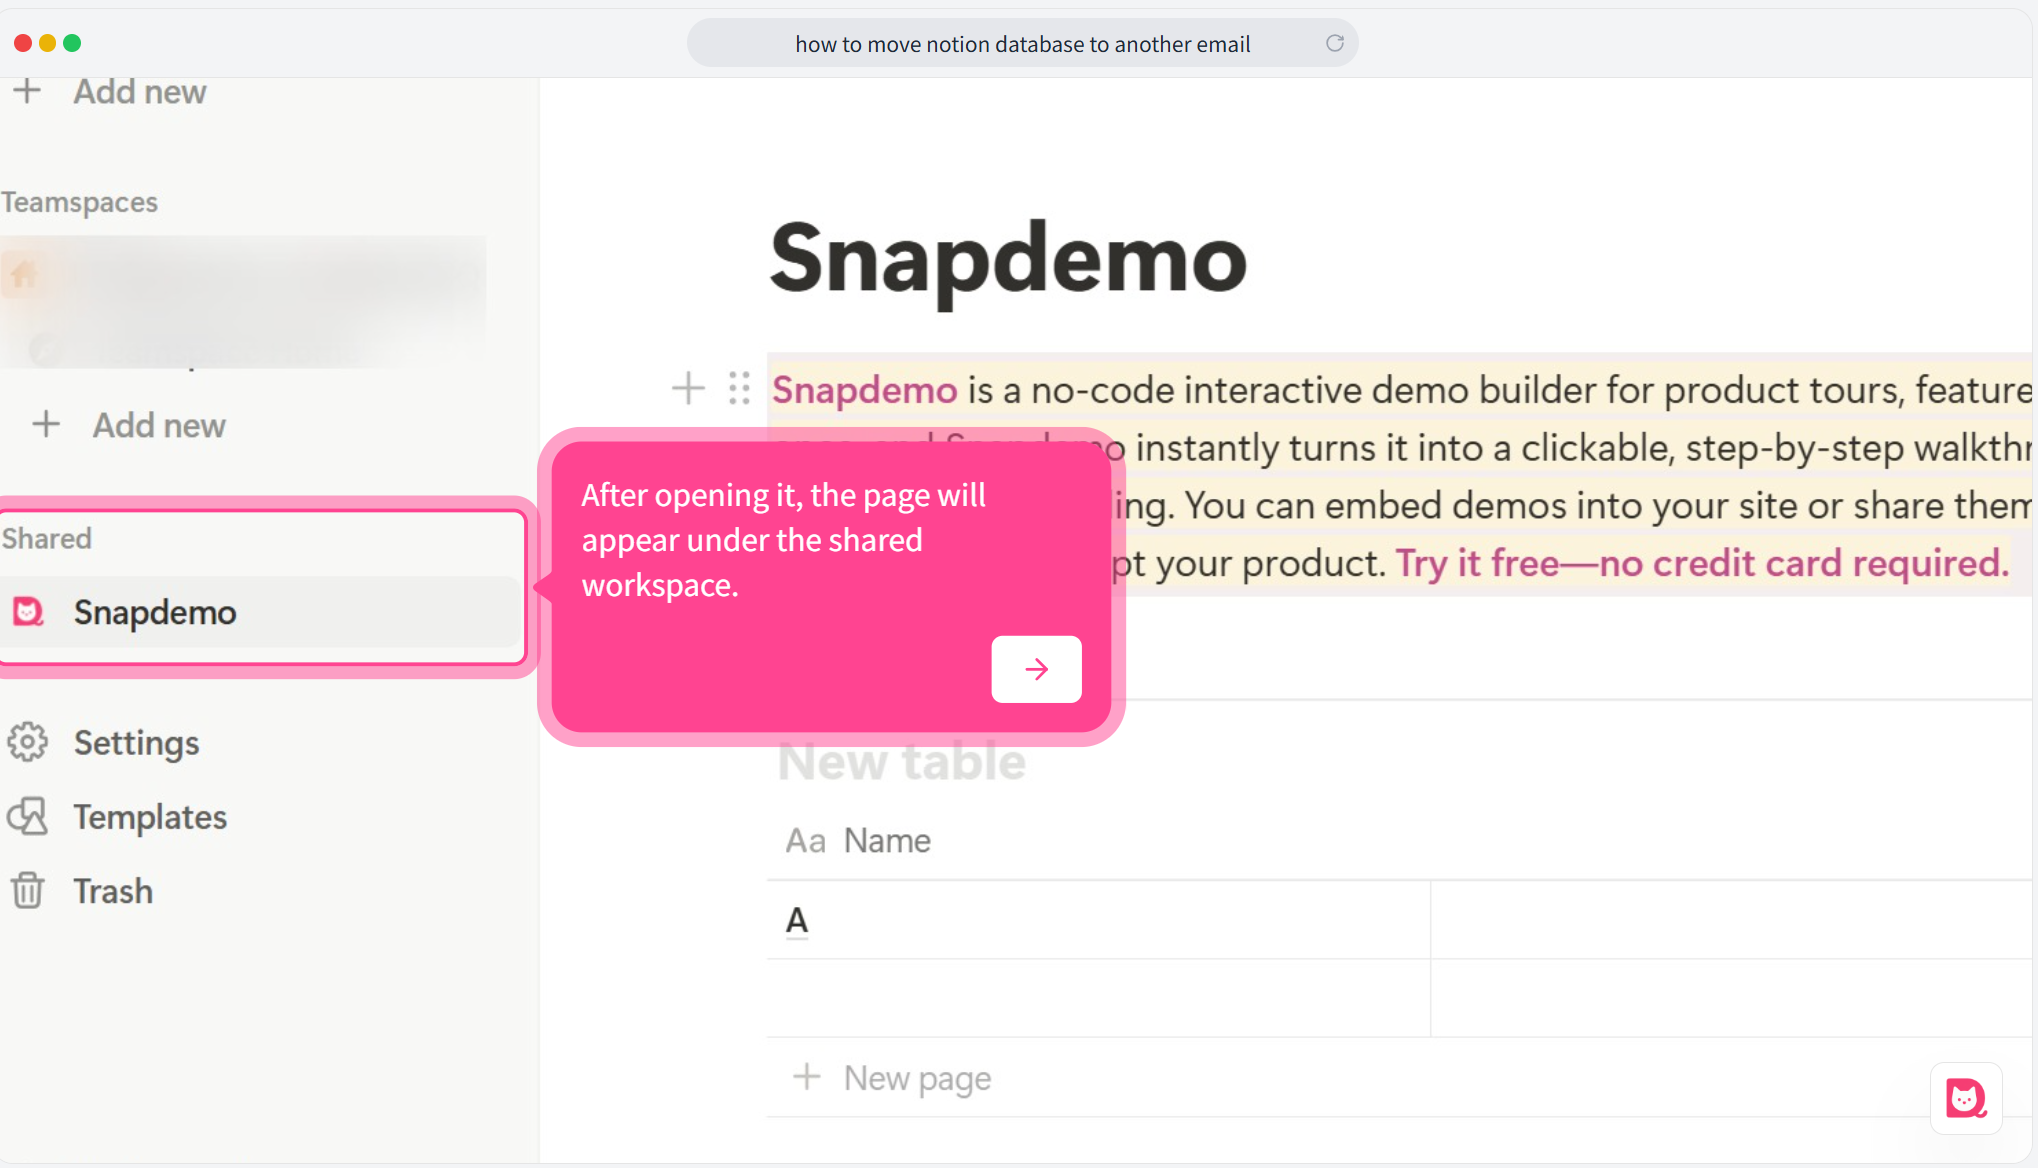
🔁 Step 6: The page is now in the shared workspace
When you open it, the page will be under a Shared section. It hasn’t been added to your private space just yet.
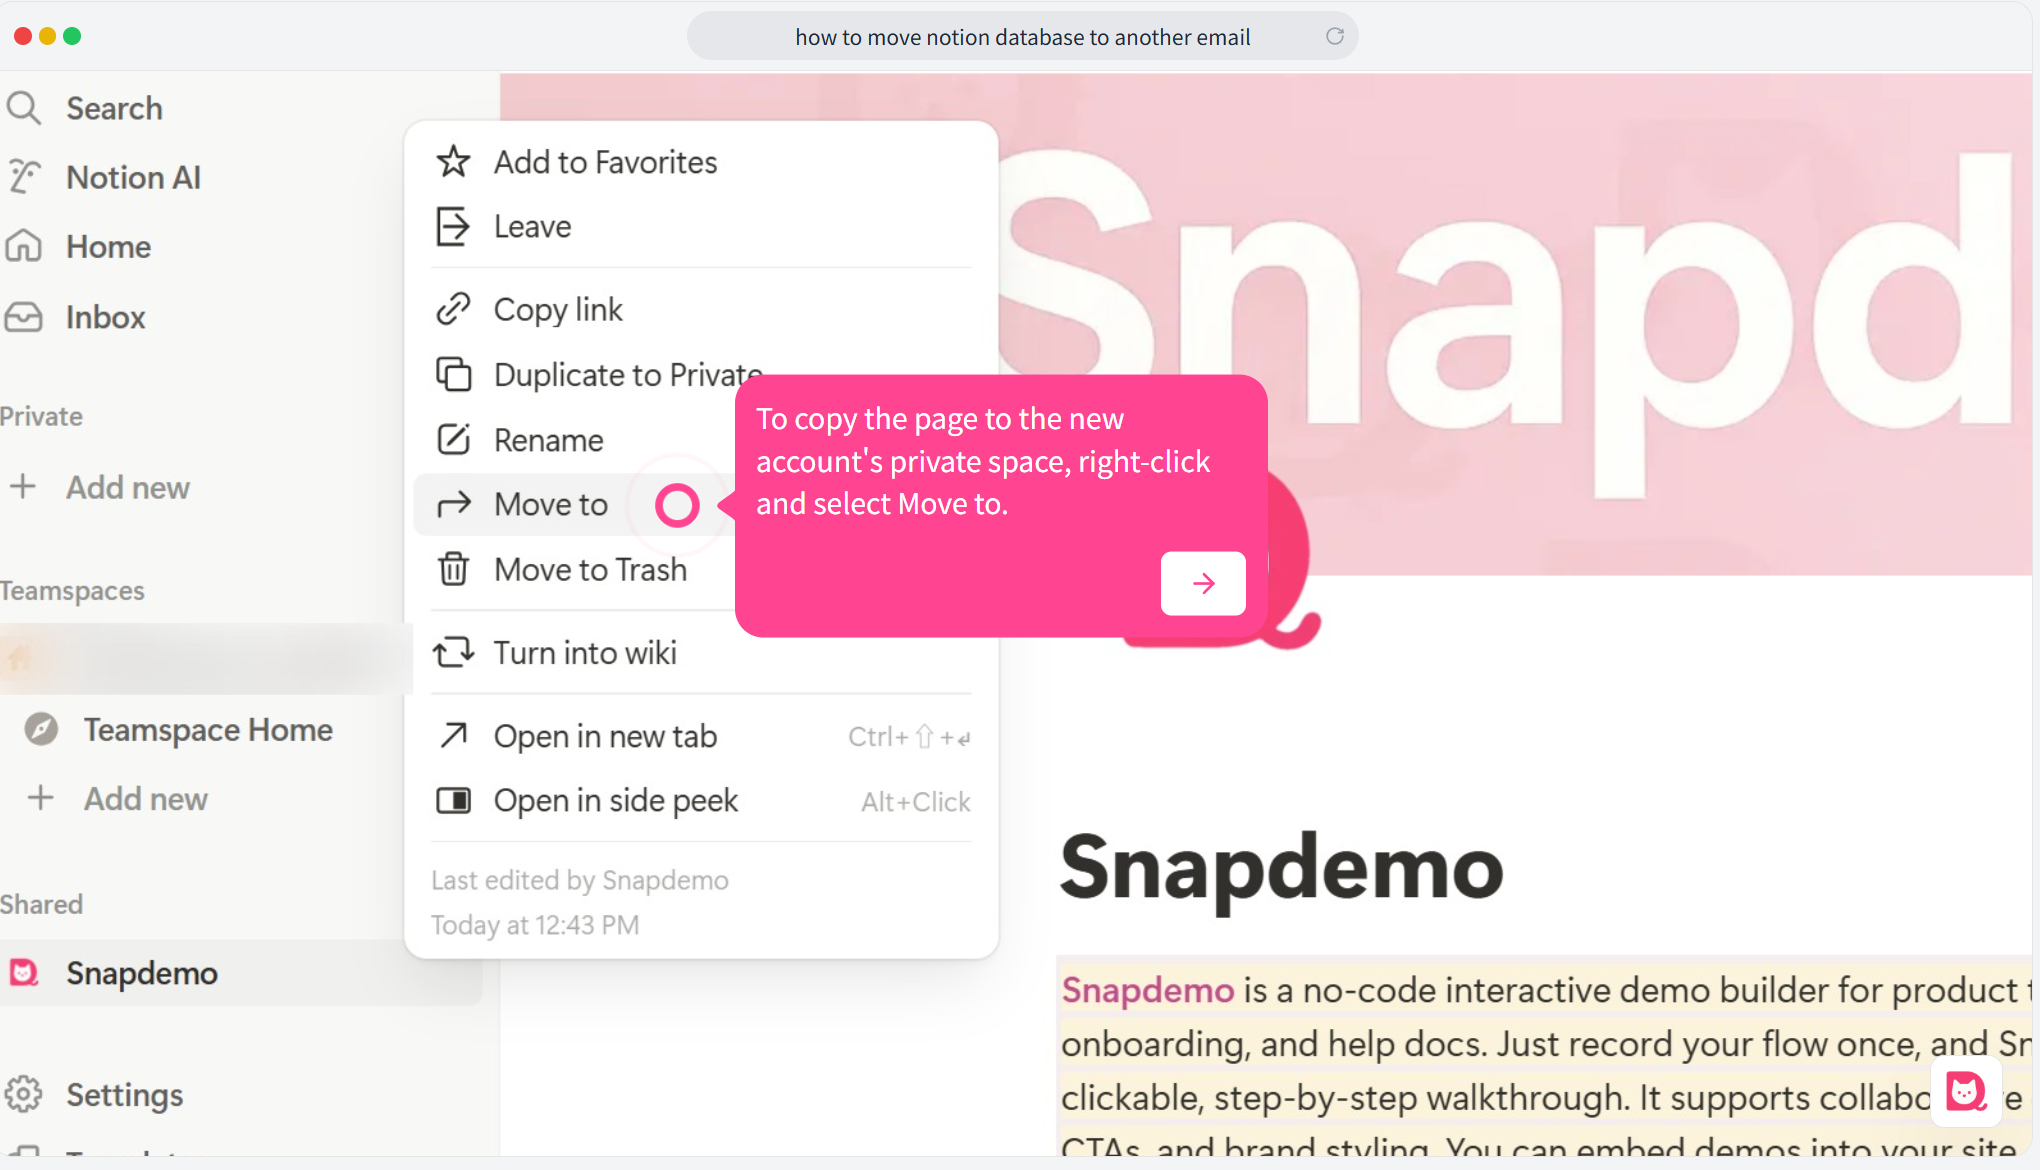
📁 Step 7: Move the page to your private space
Right-click the page title (or right-click the page in the sidebar), then select Move to.
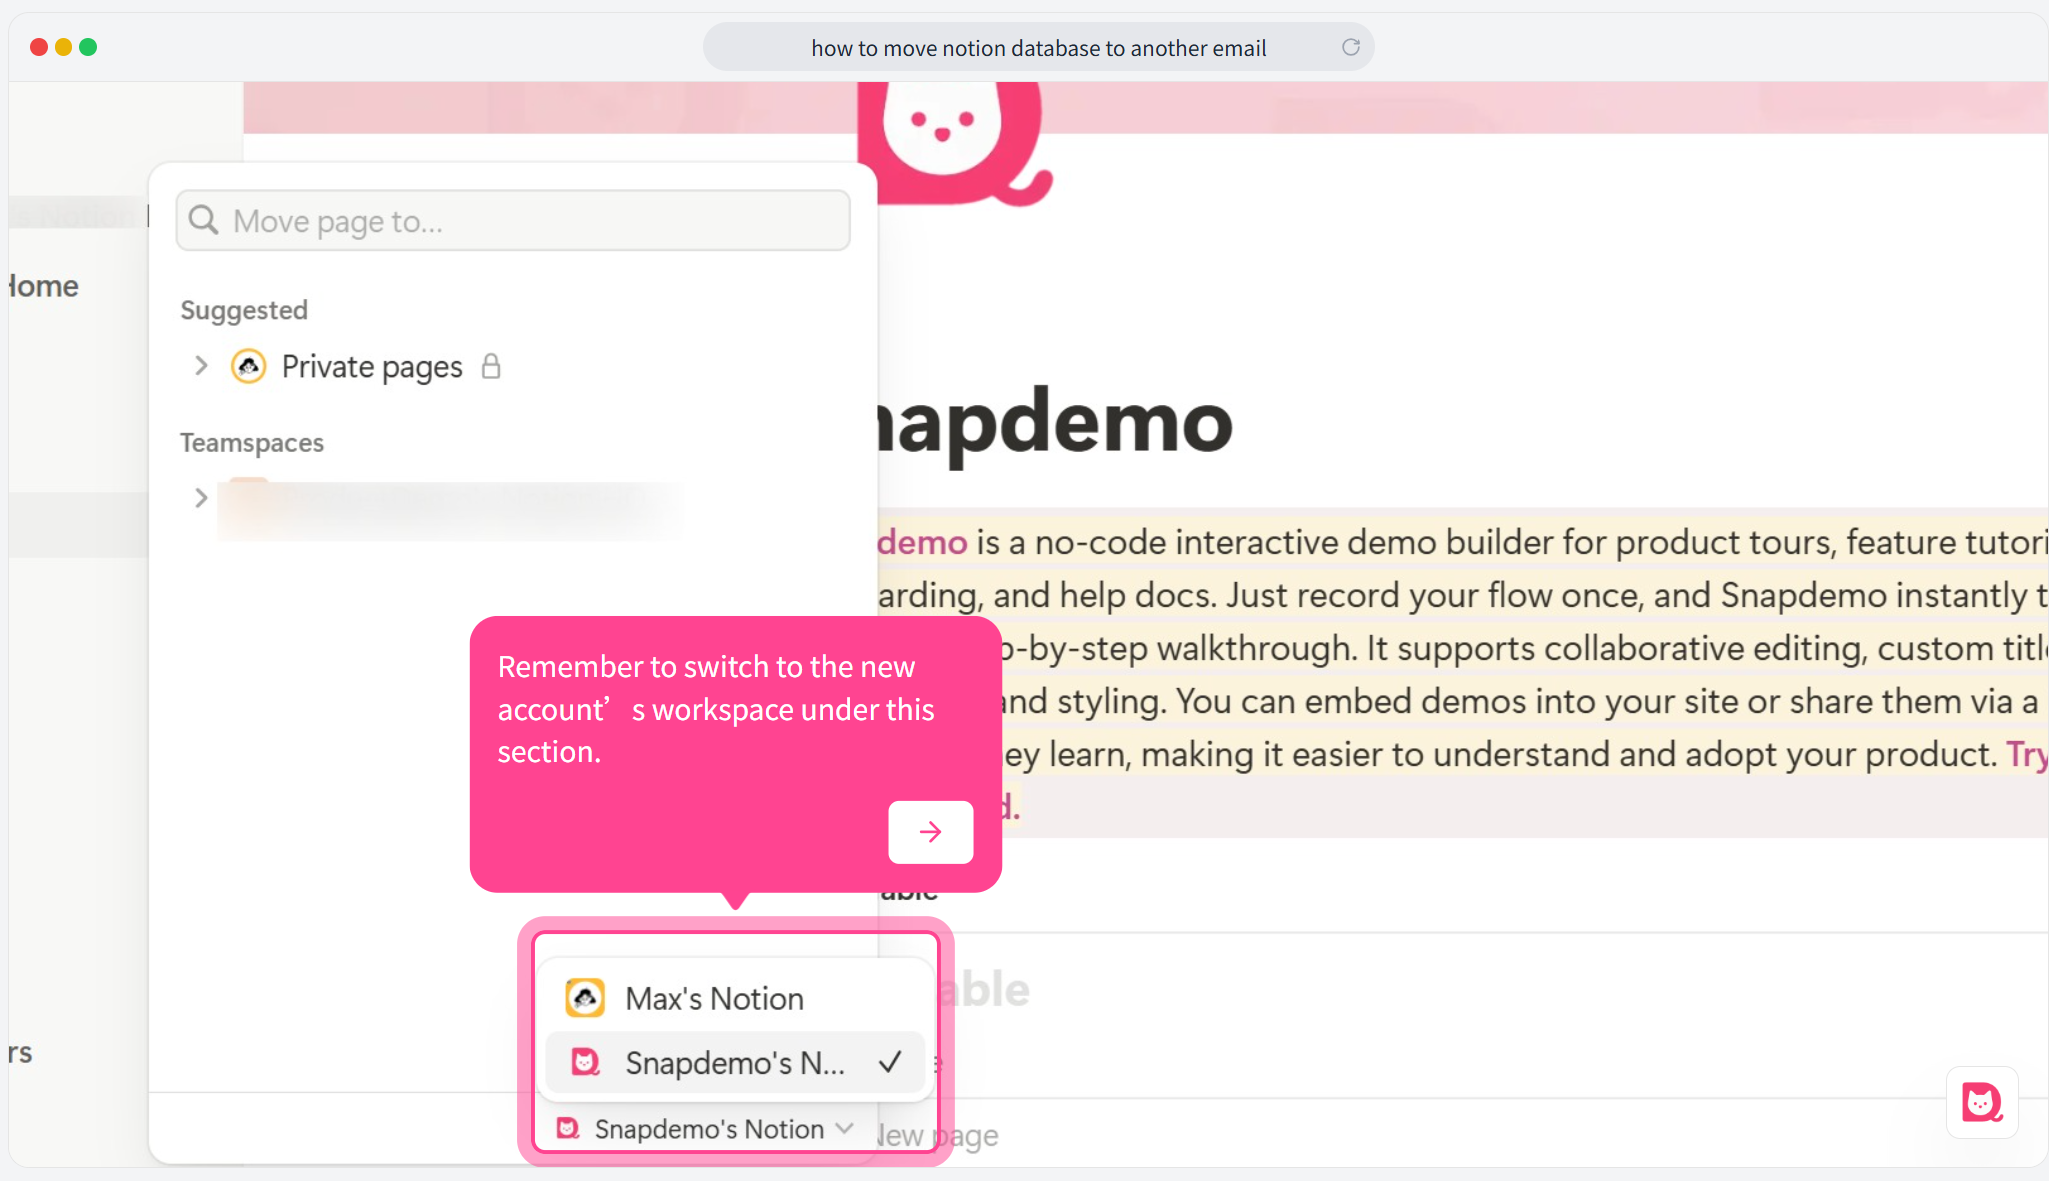
📁 Step 8: Switch to the destination workspace
In the move window, make sure to switch to your private workspace.
By default, it might still show the original workspace it was shared from.
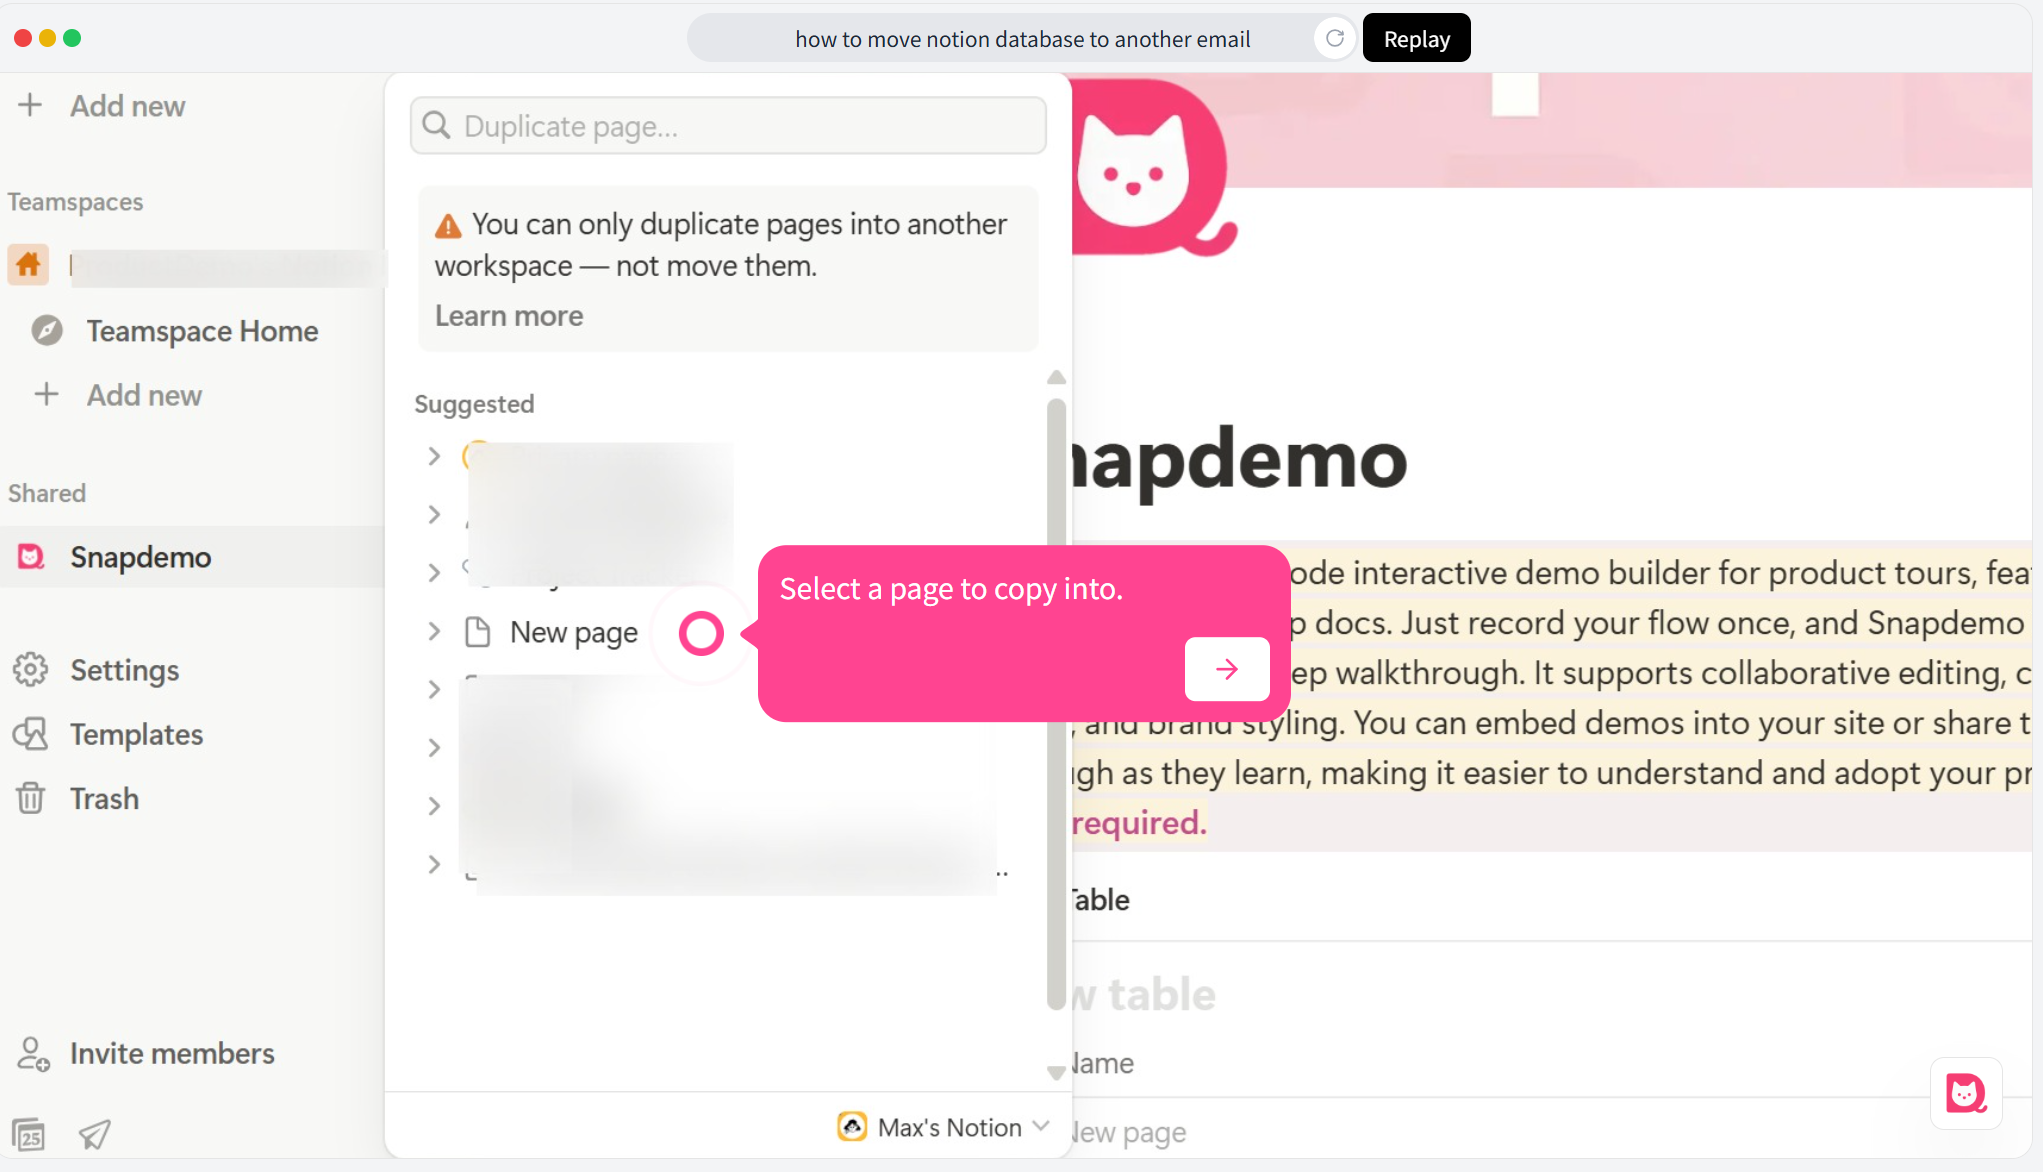
📁 Step 9: Choose or create a destination page
Pick an existing private page as the destination, or create a new blank page.
Once you move the shared content there, you’re all set.