In today's fast-paced work environment, effective task tracking and project management are essential for everyone—from freelancers and team members to project managers. Maintaining organization and clear task assignments can significantly impact the pace of your project. Today, I'll use a simple task tracking manager as an example to show you how to create a practical project roadmap in Notion.
🚀 Build interactive demos with Snapdemo. Explore features and get started for free!
If you would like to use the same template featured in the demonstration, click here to copy it for free.
Step 1: Create a Database
At the heart of a task tracking manager in Notion is the database. Depending on whether you're starting with a blank page or working in an existing one, the way to create your database differs slightly:
For a Blank Page: Click the "Add Database" button, which typically appears at the bottom of your new page, and select your desired database option.

For an Existing Page: Type
/tableand select "table view" to insert a database.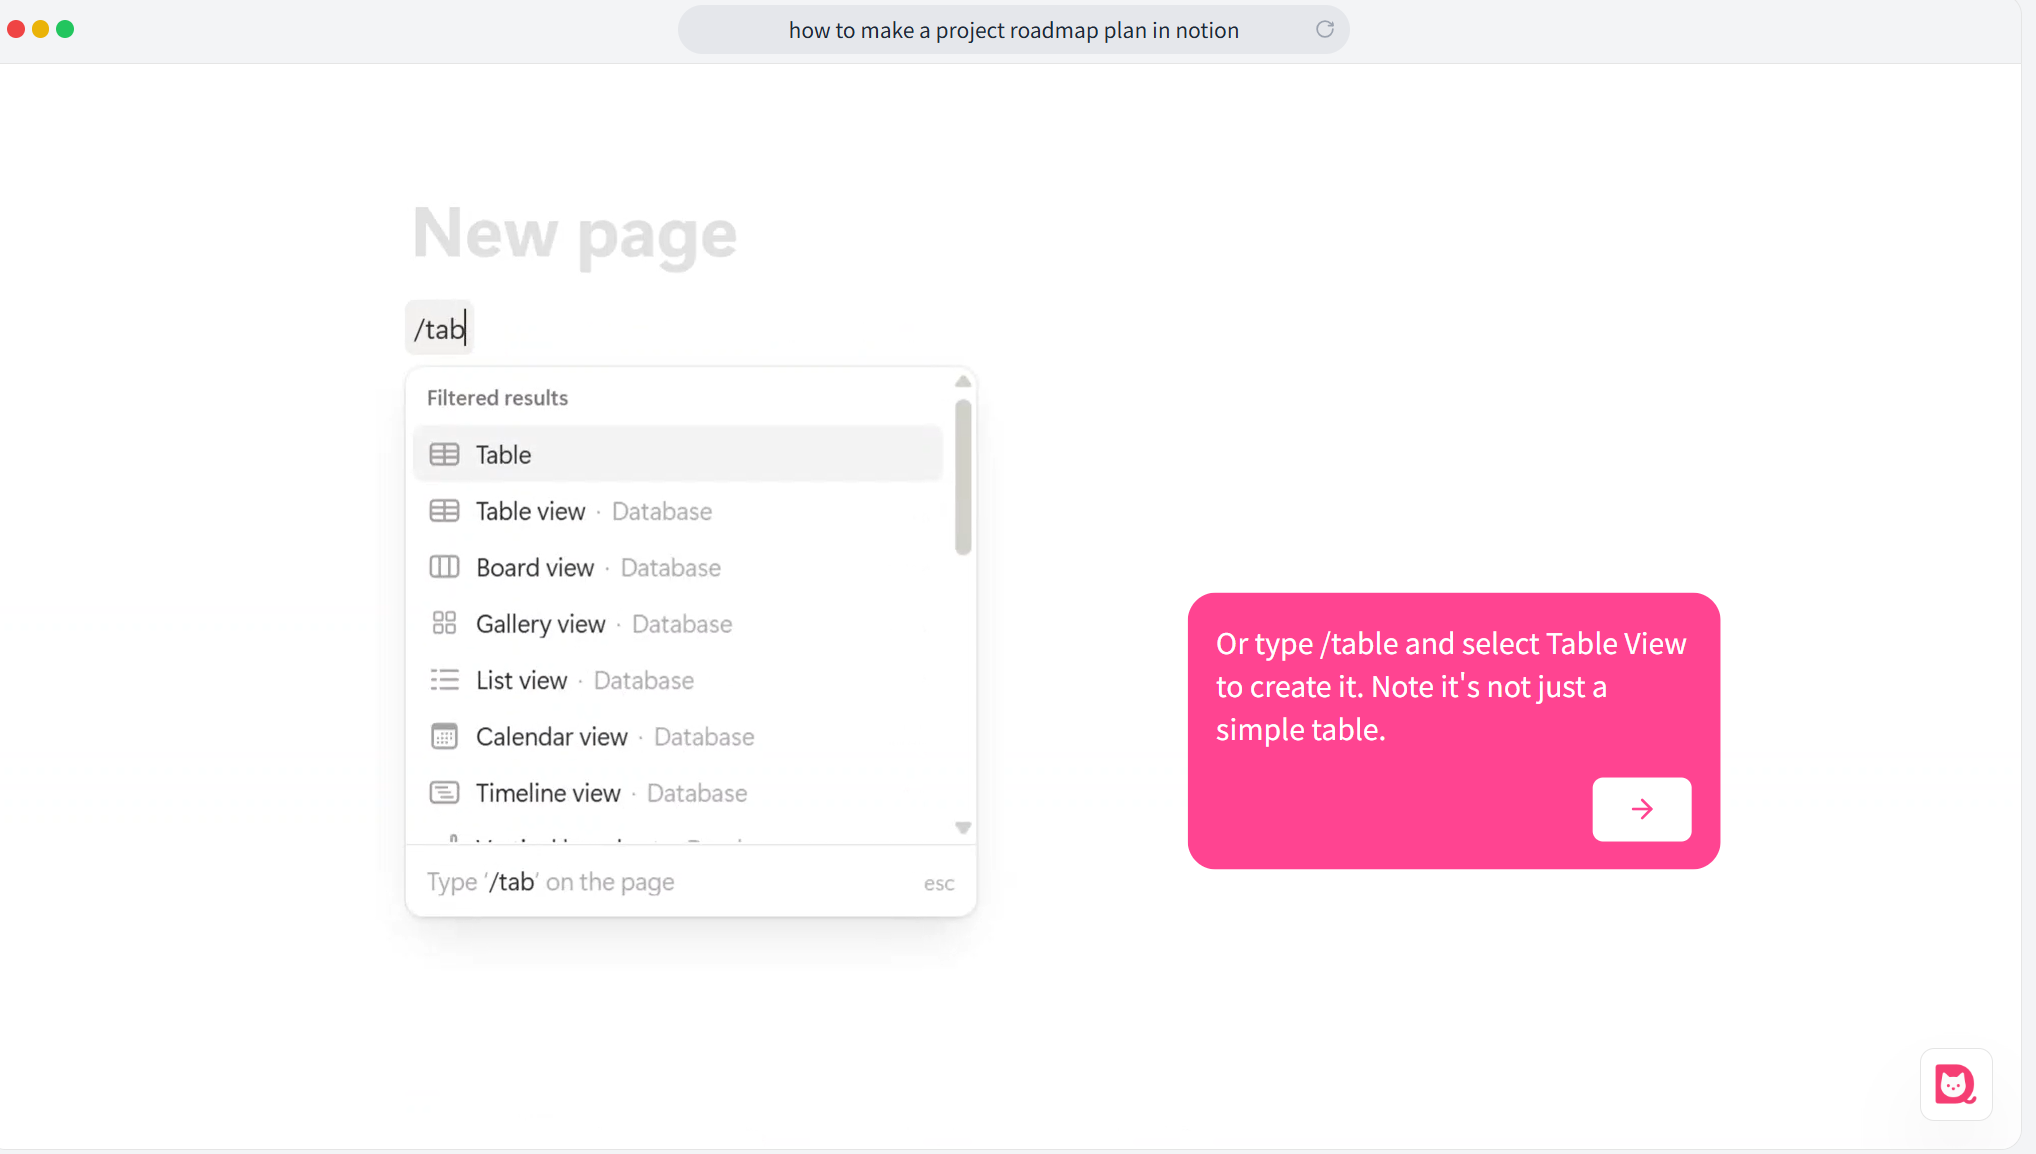
Once your database is set up, you can start inputting essential information for your task management.
Step 2: Fill in Task Information
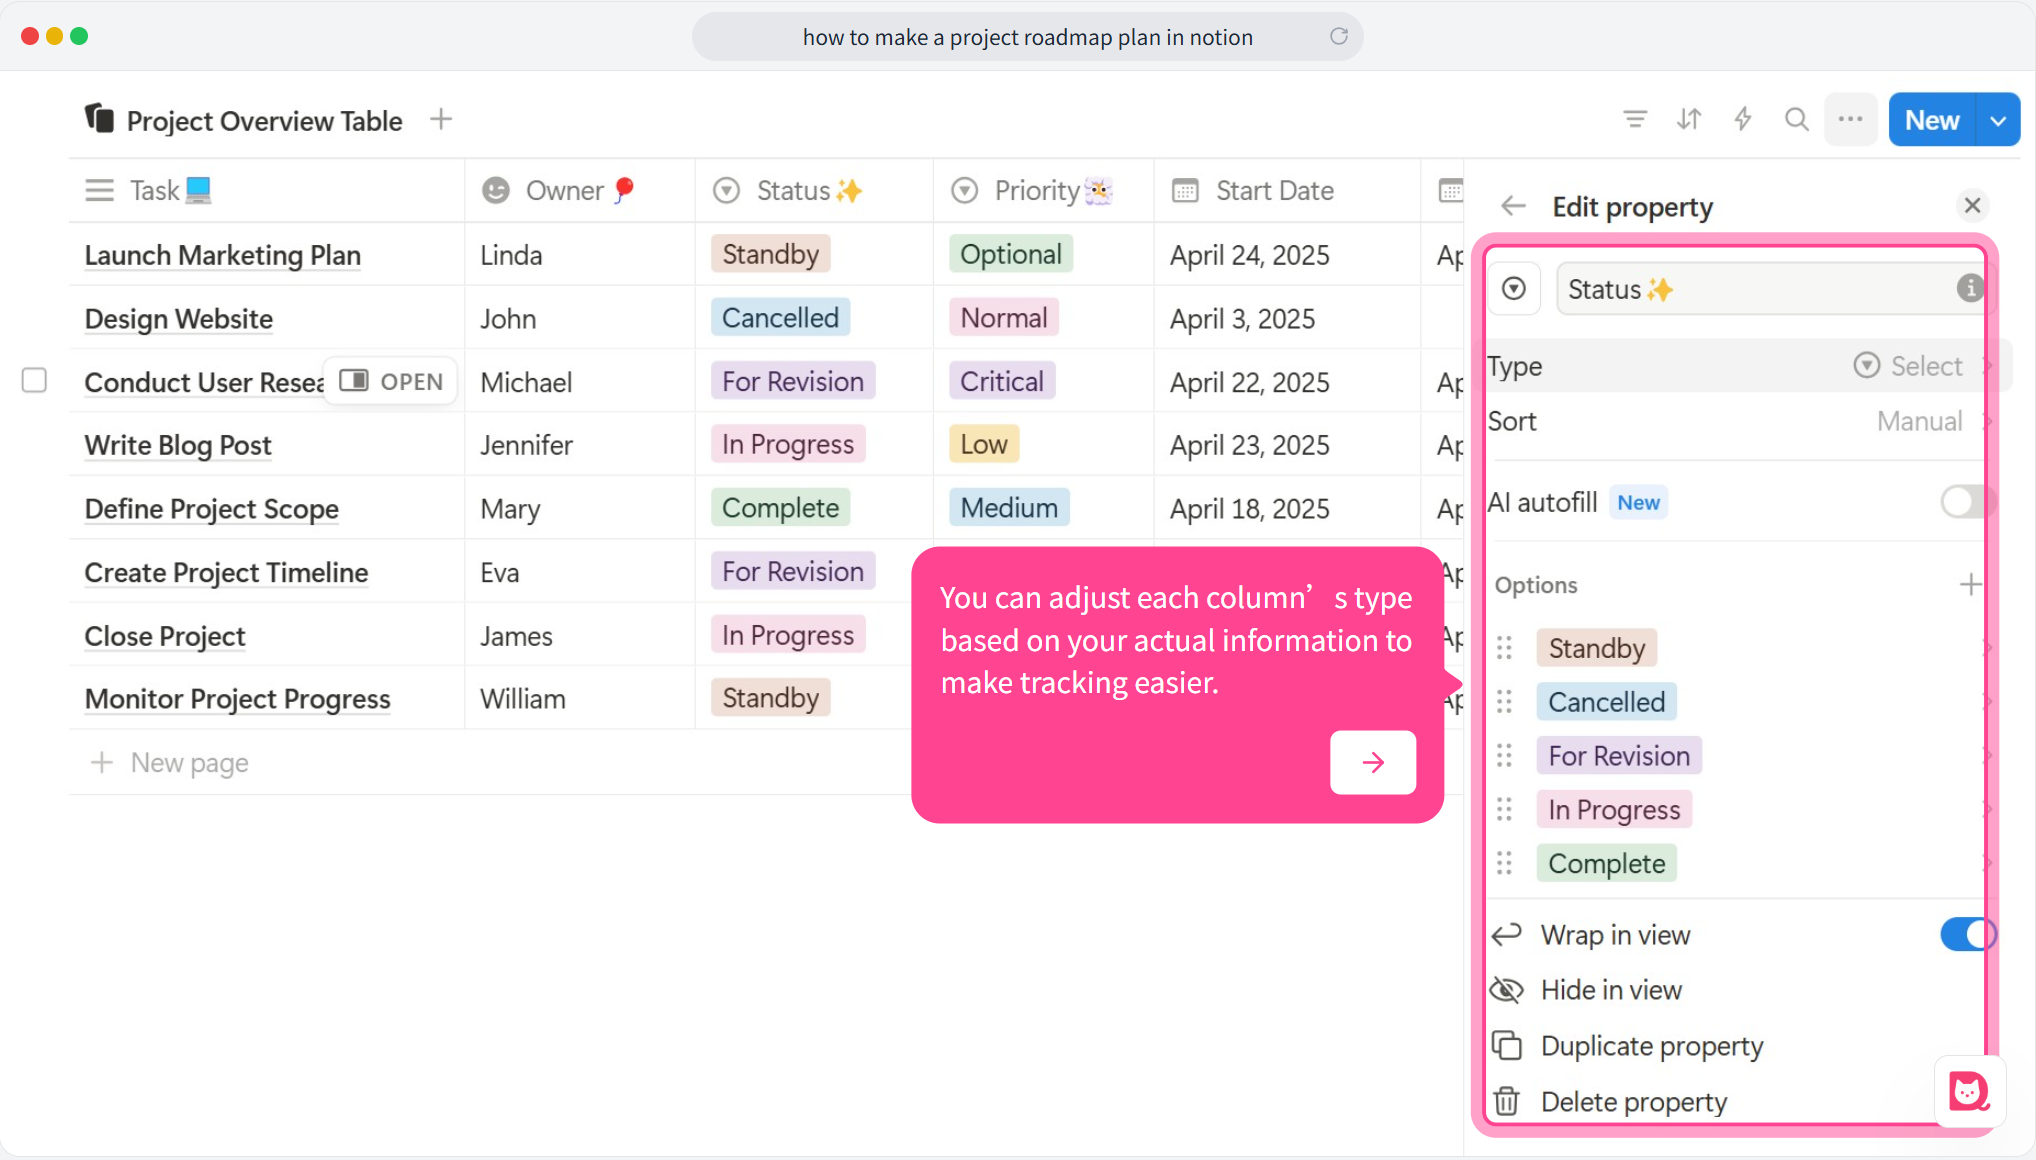
An efficient task tracking manager should include key fields such as task name, current status, due date, and assignee. You can customize the column types based on your needs, like so:
- Task: Text type
- Status: Select type (e.g., "In Progress," "Completed," etc.)
- Due Date: Date type
- Assignee: User type
Additionally, if you're interested in adding some automation (like changing colors when task statuses change), you can utilize Notion's formula functionality. If you’d like to learn more about this, check out this related tutorial.
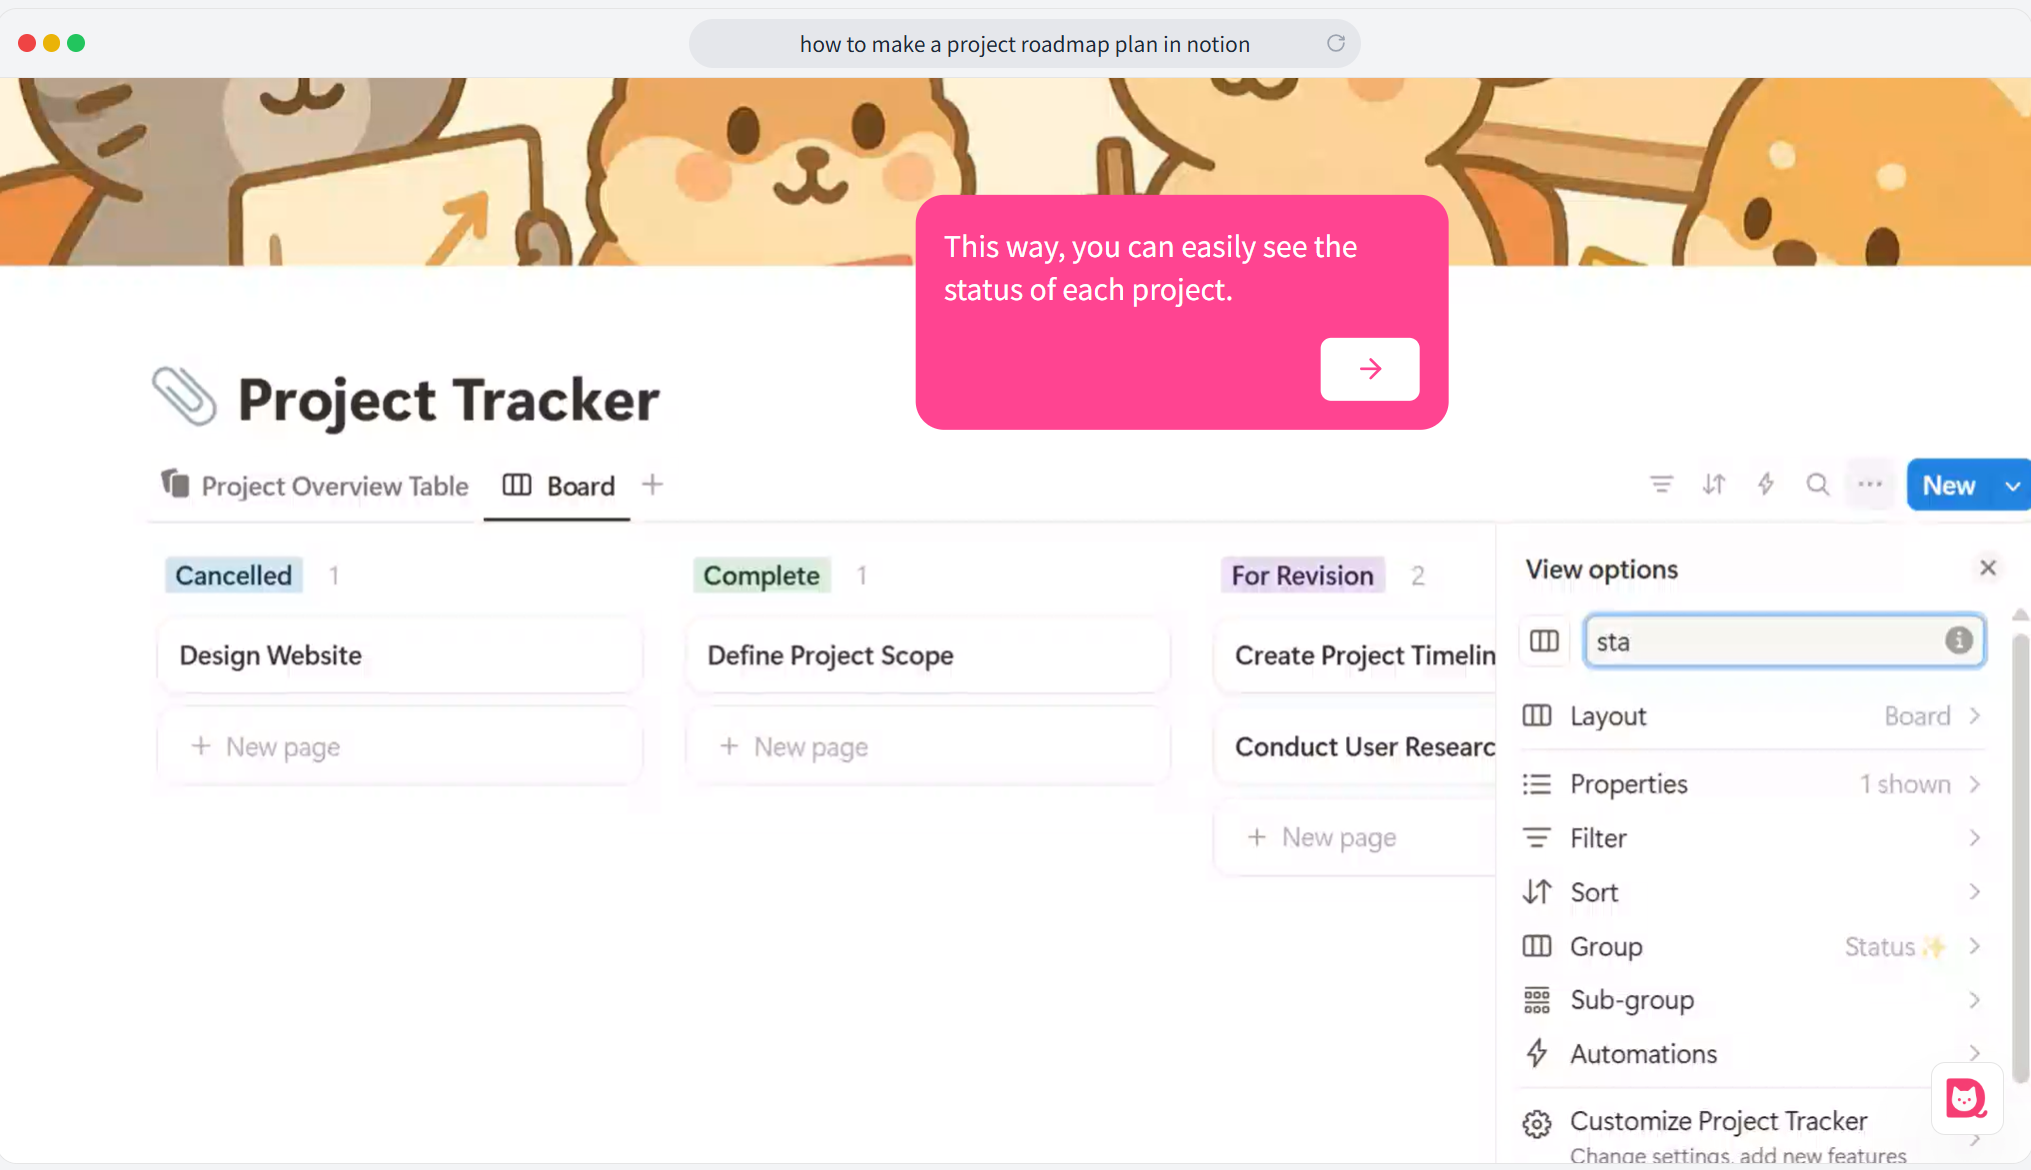
Step 3: Add a Kanban Board
After you’ve populated your database, the next step is to visualize your task statuses by adding a Kanban board. Simply click to add a board and choose to display it based on the ‘Status’ column. The Kanban view offers a clear perspective on the current progress of each task, making project management much easier.
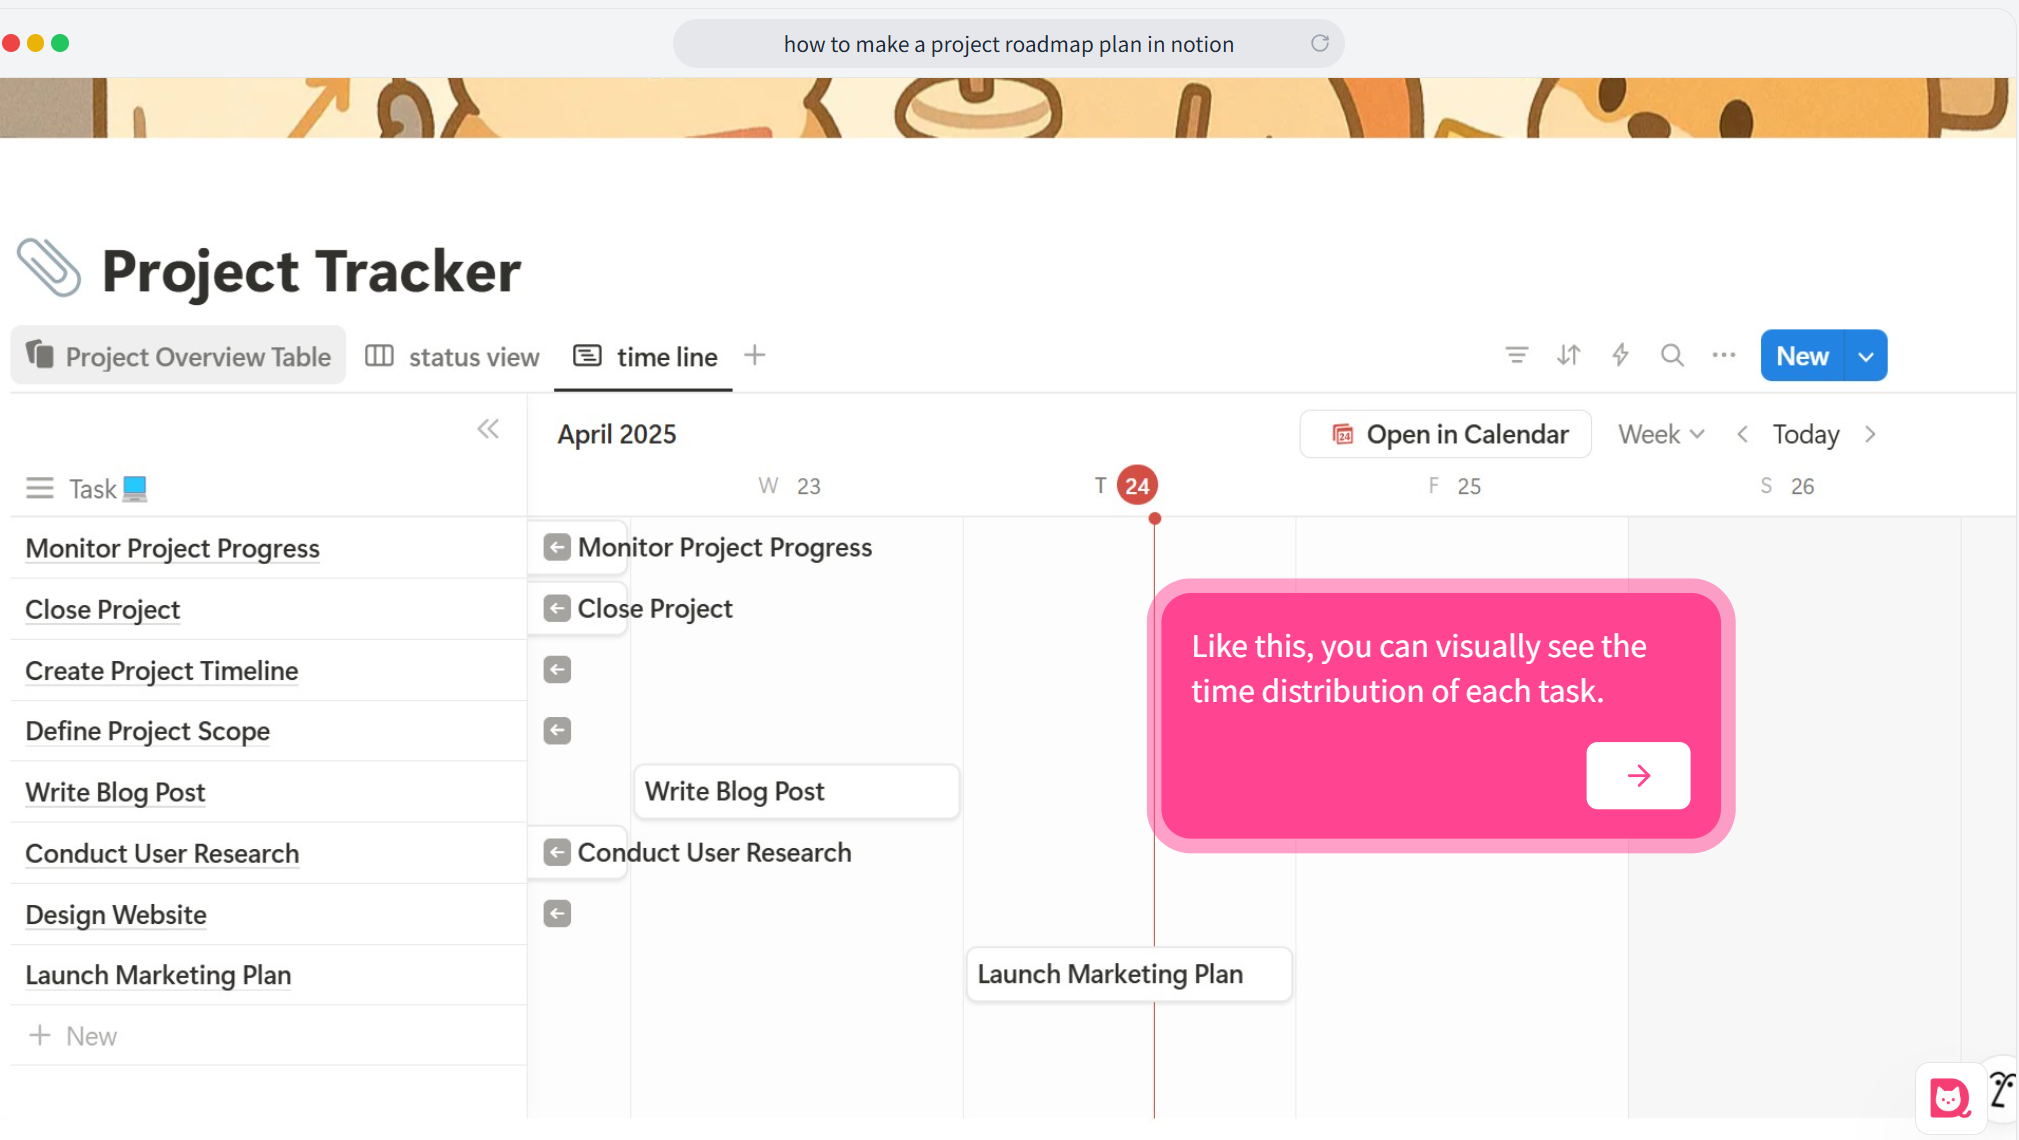
Step 4: Create a Timeline
Finally, by clicking to add a timeline view, you'll gain a visual understanding of the time distribution and interrelationship of tasks. This feature helps you manage task schedules effectively, ensuring that critical deadlines aren’t overlooked.