Whether you're designing a sleek interface or creating a custom graphic, sometimes you need to crop an image to make it fit just right within your design. In Figma, cropping images is quick and simple, and there are two ways to do it. Just follow my steps and click next to get started.
🛠️ This demo was made with Snapdemo. It’s easy to use, no coding needed — try it free, no credit card required.
Two Easy Ways to Crop an Image in Figma
Method 1: Crop Using the Image Toolbar
This is the most straightforward and commonly used method. If you're working with an image inside a frame or component, this is your go-to option.
Select the Image
Before you can crop, you need to select the image. Click on the image you want to crop. If the image isn’t selected, the crop menu won’t show up.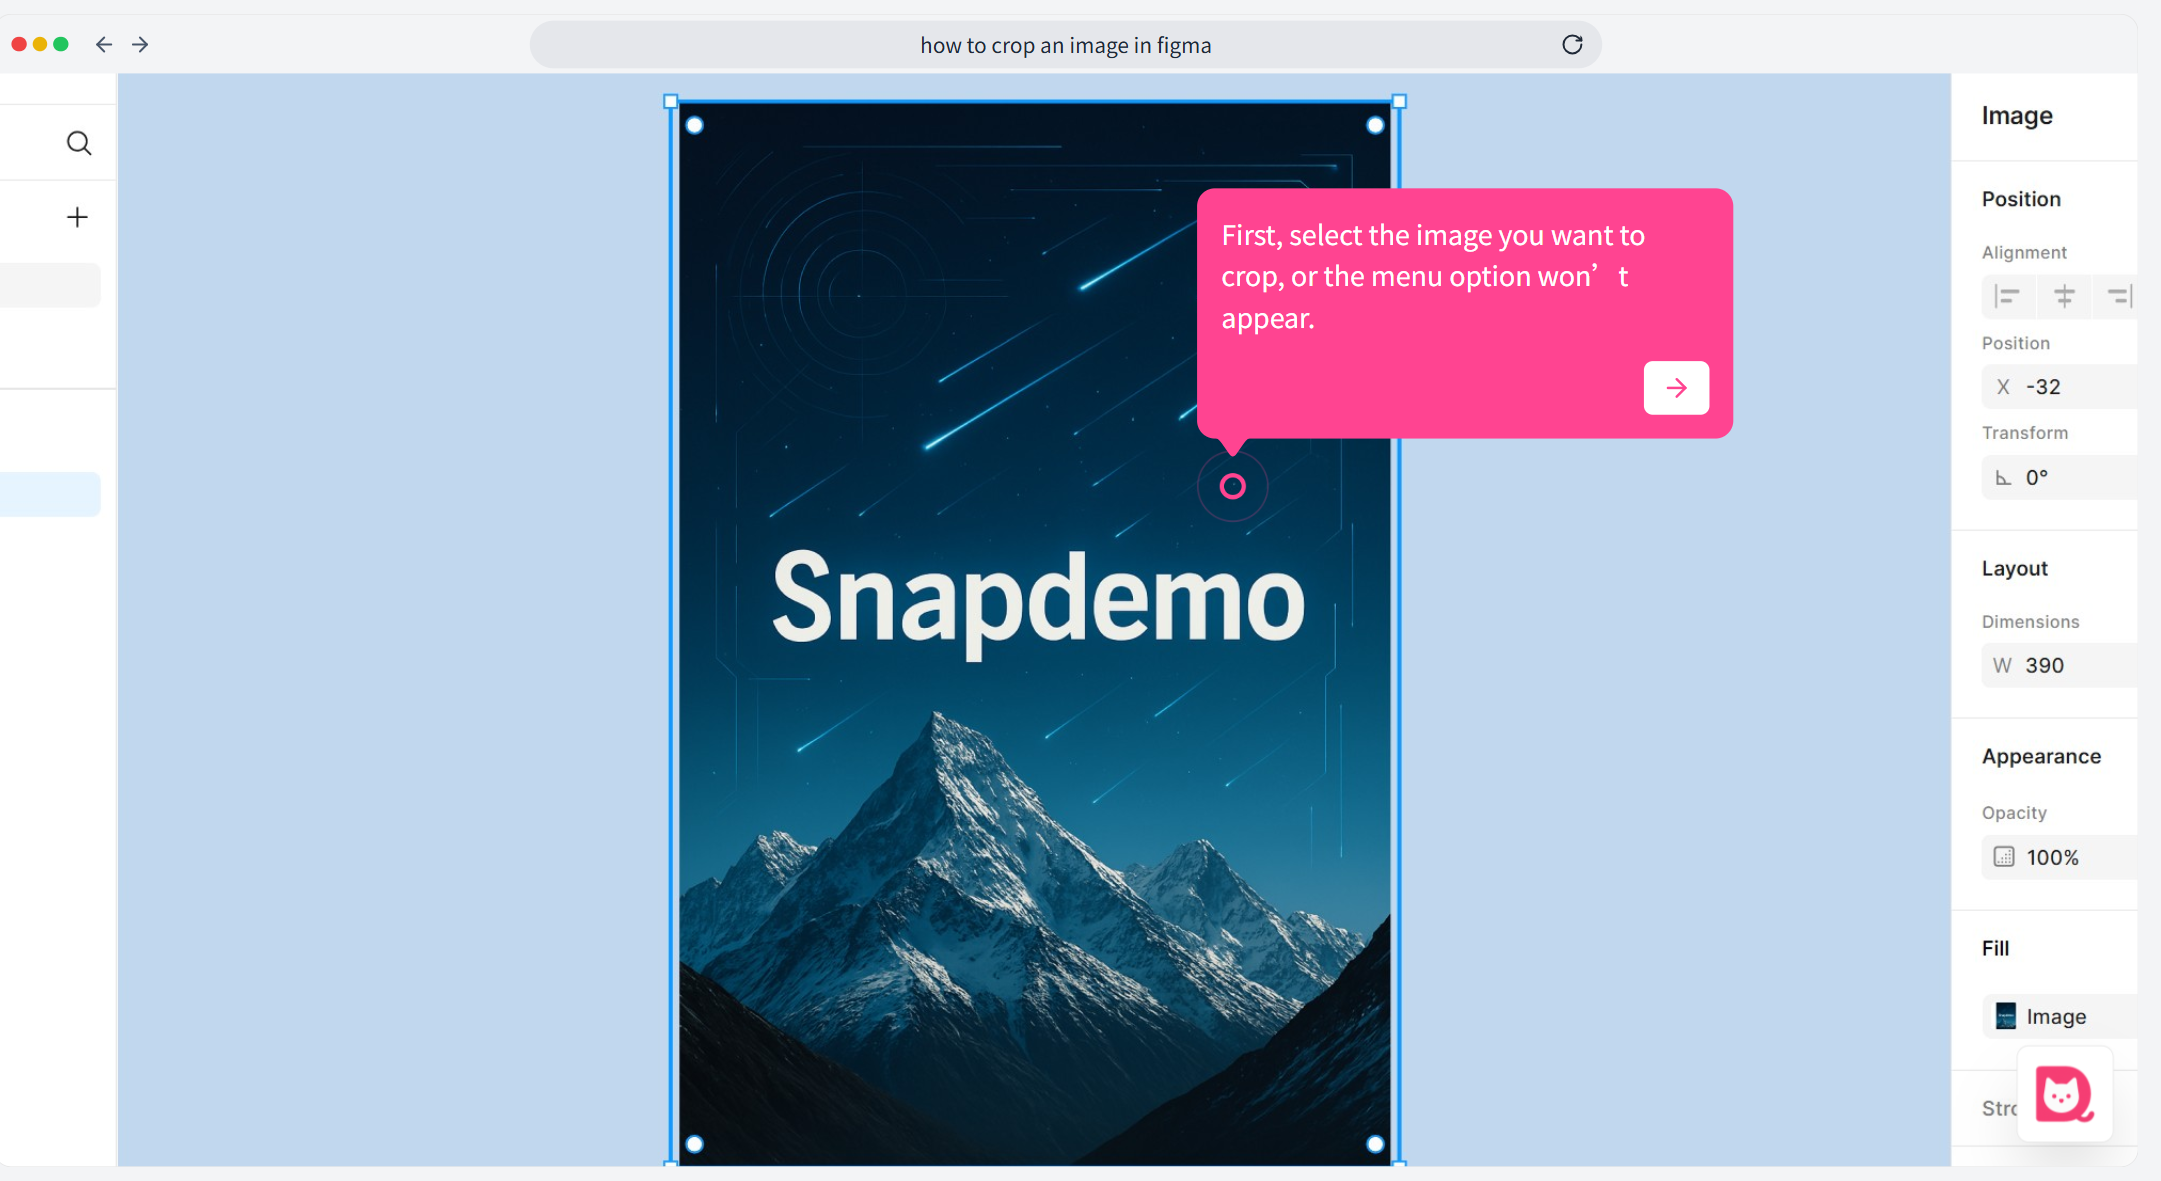
Click the Crop Button
Once the image is selected, look at the right-hand panel under the Image section. You’ll see a small Crop button next to the "Image" label. Click on this to enter crop mode.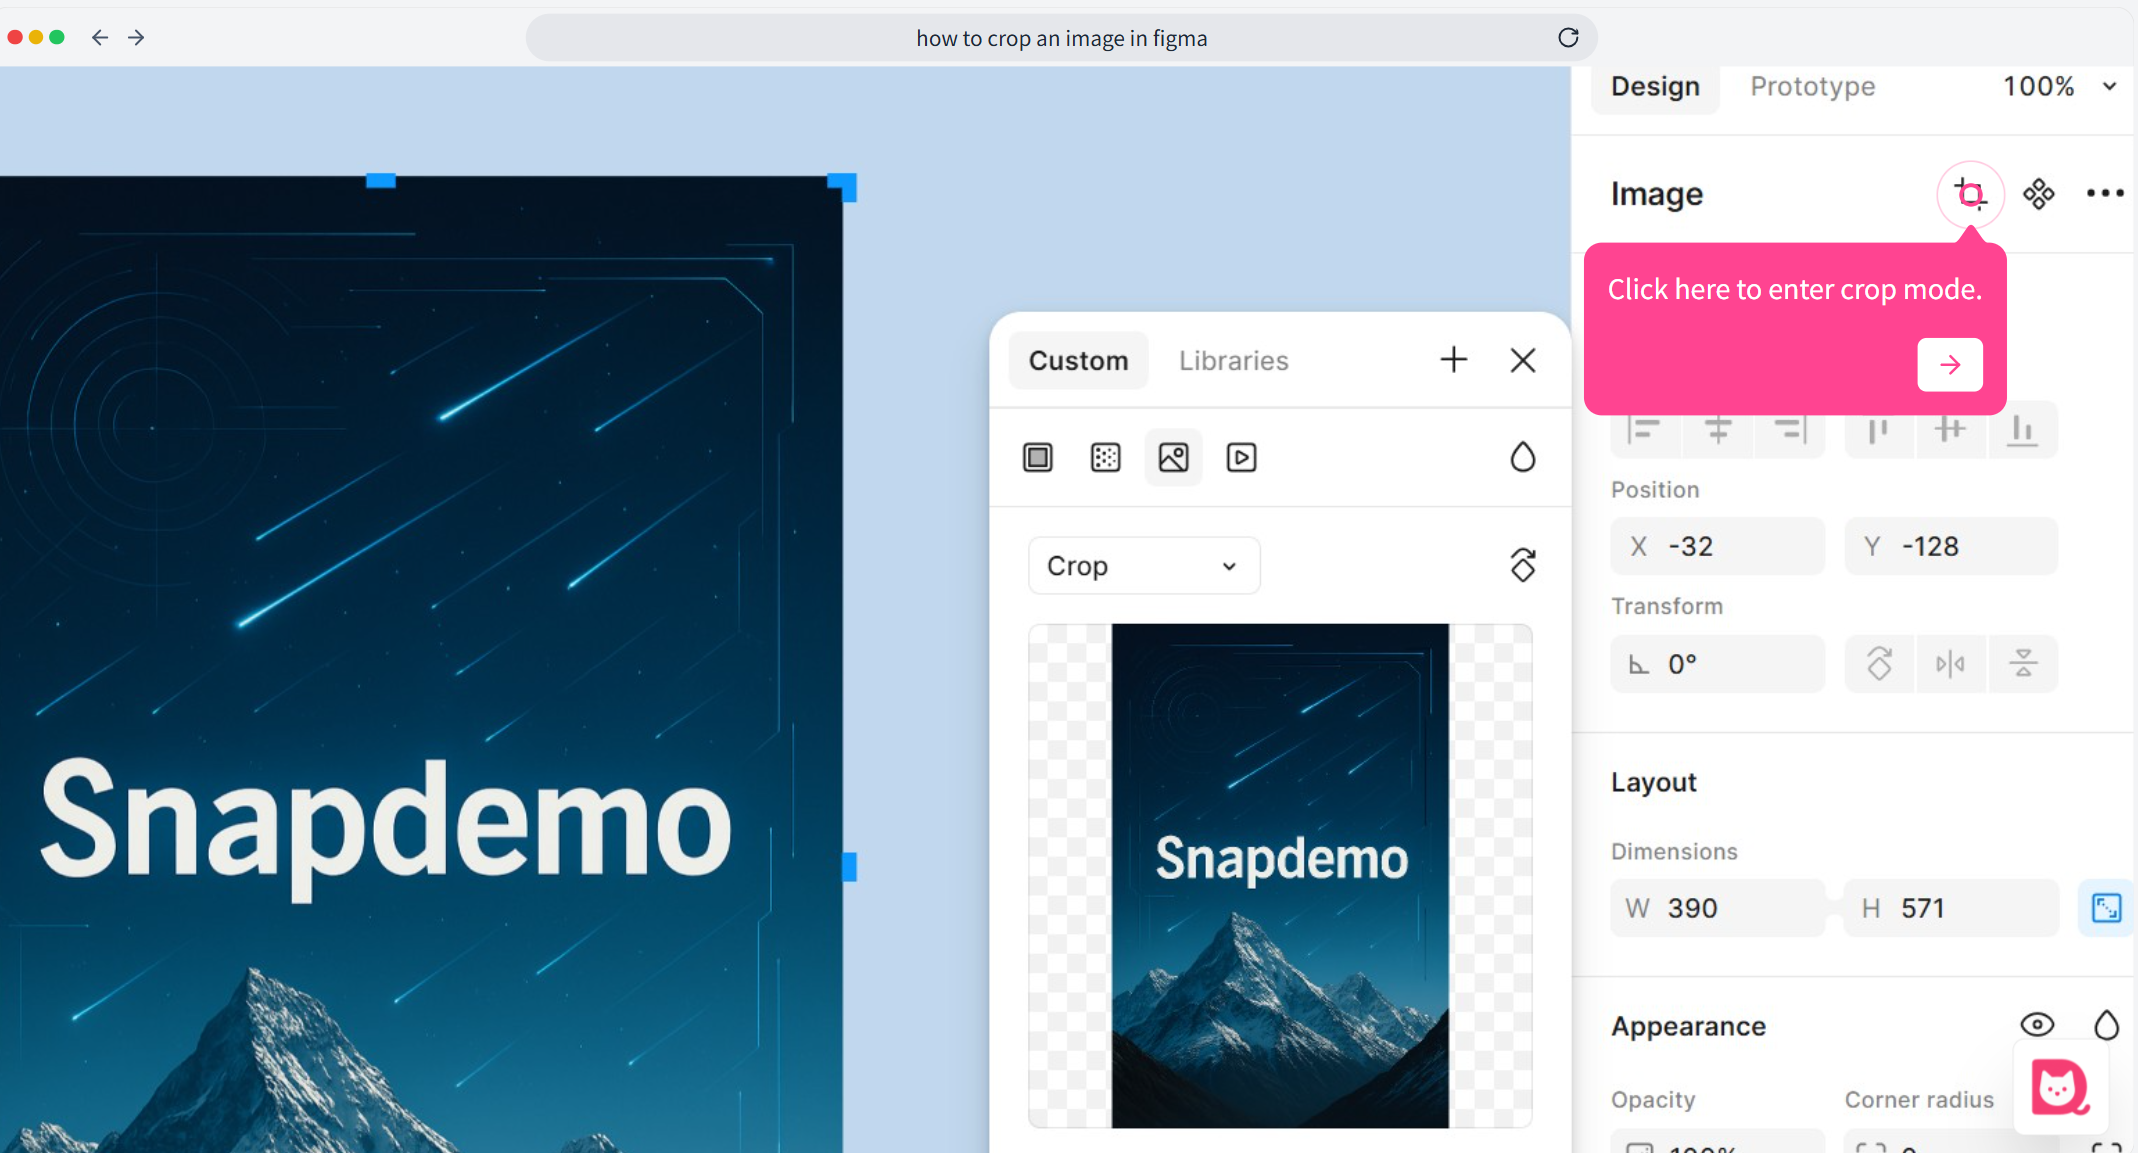
Drag the Blue Lines to Crop
Once in crop mode, blue lines will appear around the image. Hold down the mouse and drag these blue lines to crop the image to your desired size. Release the mouse button when you're happy with the crop. Done.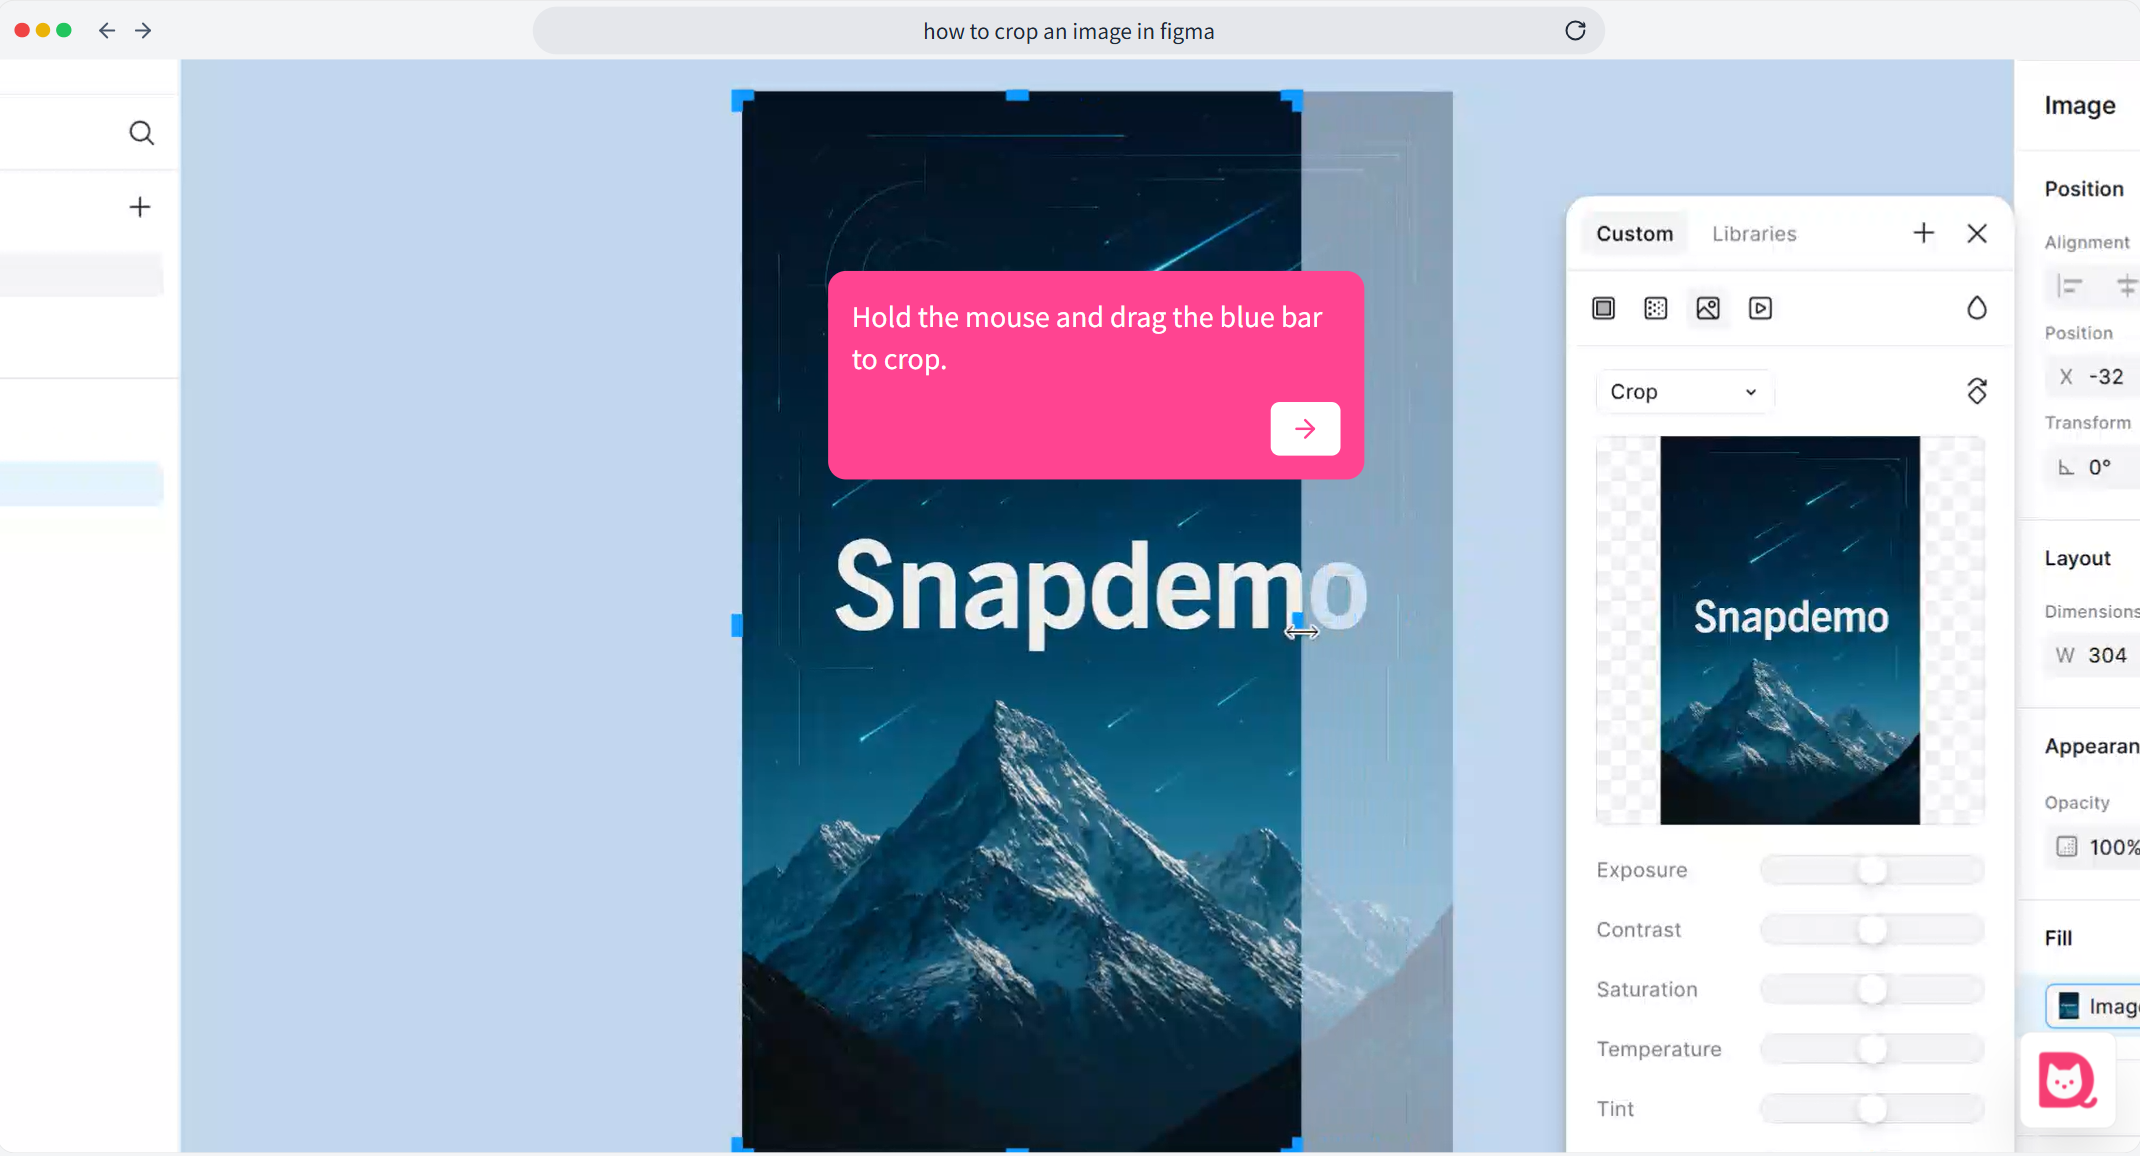
Method 2: Crop Using the Fill Settings
If you prefer using the Fill settings, this method gives you an alternative way to crop your image. It’s especially useful if you want more control over how your image fills a shape or container.
- Select the Image
First, select the image you want to crop, just like in the first method. Then, go to the Fill section in the right-hand panel. Click the Four Small Dots
Next to the Fill label, you’ll see an icon with four small dots. Click on it to open additional options.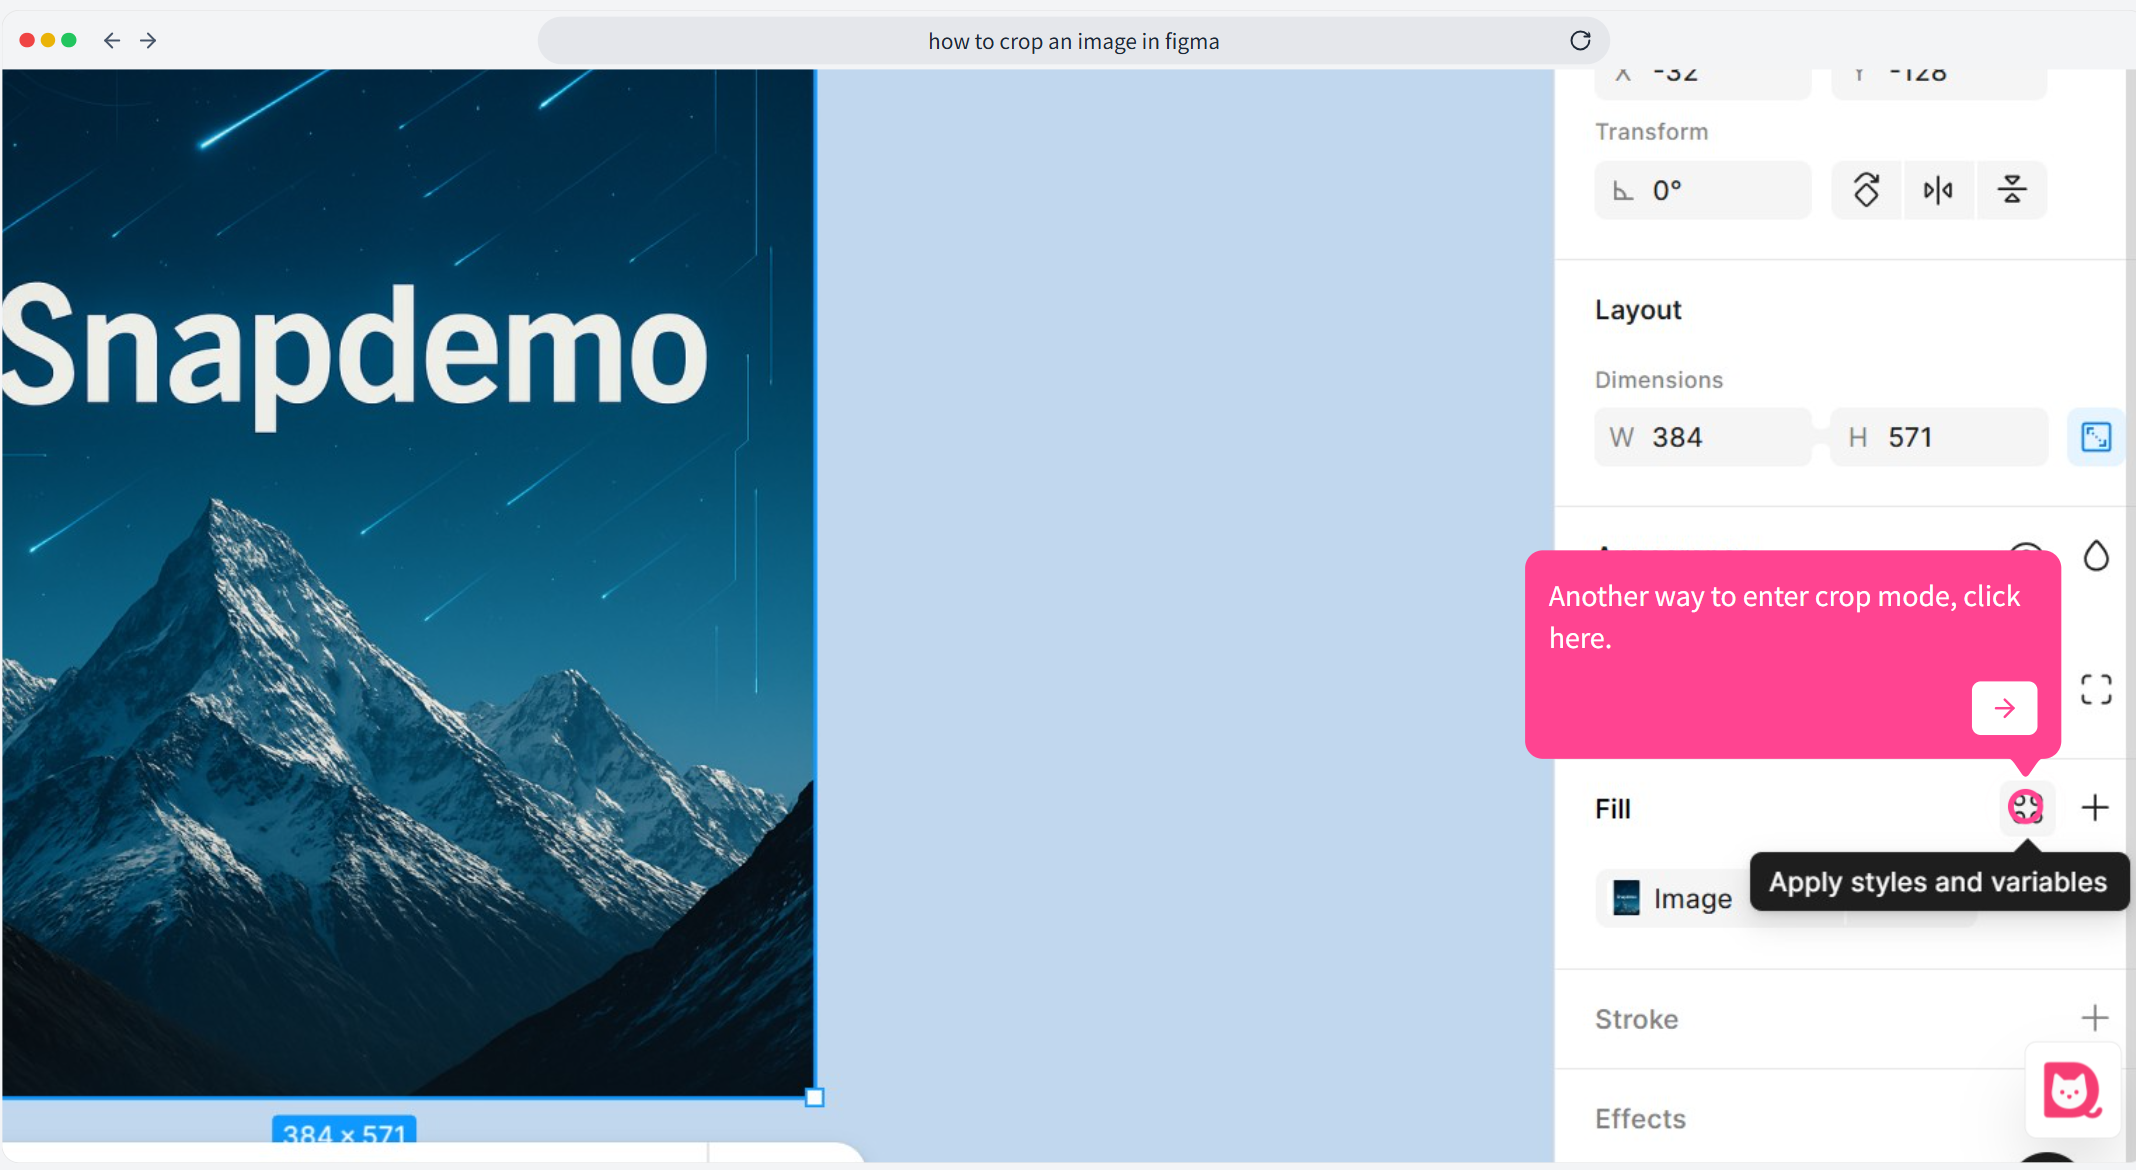
Switch to Crop Mode
In the dropdown menu that appears, change Fill to Crop. Now your image will switch to crop mode, and you can adjust its size and position.