Managing multiple pages in Notion can sometimes feel overwhelming. Wouldn’t it be great if you could easily access your most important pages all in one place? That’s where creating a custom sidebar comes in.
Follow these simple steps in my interactive demo by clicking "Next" to create your own sidebar and streamline your workflow:
✨ Want to create your own interactive tutorial? Snapdemo lets you build it without code. Free trial, no credit card needed.
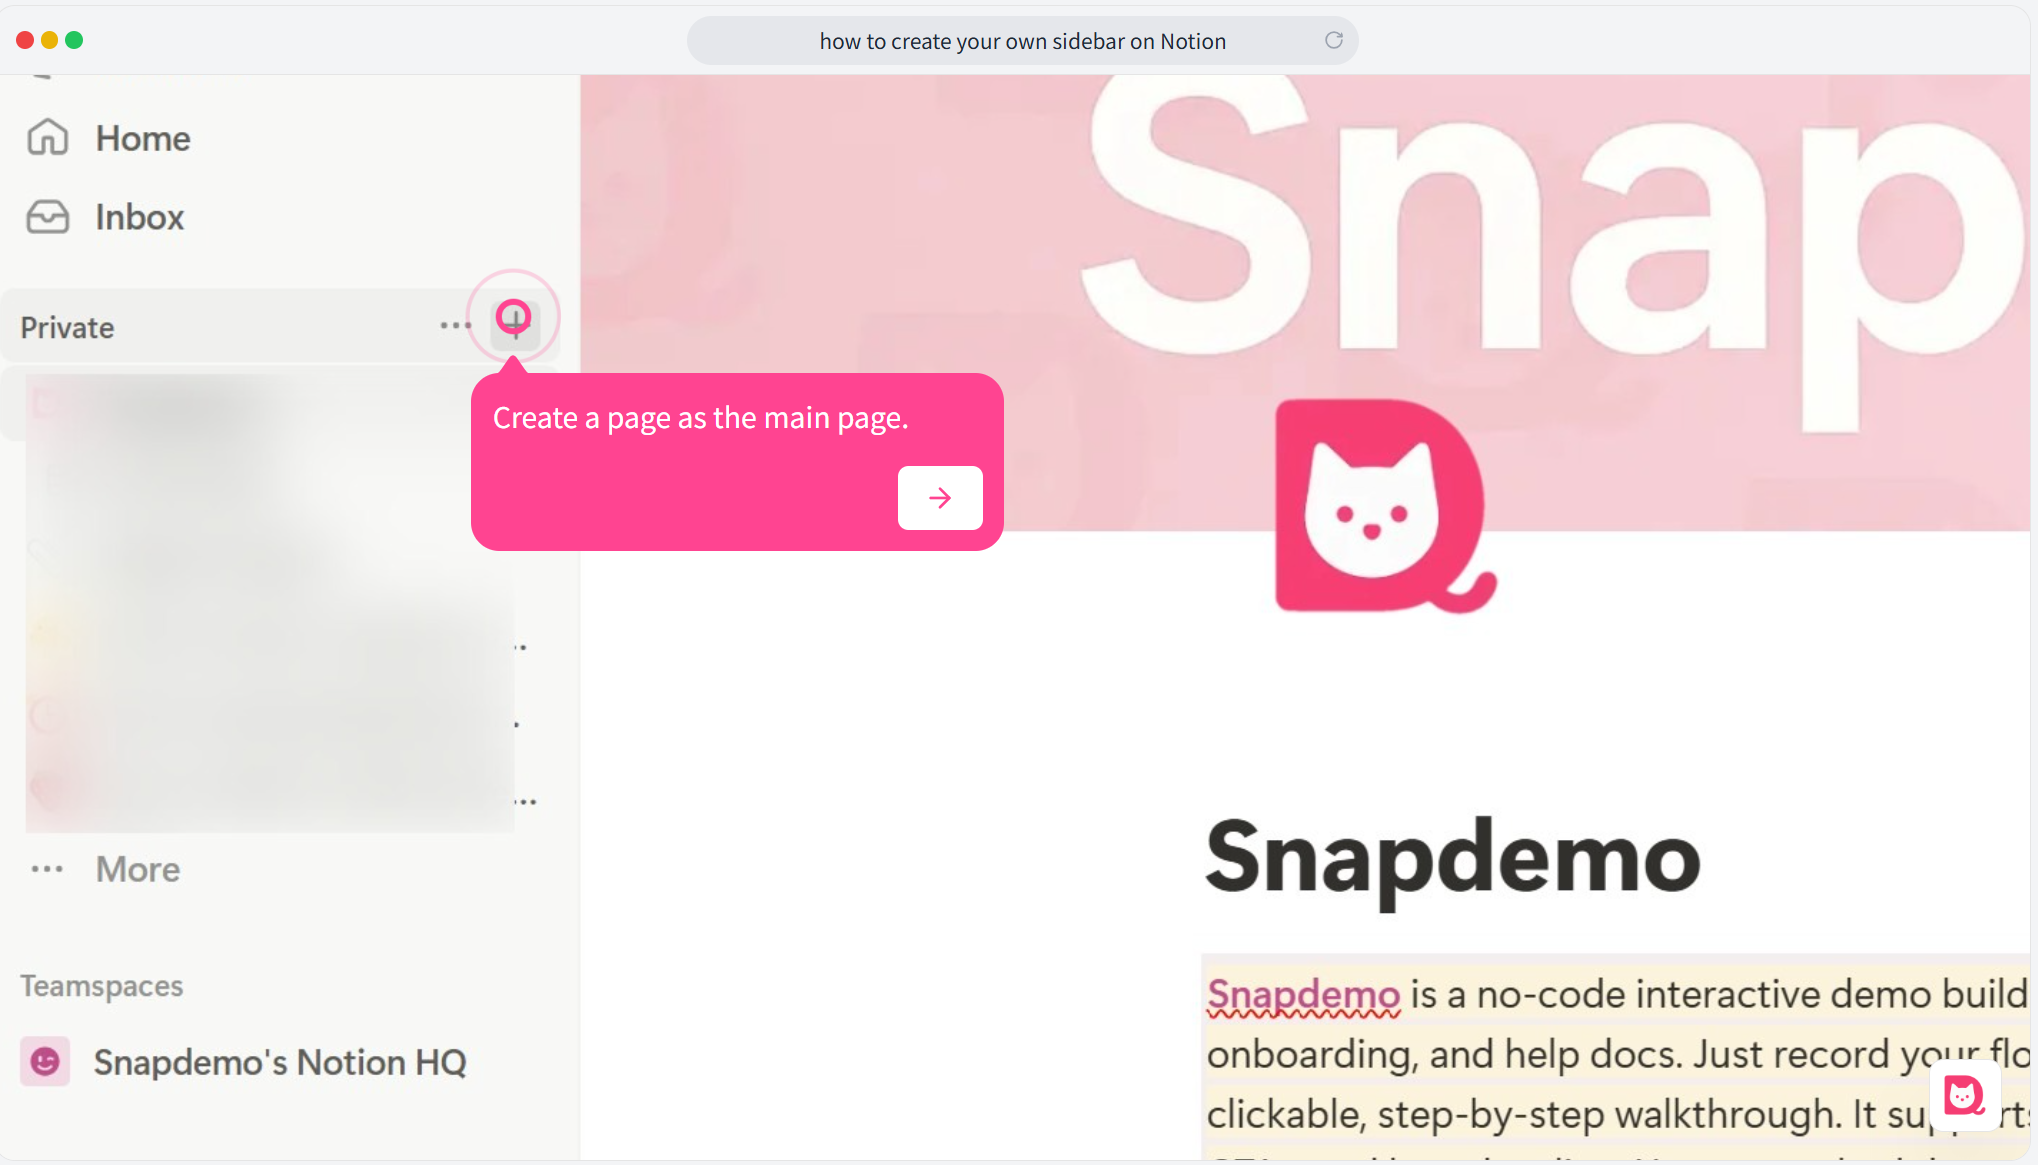
1. Create a Main Page
Start by creating a main page that will serve as the central hub for your sidebar.
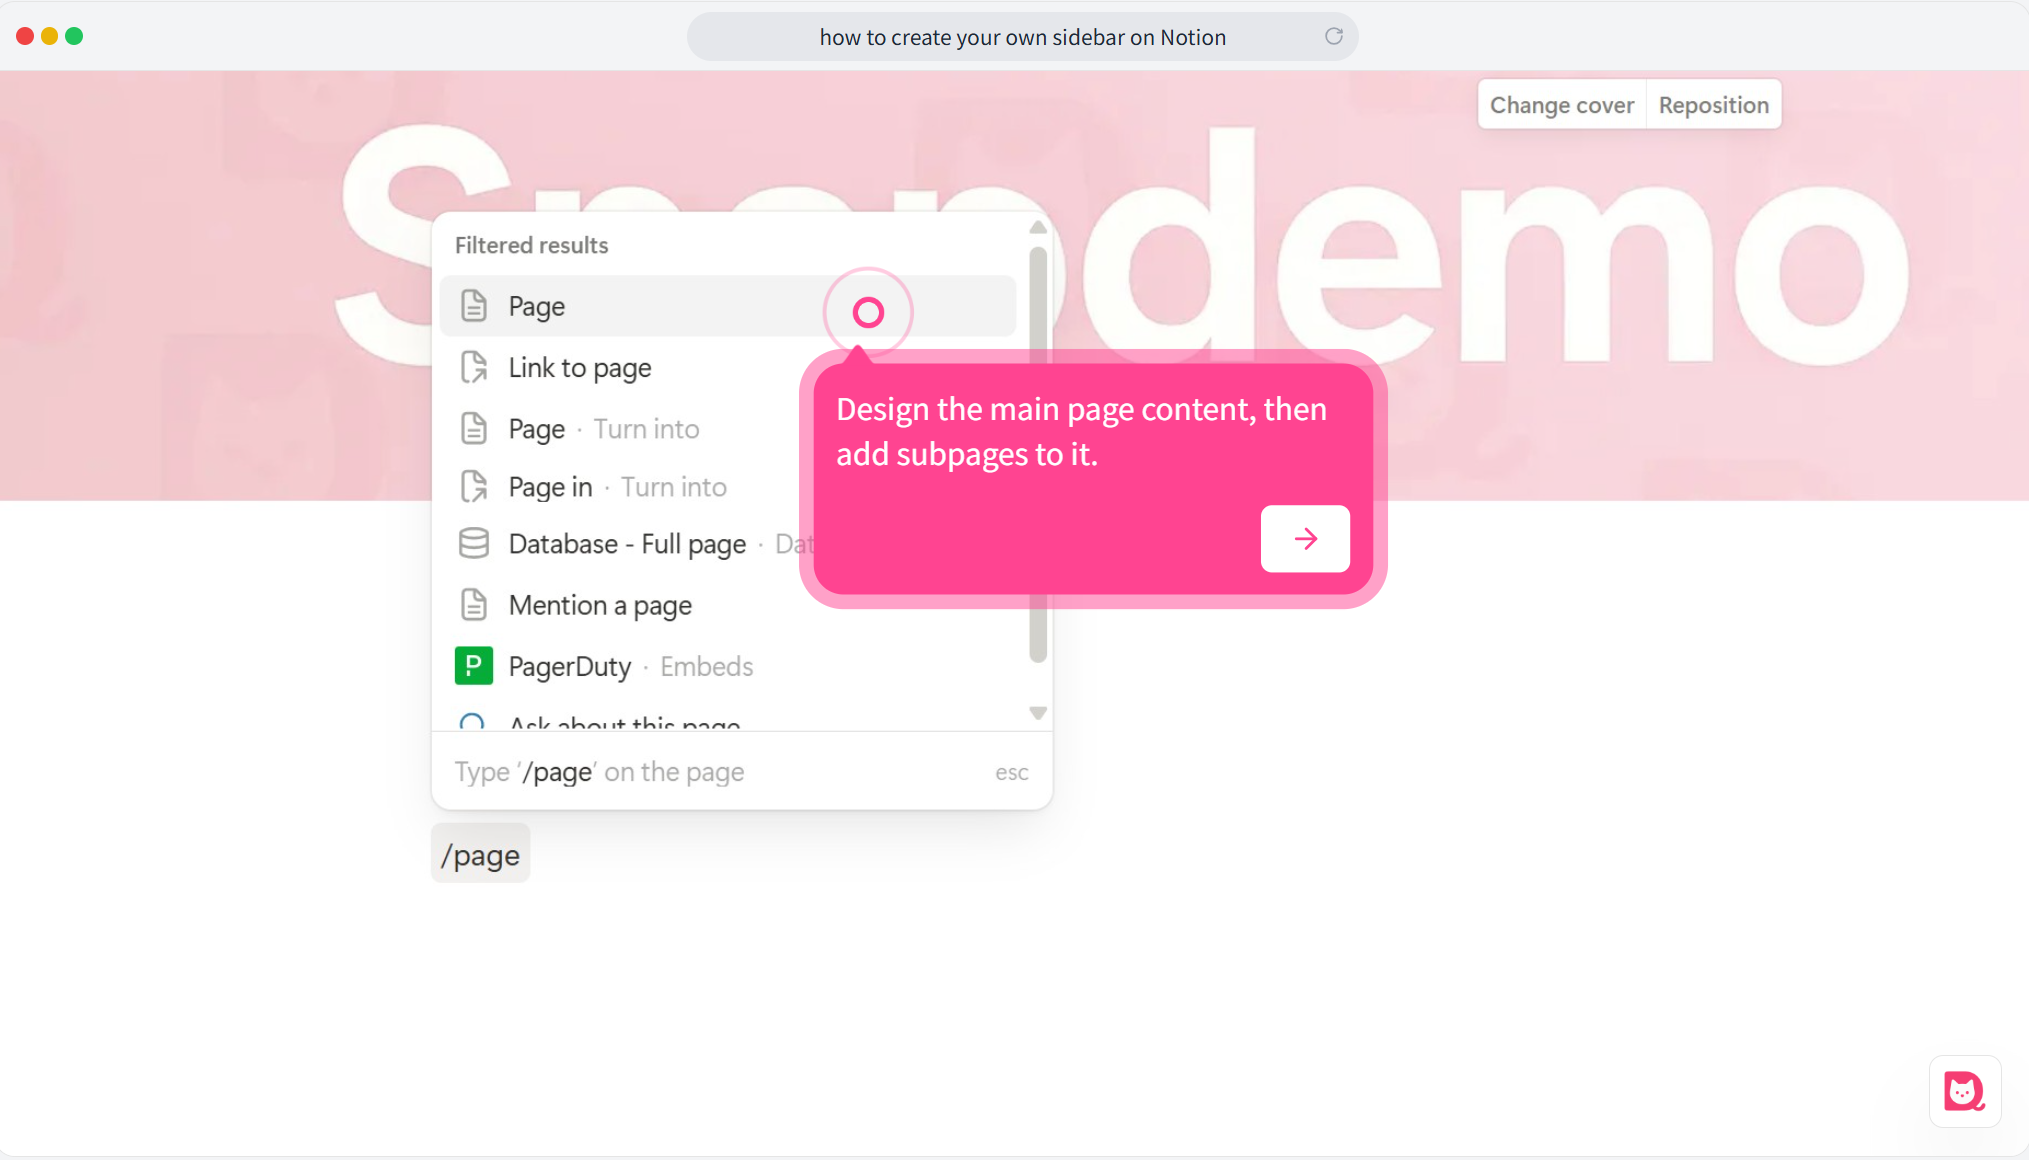
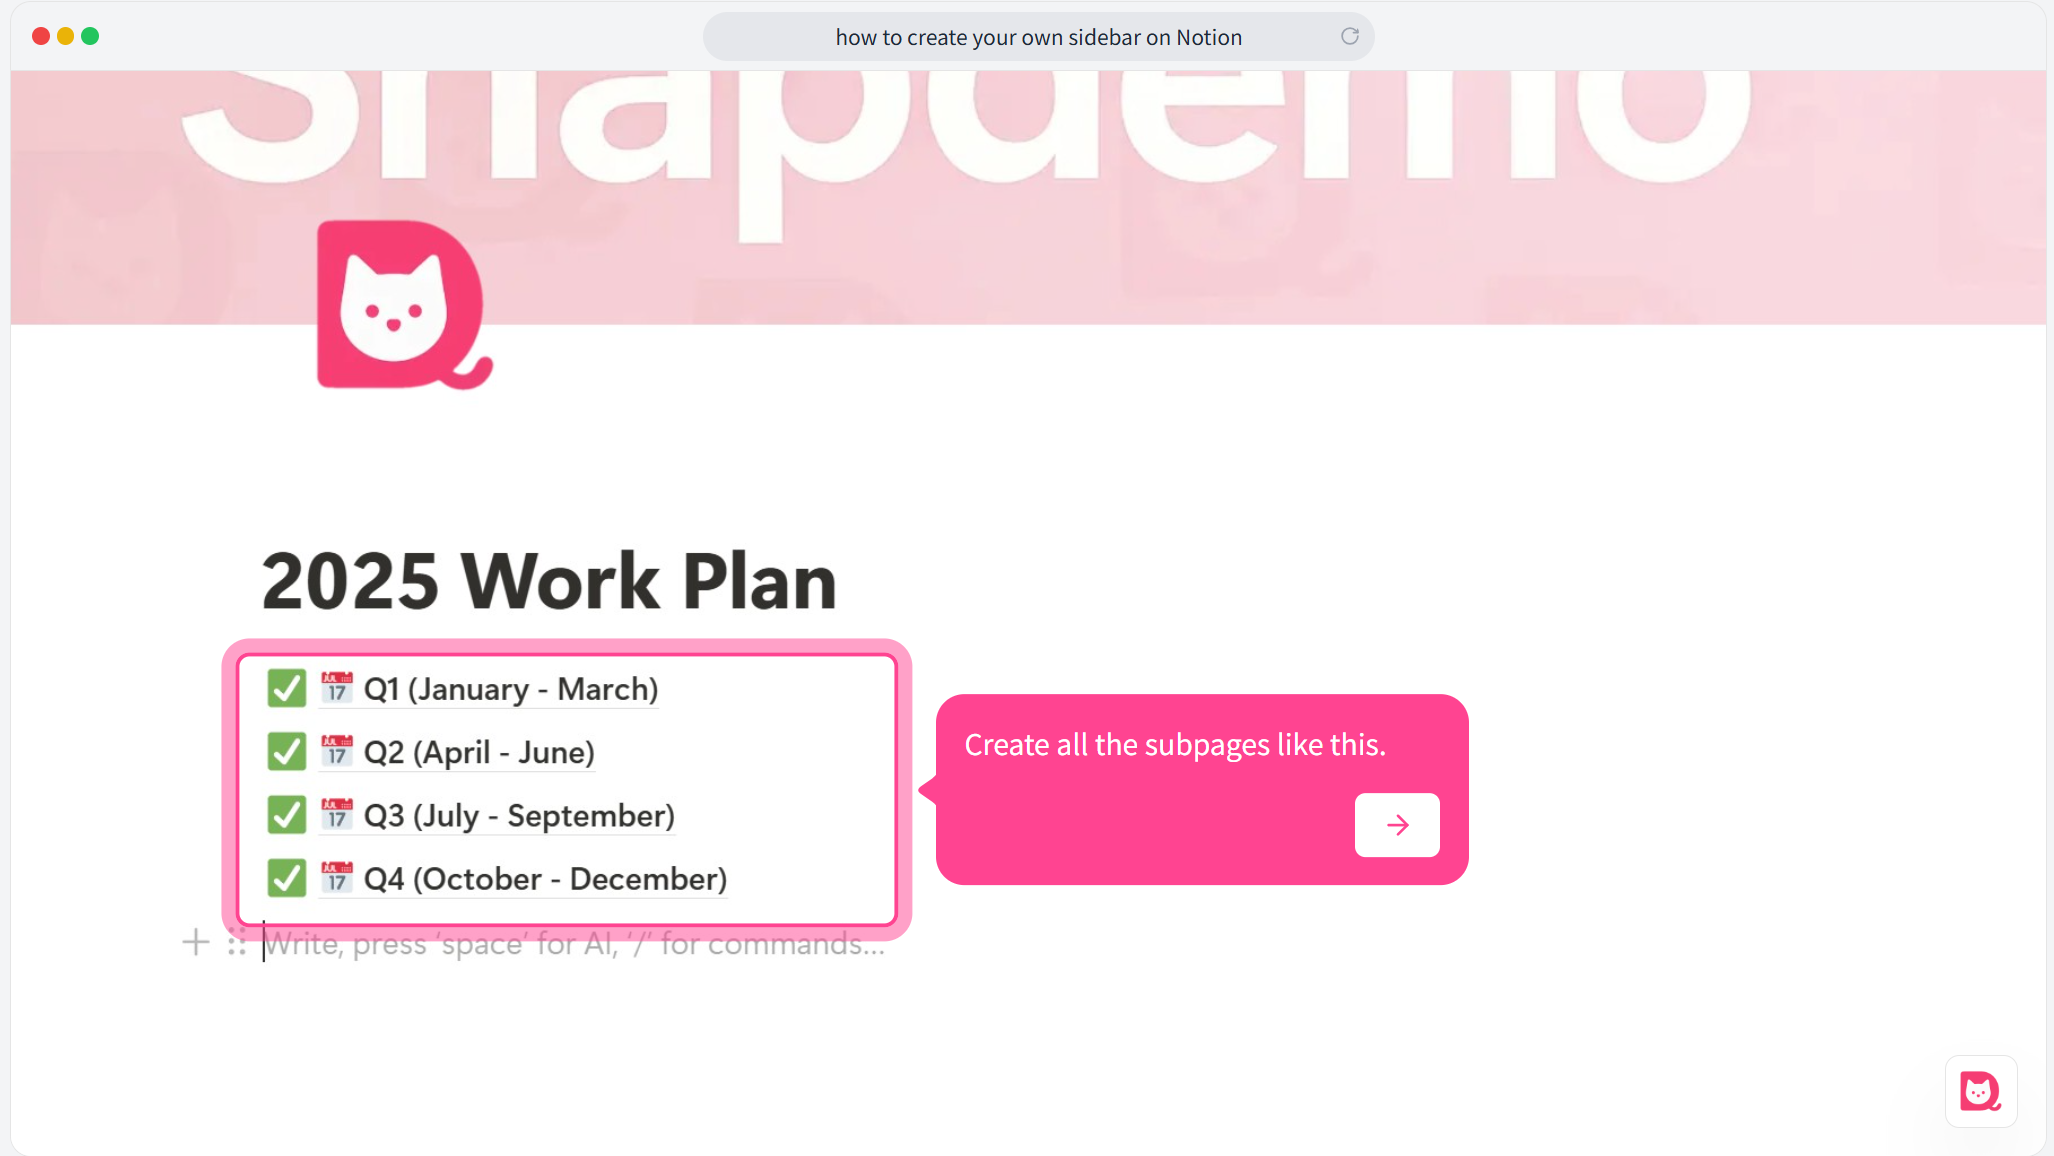
2. Create Subpages
Inside the main page, create your subpages by typing /page.
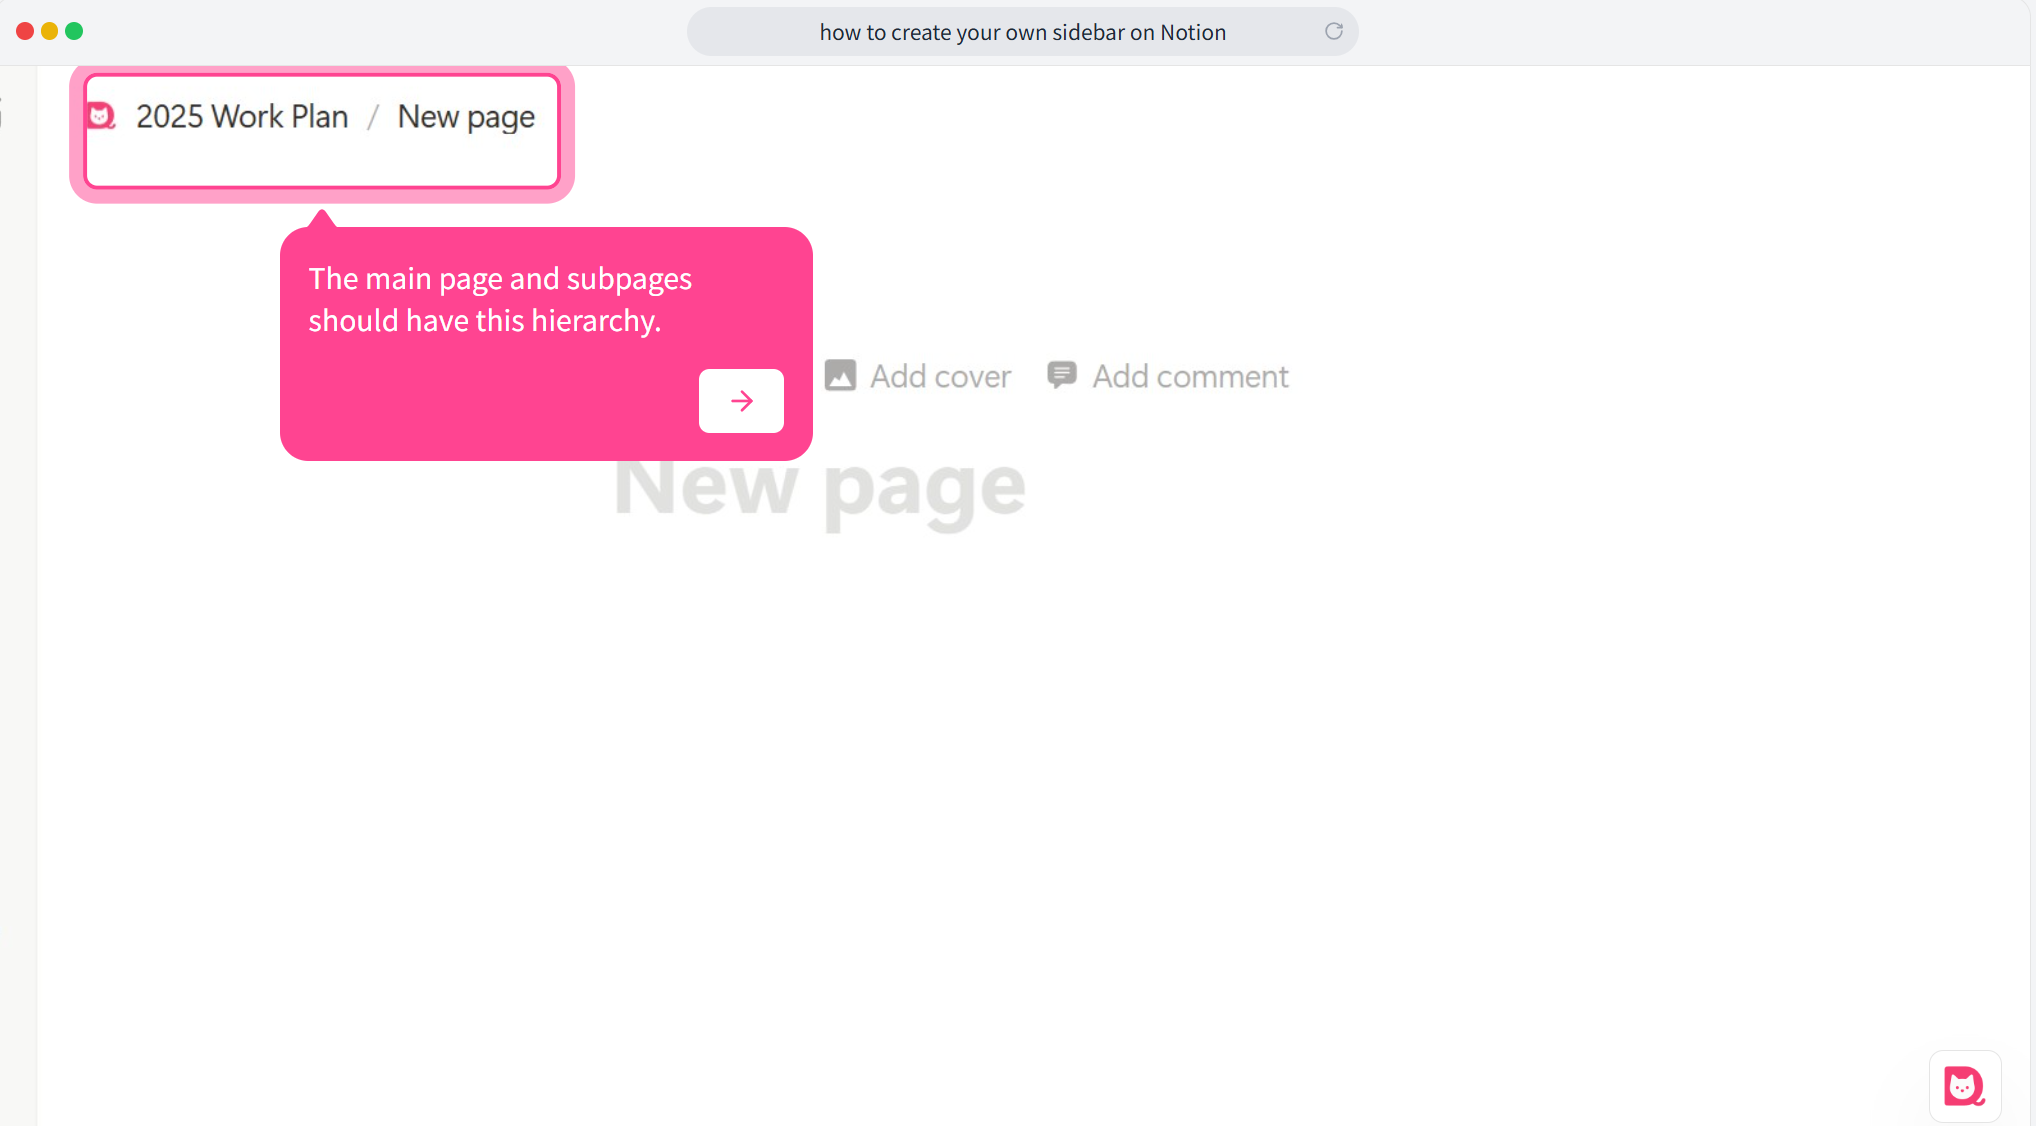
*You'll see a hierarchy appear in the top right corner of the page, showing home page/subpage, making it easy to differentiate between your main page and subpages.
3. Set Up Page Links
Make sure all your subpages are created. The link names will be the same as the page names, and while you can’t change them individually, you can customize their appearance by adjusting colors or using columns to make them stand out.
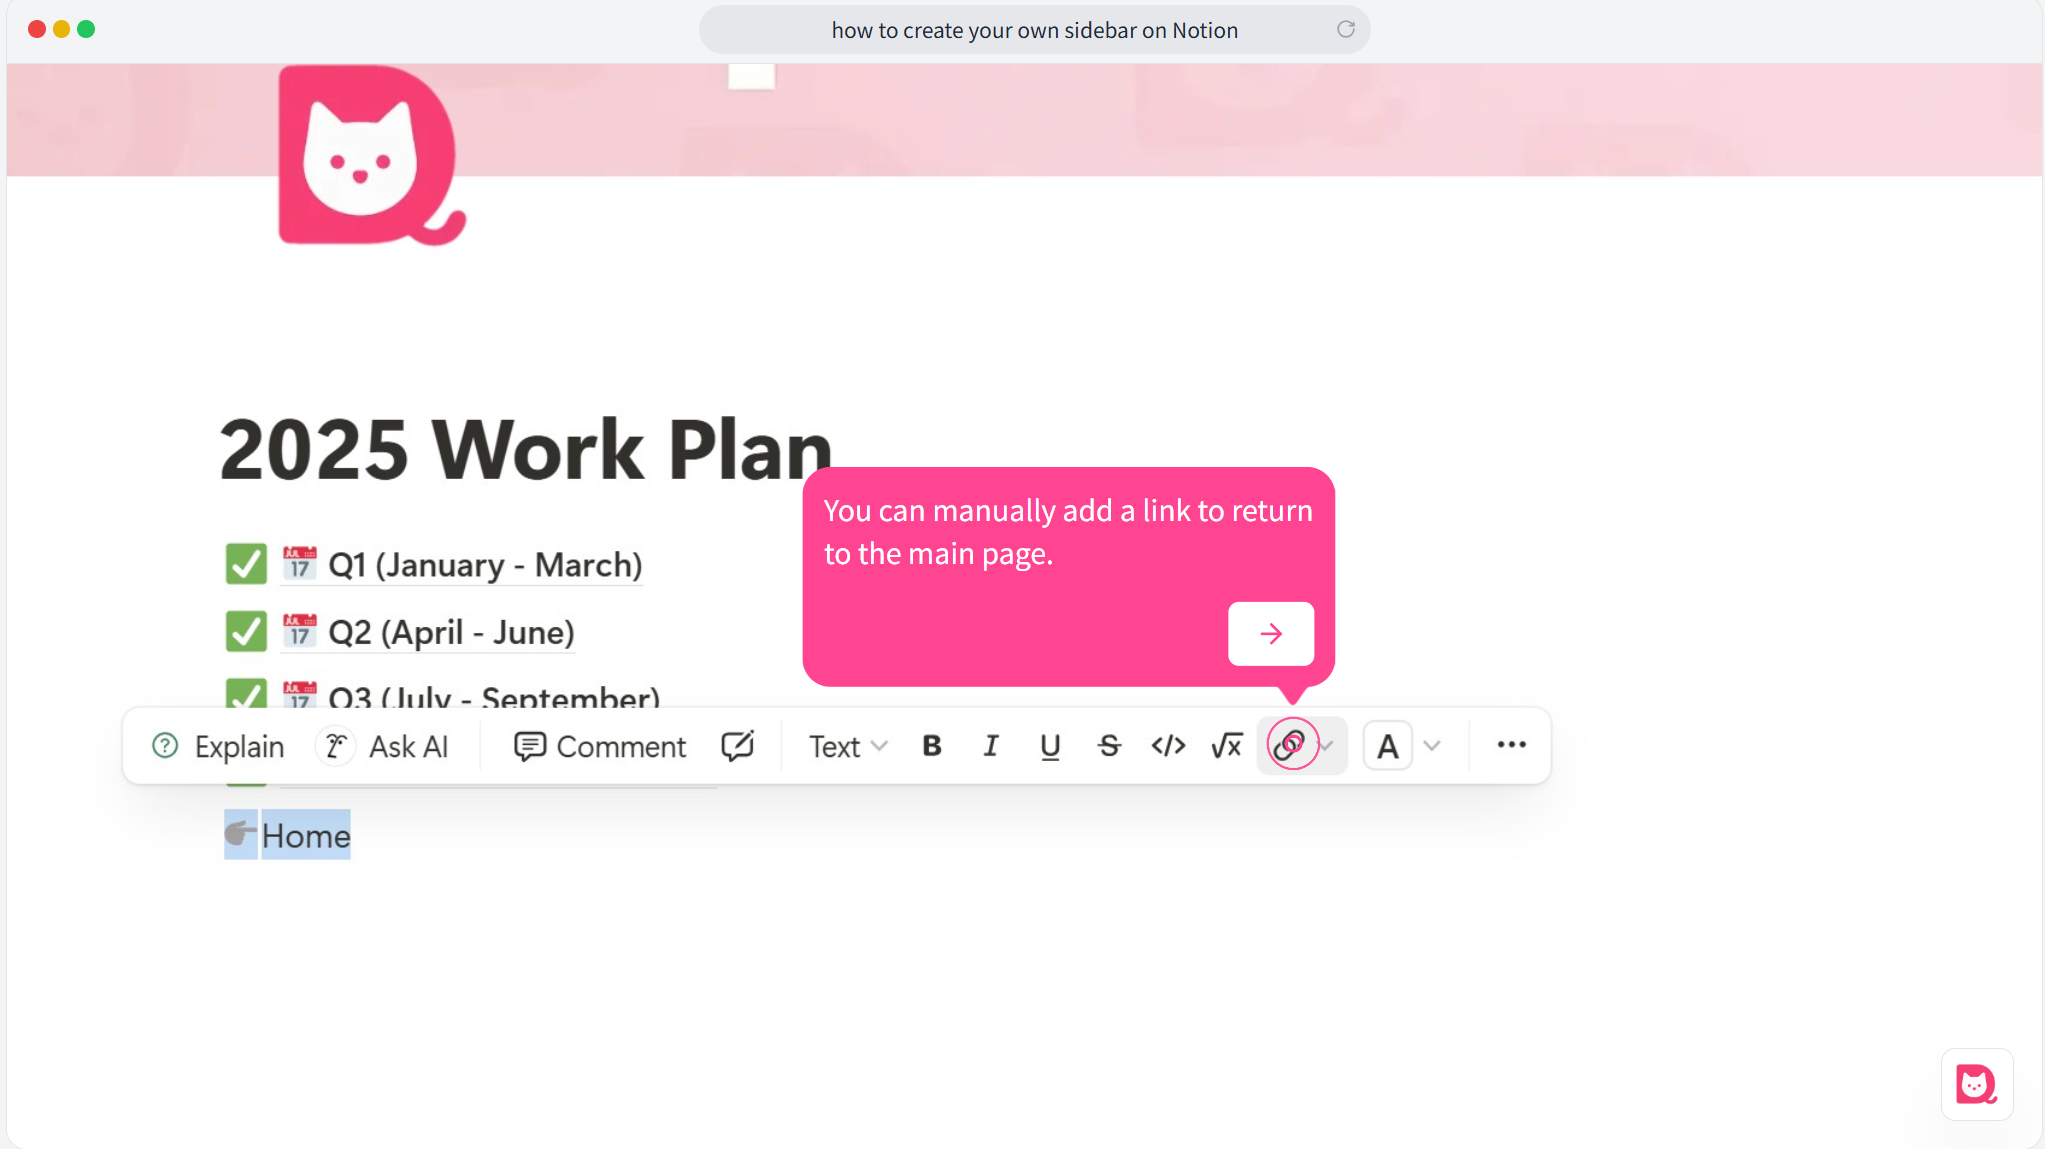
4. (Optional) Add a Return Link to the Main Page
For easier navigation, consider adding a "Return to Homepage" link in each subpage so you can quickly get back to the main page.
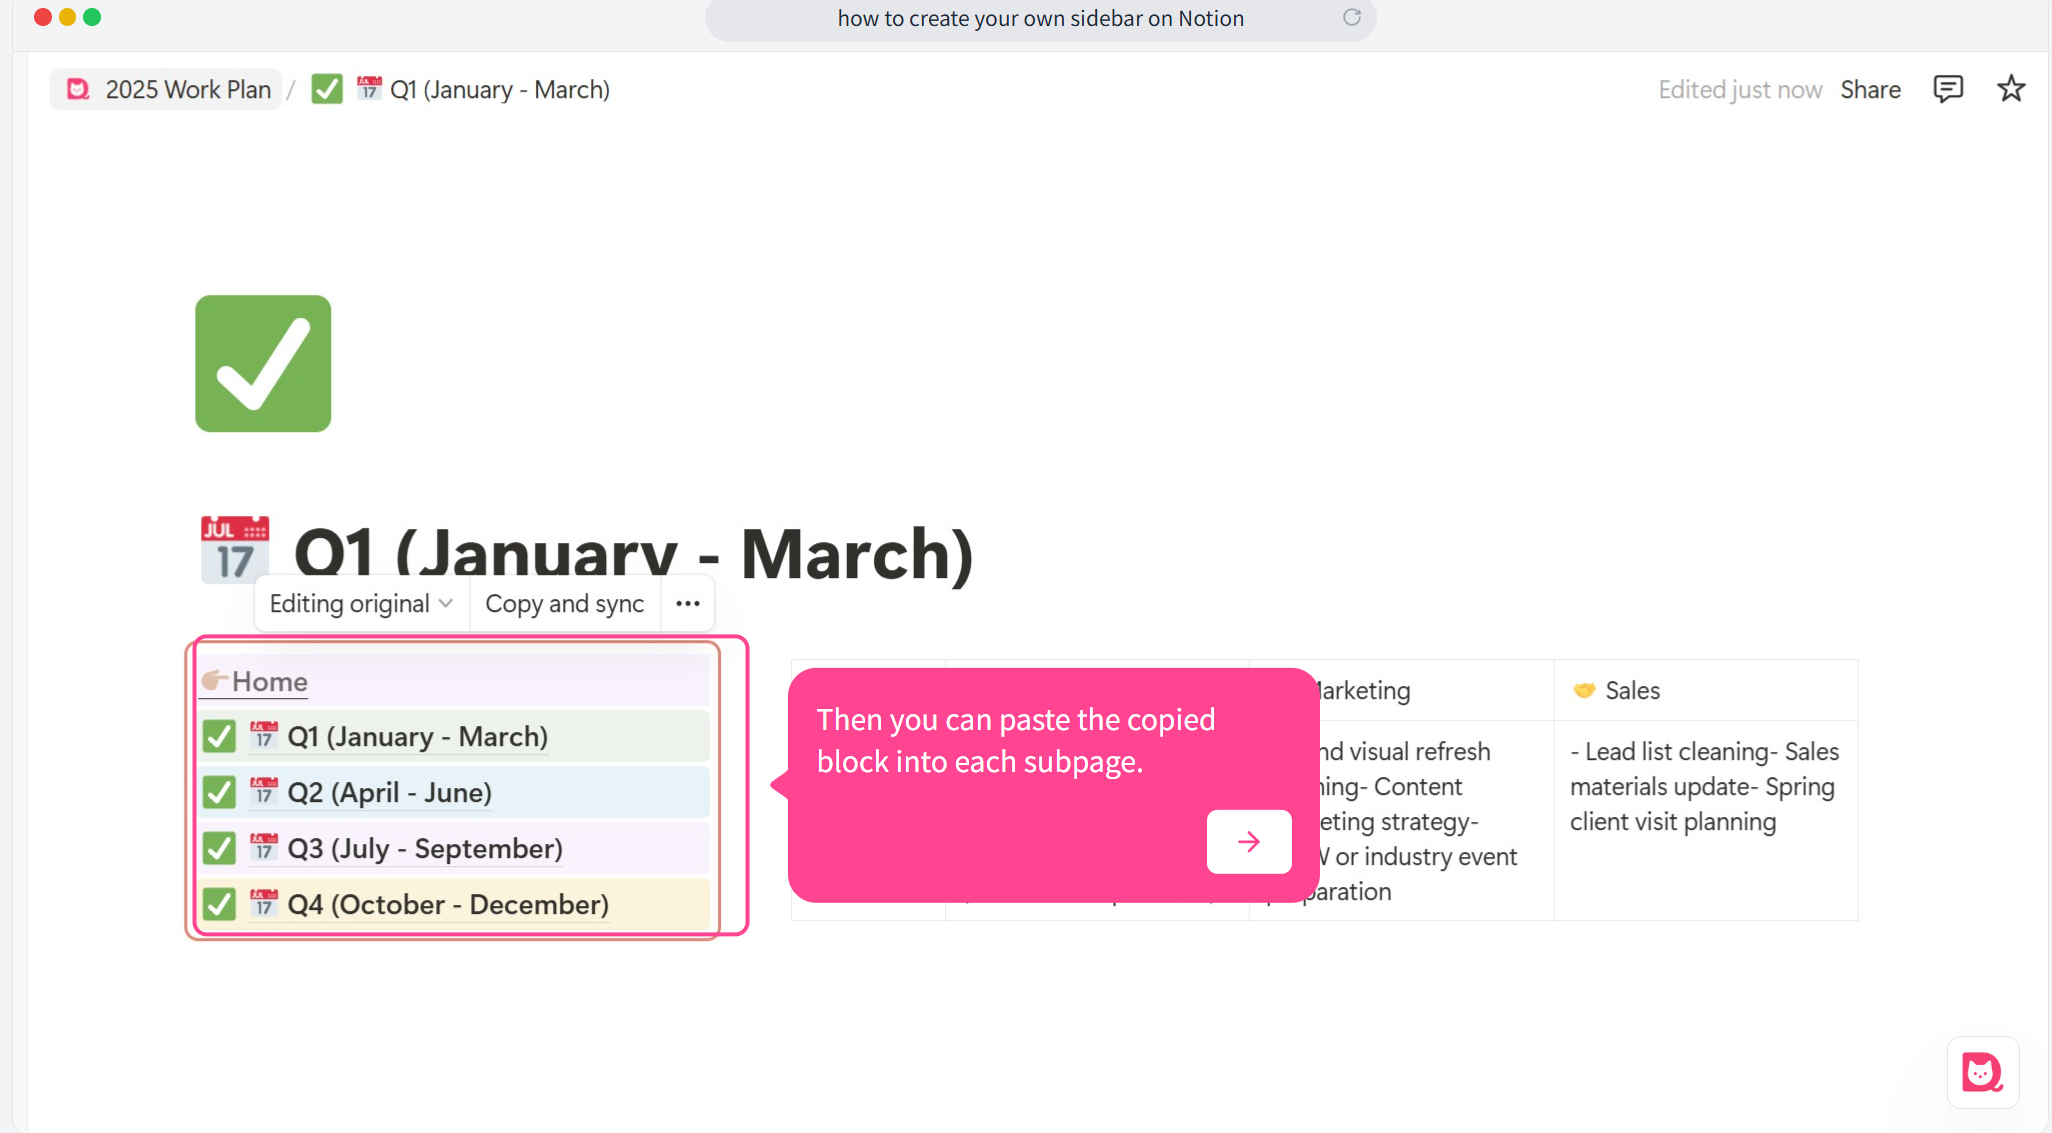
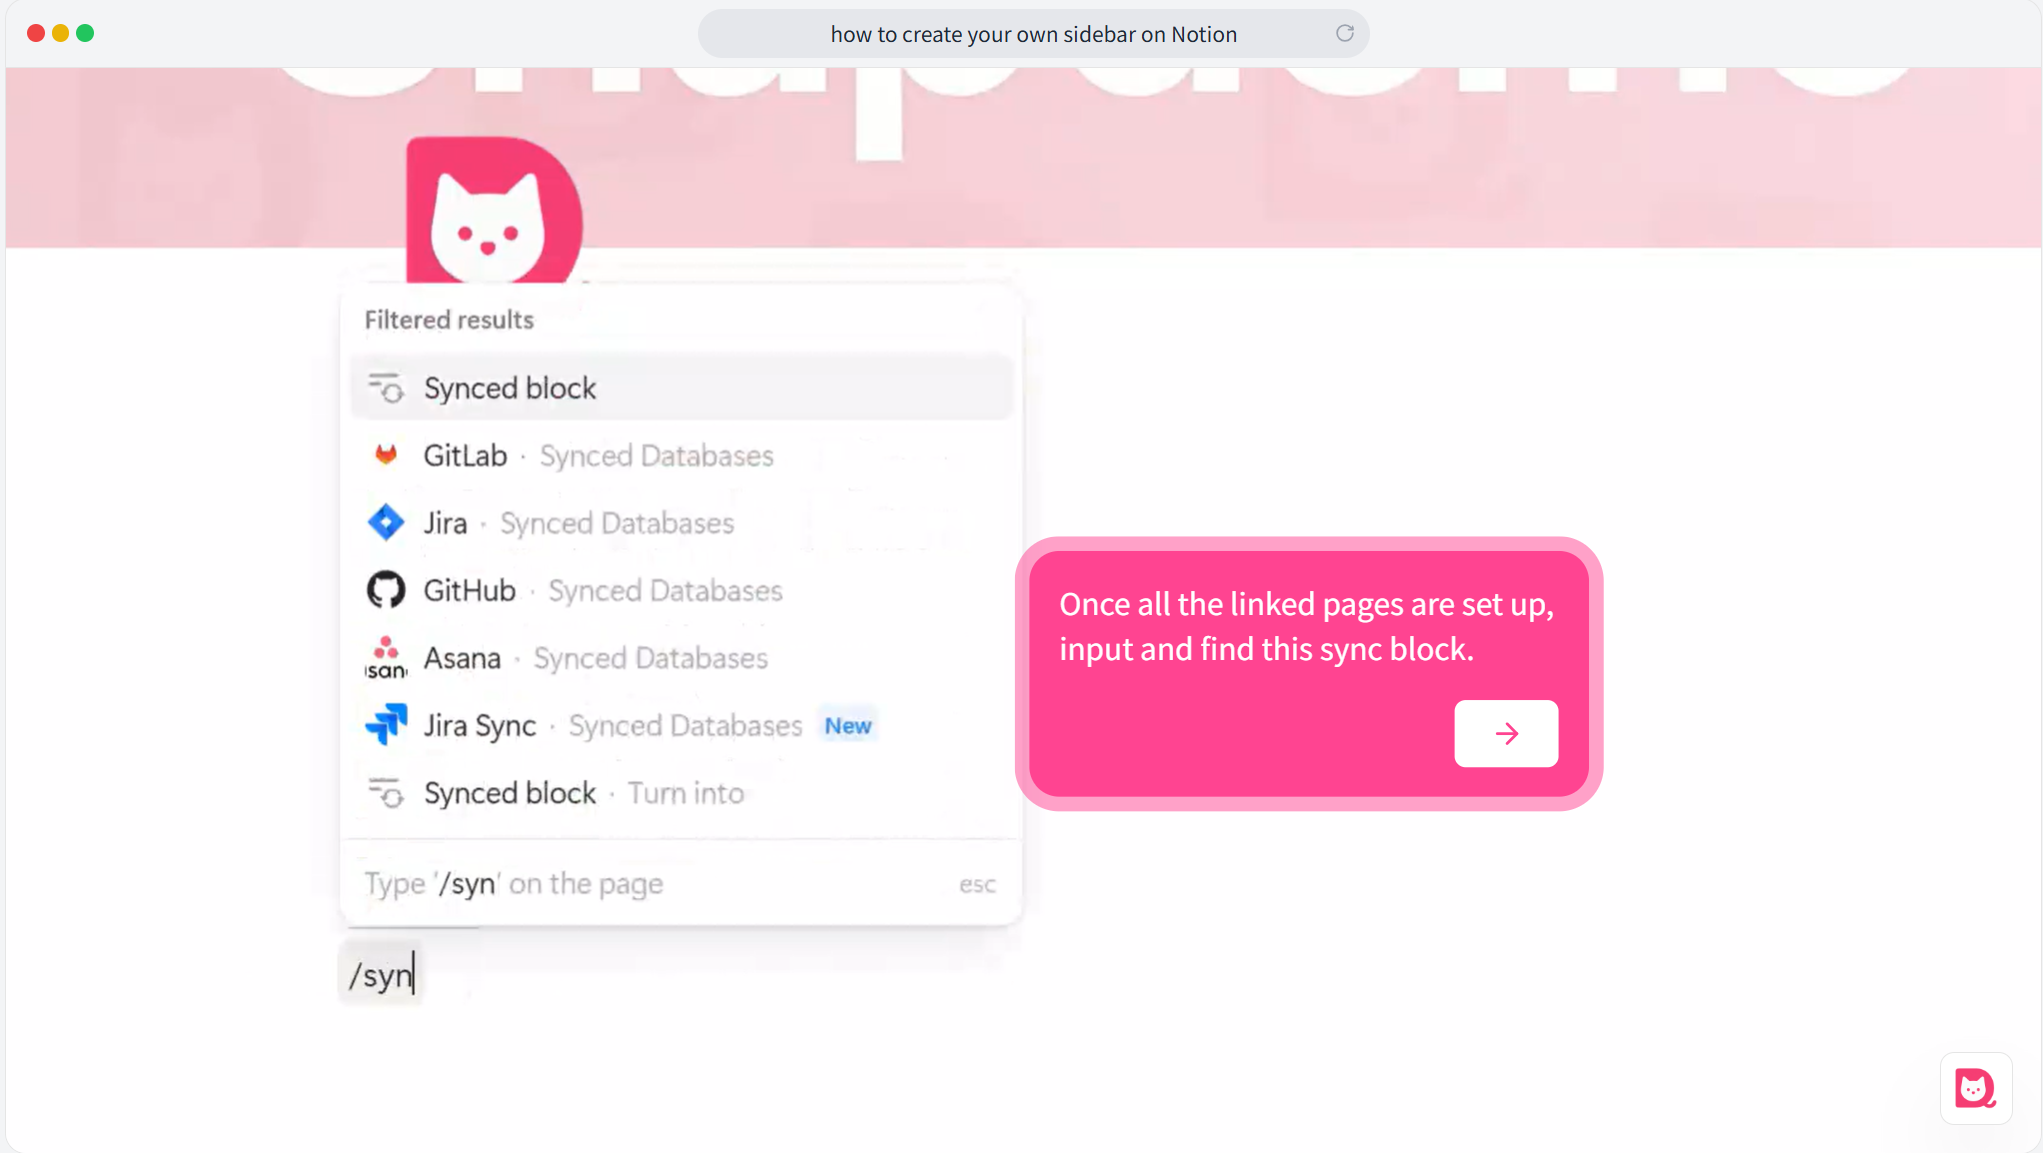
5. Create a Synced Block
On your main page, create a synced block by typing /synced block. This will allow you to display the same content across multiple pages.
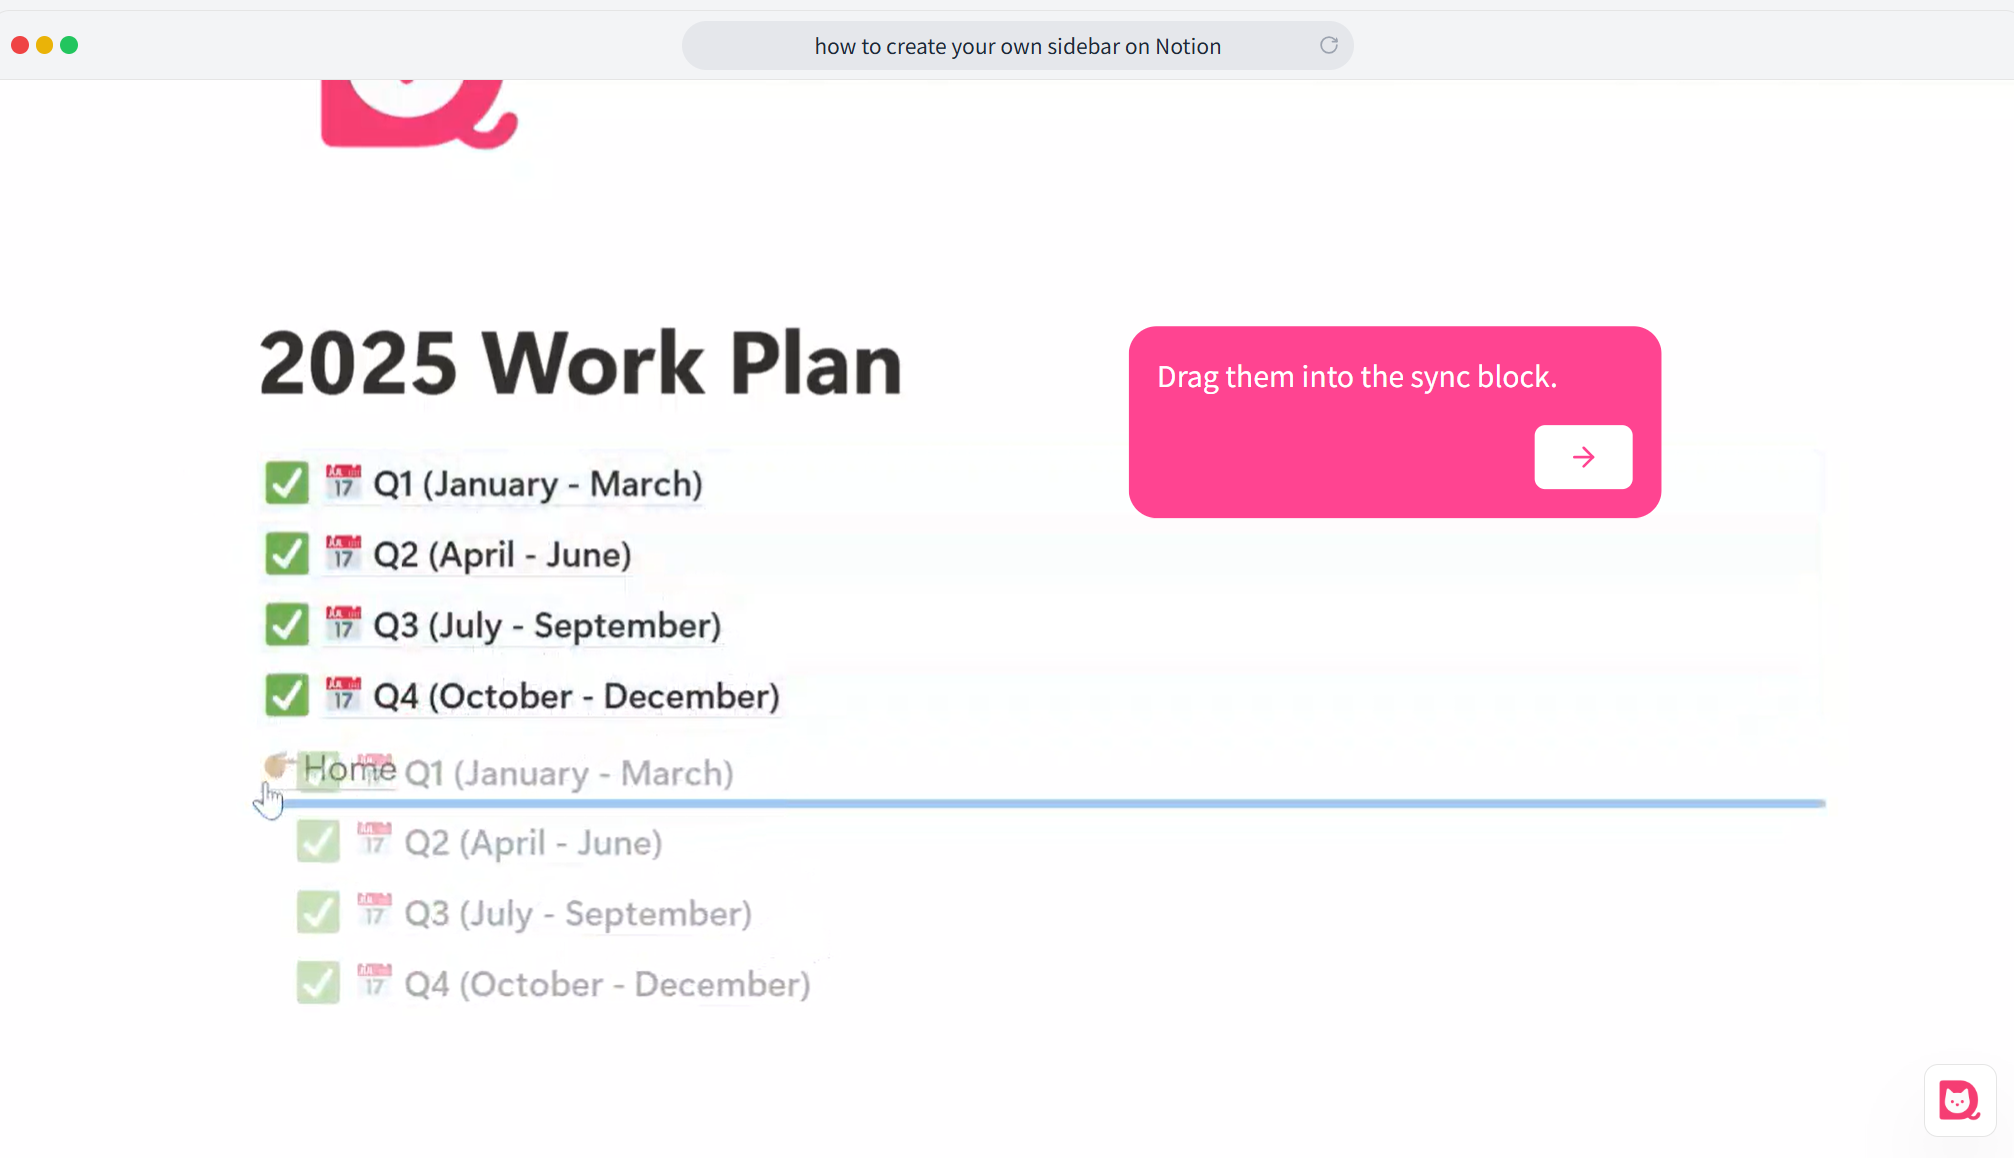
6. Drag Links Into the Synced Block
Drag your created subpage links into the synced block. You can also create the synced block first and then add the links, depending on what works best for your workflow.
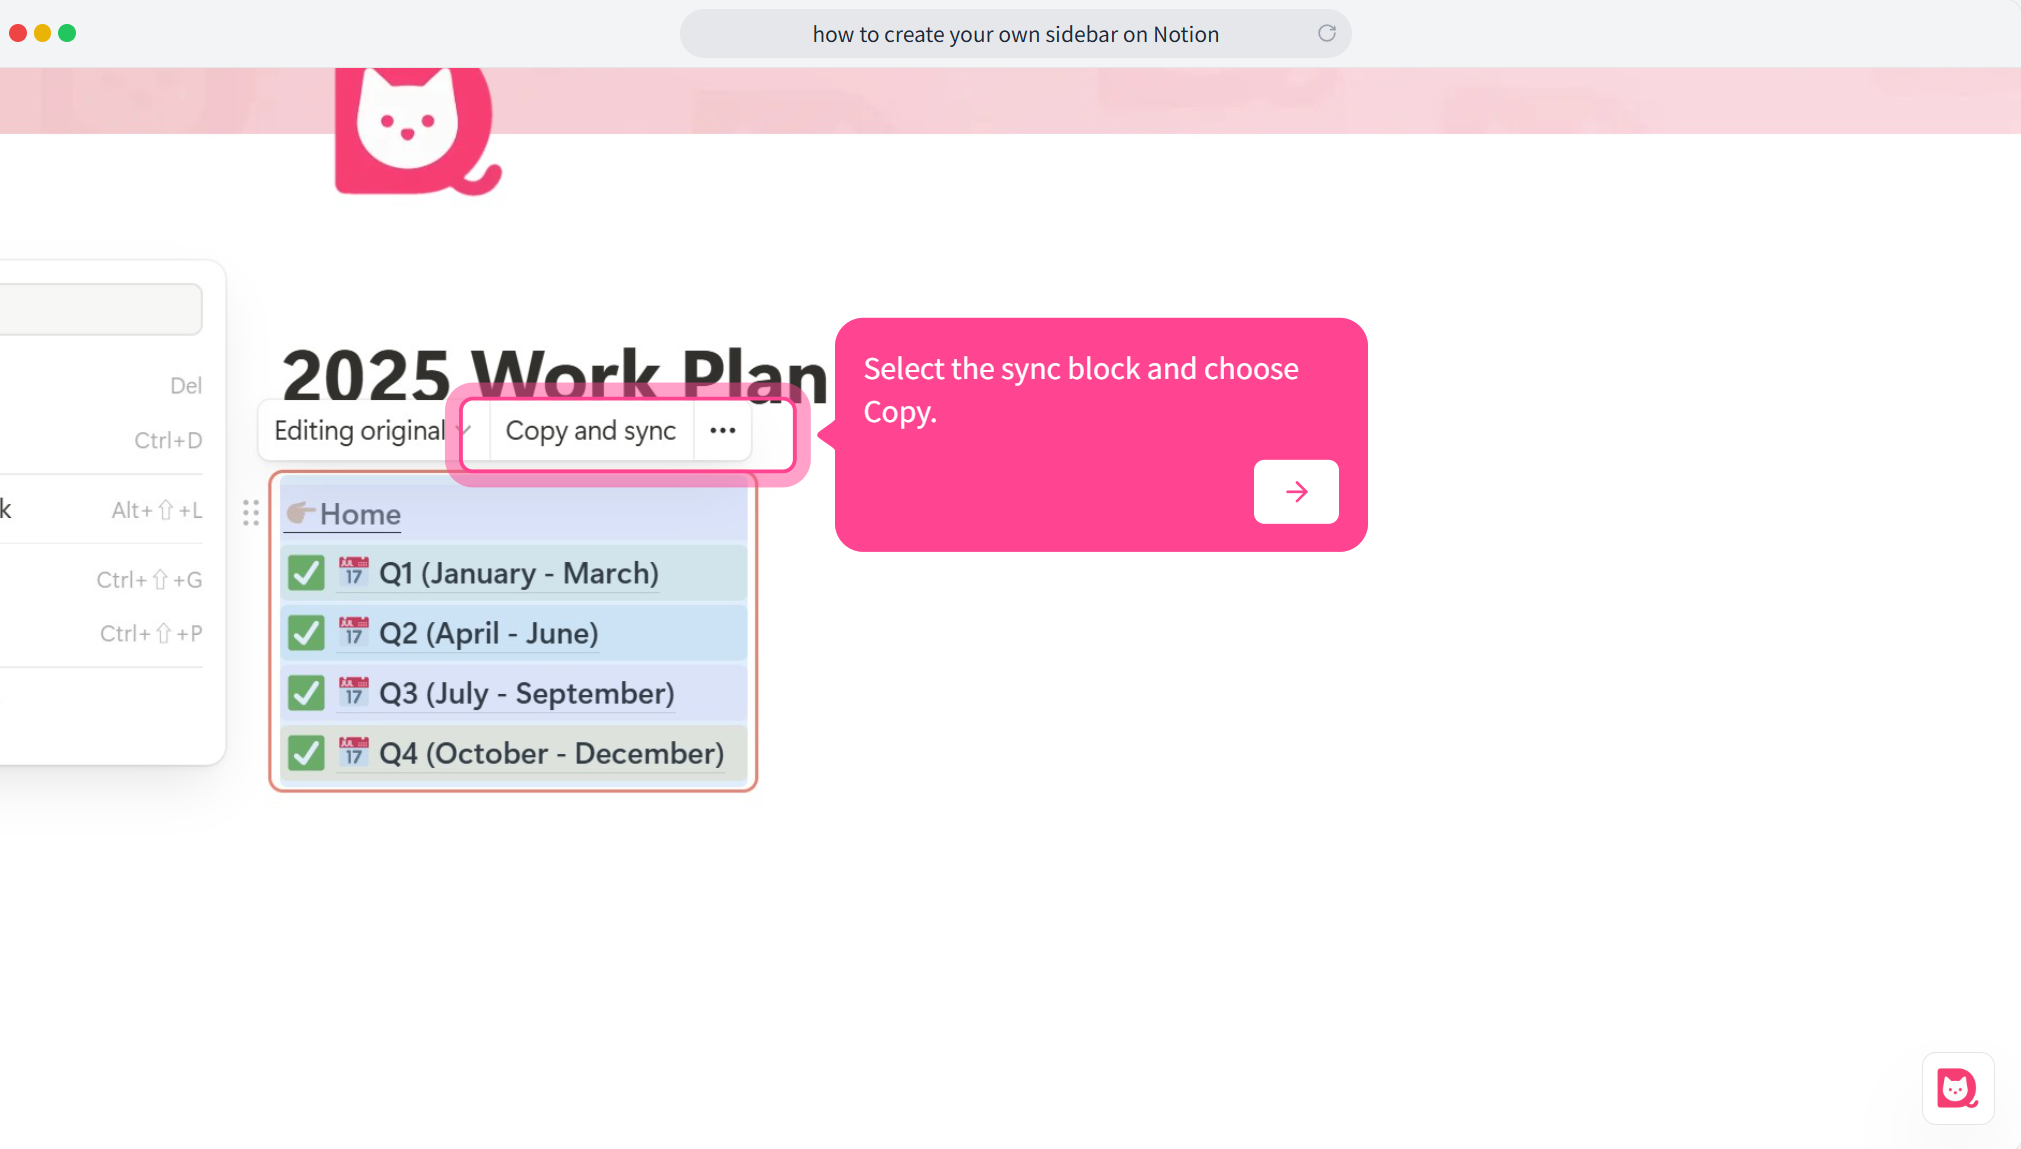
7. Copy and Sync the Block
Once the block is set up, select it and click Copy and Sync. This will allow you to sync the block across other pages.
8. Paste the Synced Block Into Each Subpage
Finally, paste the synced block into each of your subpages. Any updates you make to the block will automatically sync across all pages that include it.