Gradients add subtle depth and visual interest to your designs. In this step-by-step interactive tutorial, you'll learn how to apply and customize various gradients in Figma — including adding multiple color stops, adjusting direction, and editing the color blends. Follow along and try it yourself!
💡 This tutorial was created with Snapdemo — a no-code tool for building interactive demos. Try it for free, no credit card required.
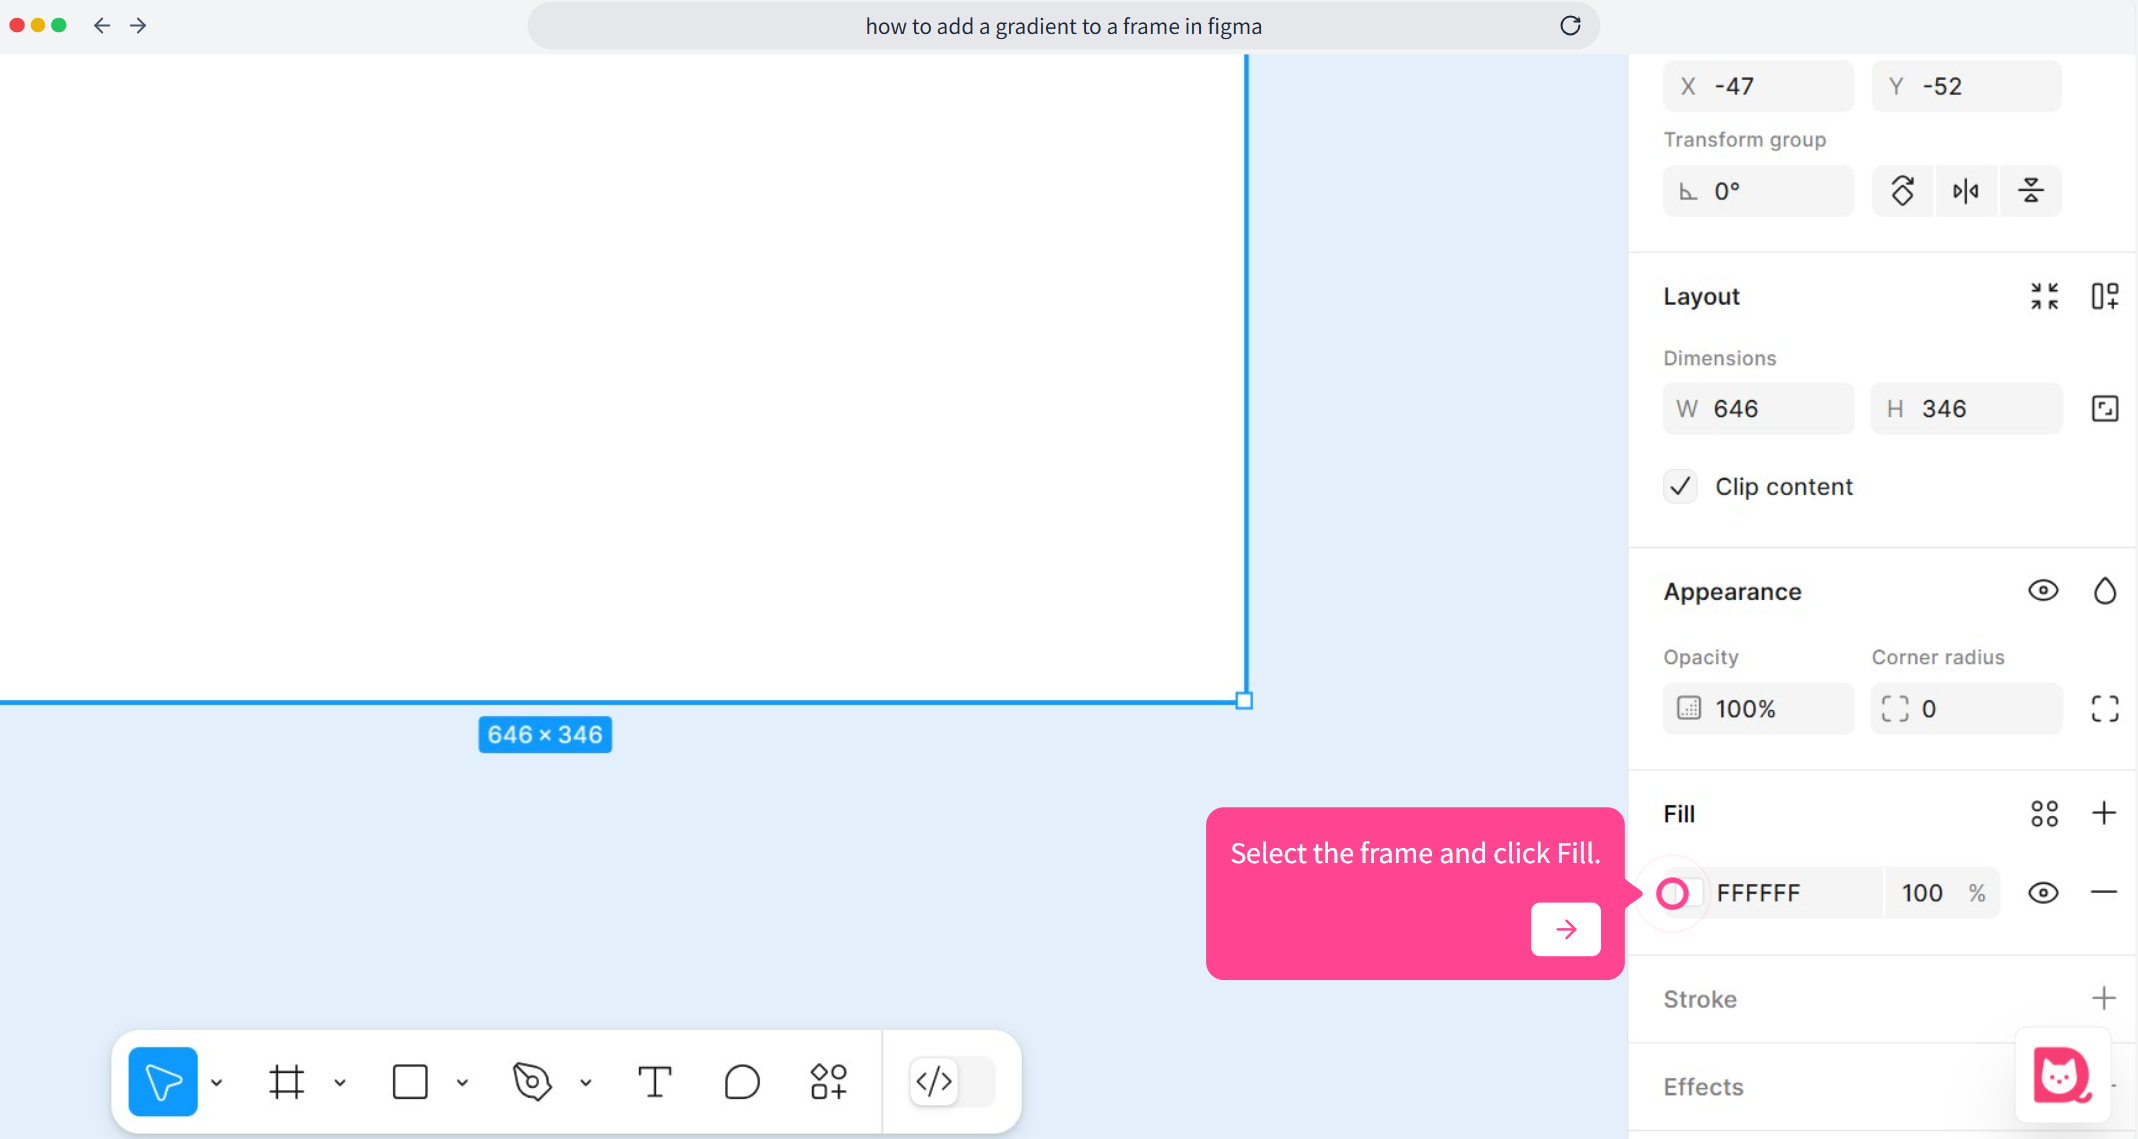
🟦Step 1: Select a frame and click on Fill
Begin by selecting the frame or shape you want to apply the gradient to. Then, go to the right-hand panel and click on the Fill setting.
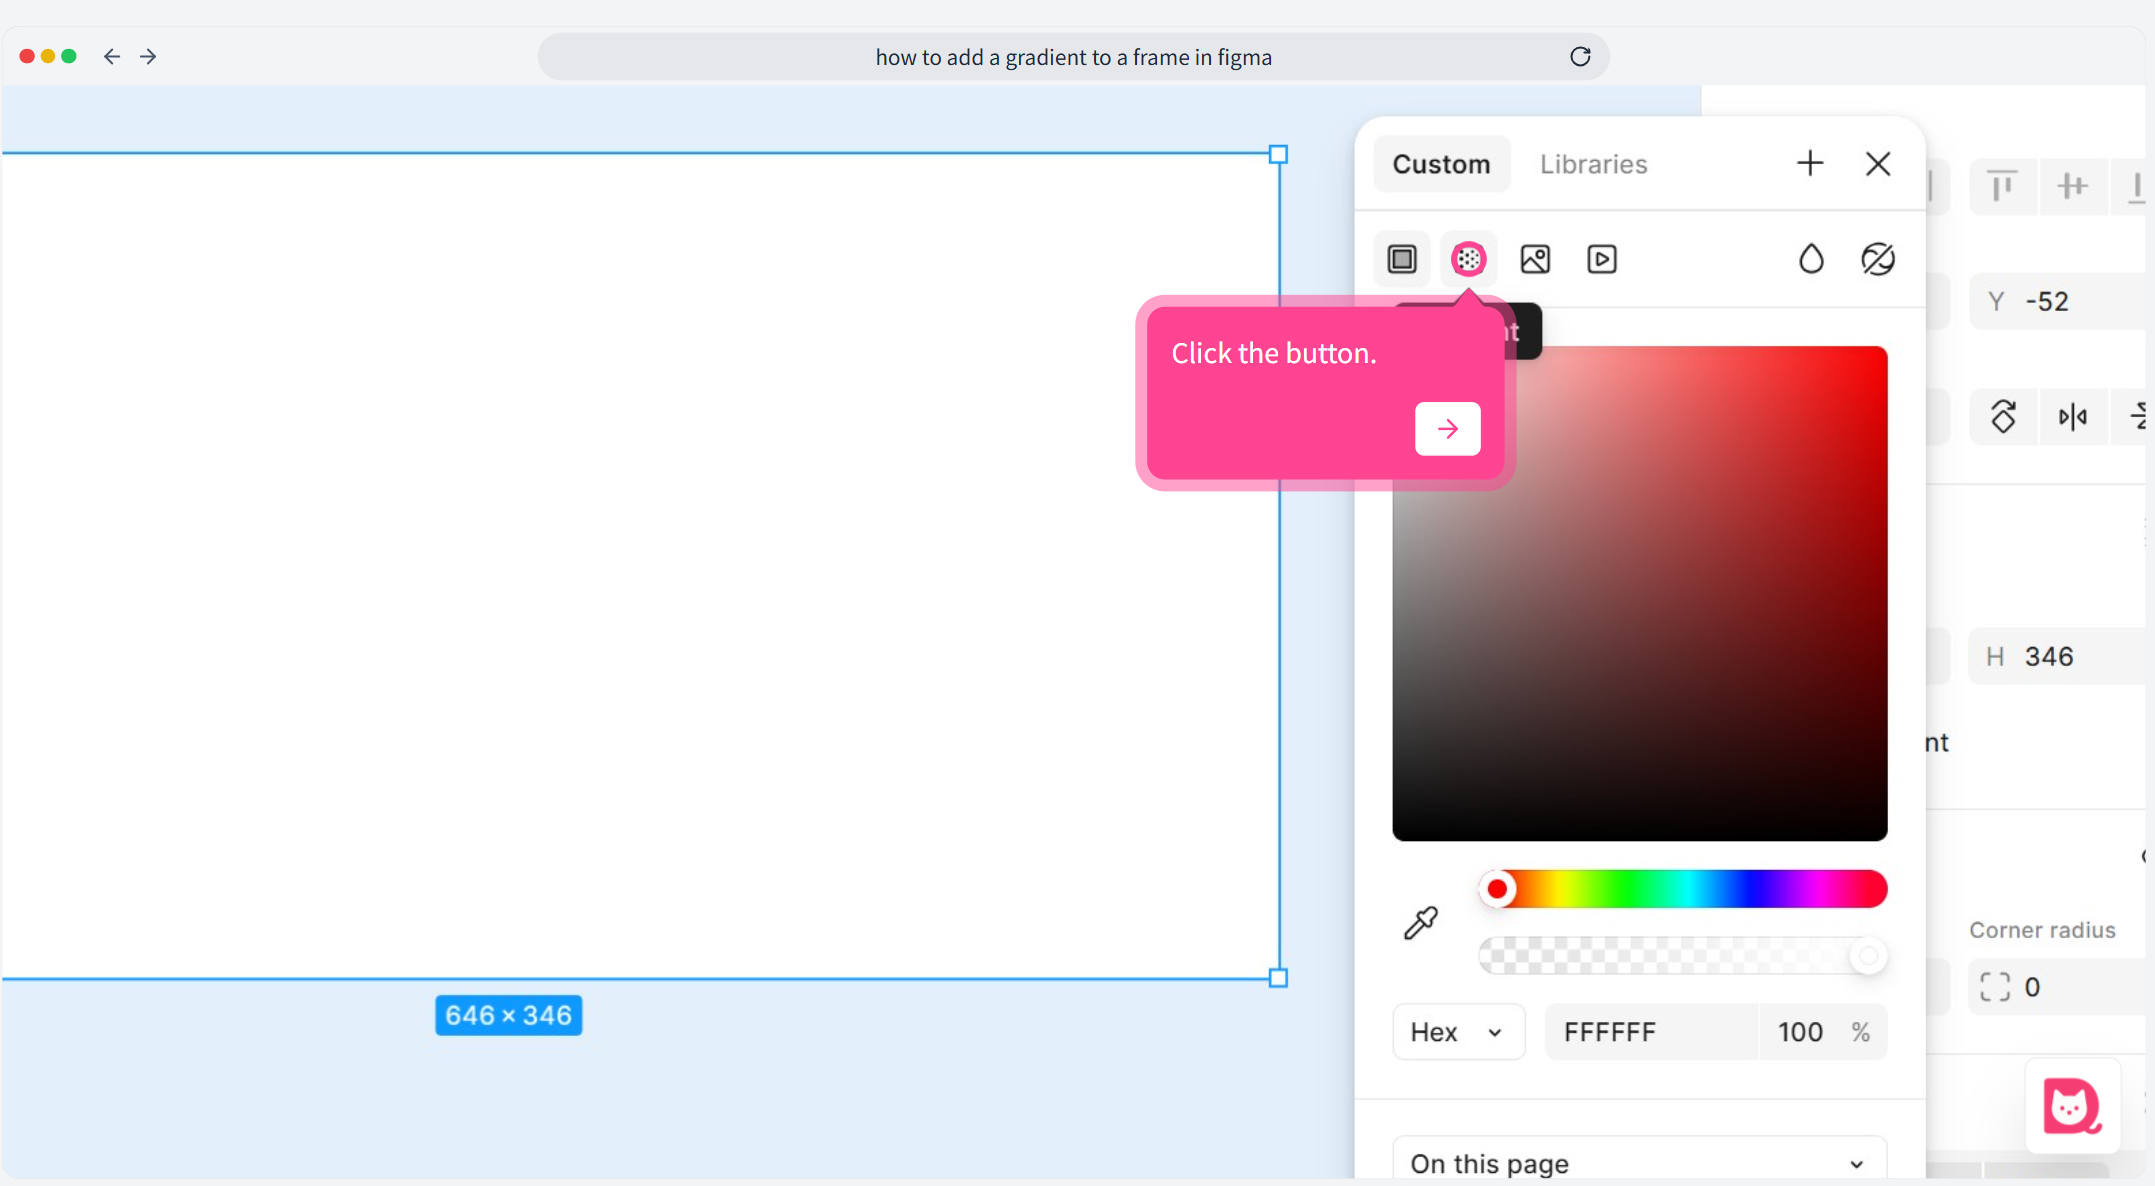
🟦 Step 2: Switch fill type to gradient
In the Fill section, you’ll see four small icons. Click on the second icon from the left — this switches the fill type from solid color to gradient.
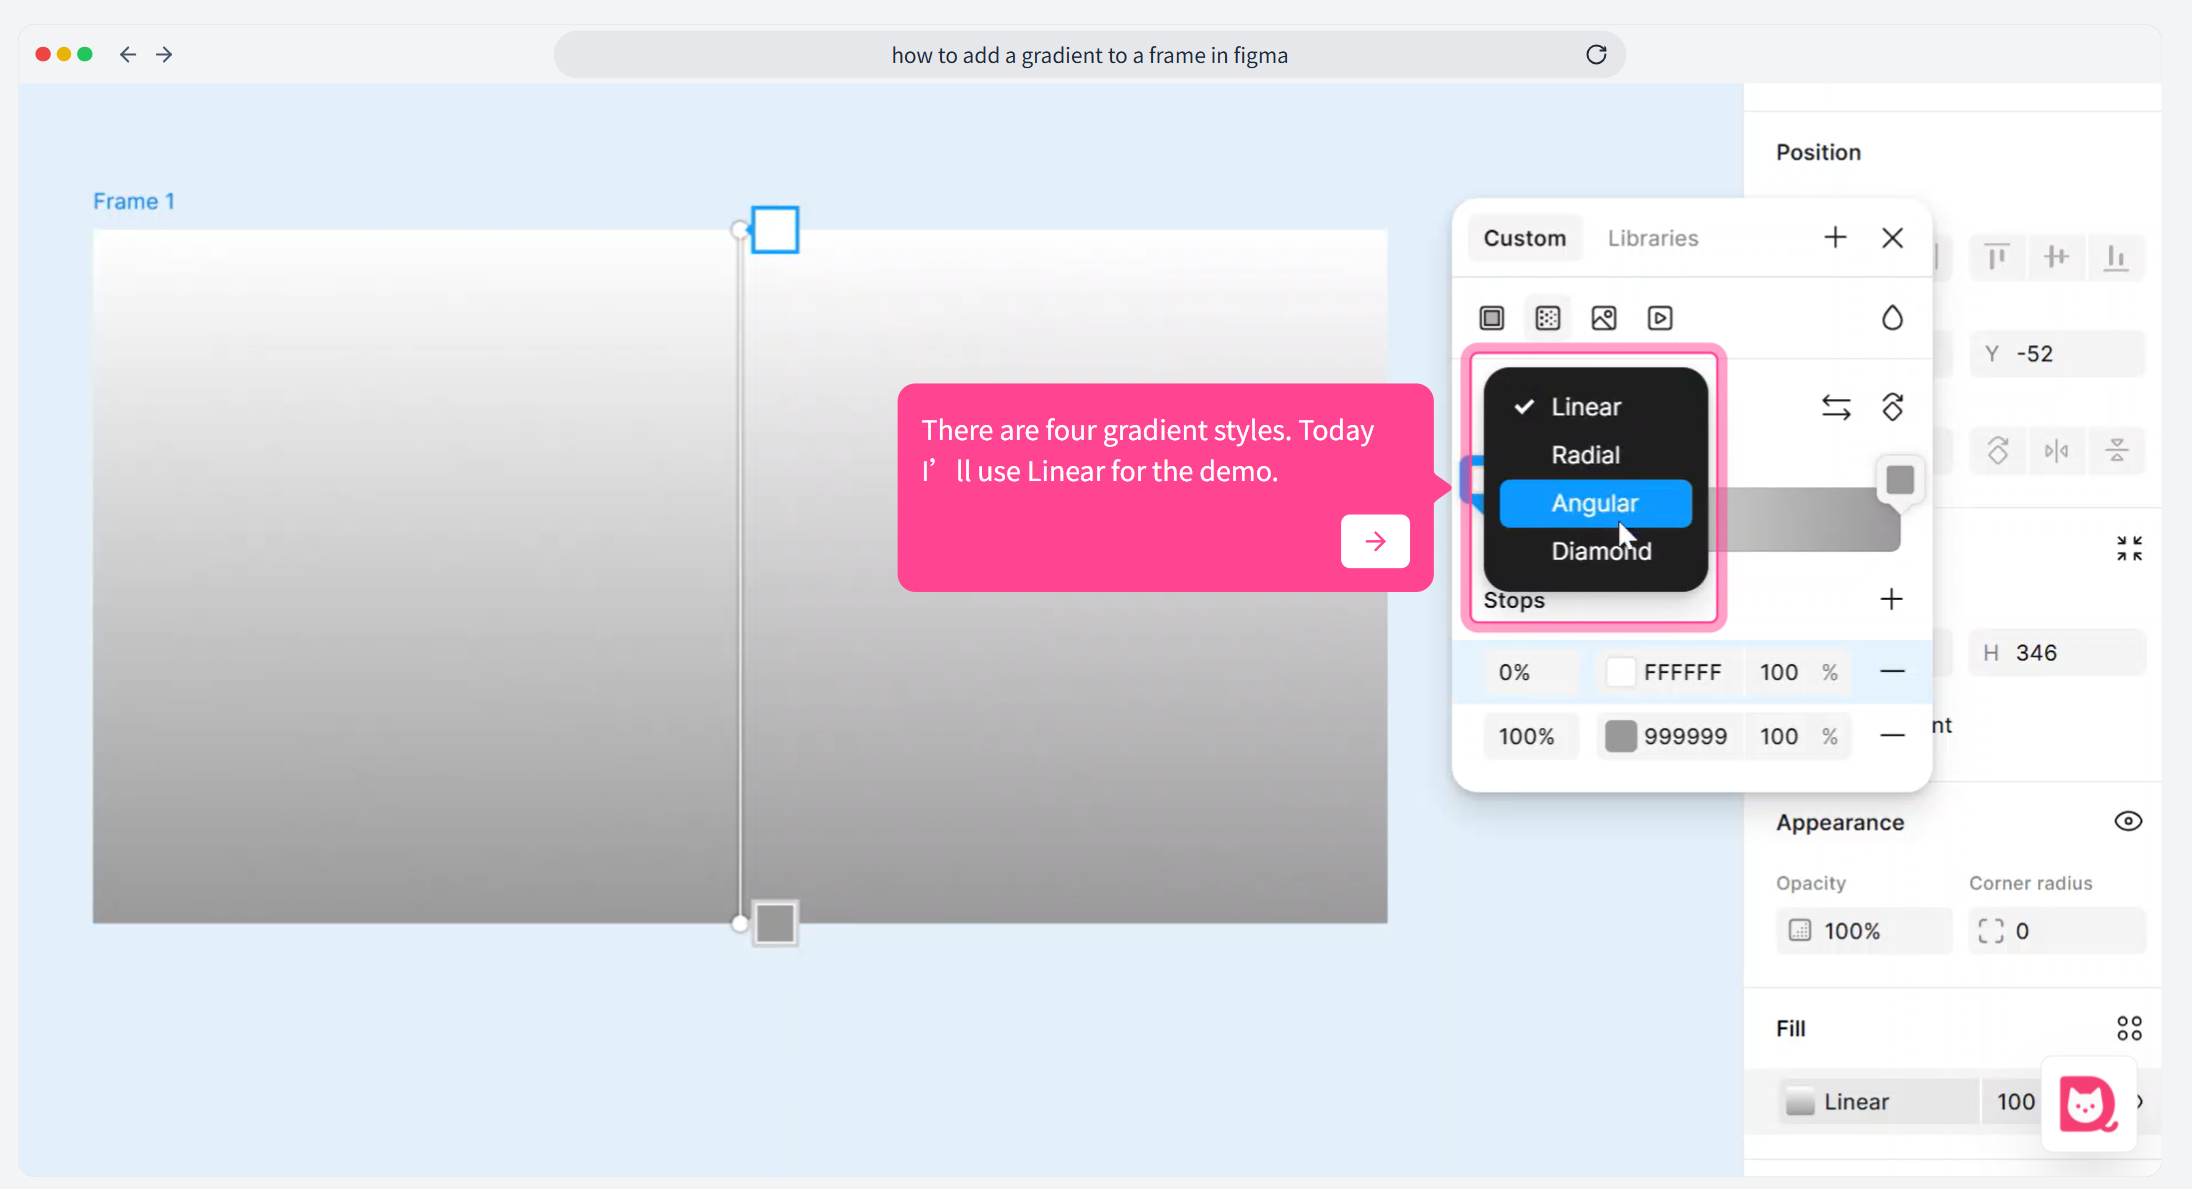
🟦 Step 3: Choose a gradient type
Figma supports 4 gradient types: Linear, Radial, Angular, and Diamond. In this tutorial, we’ll use Linear as an example.
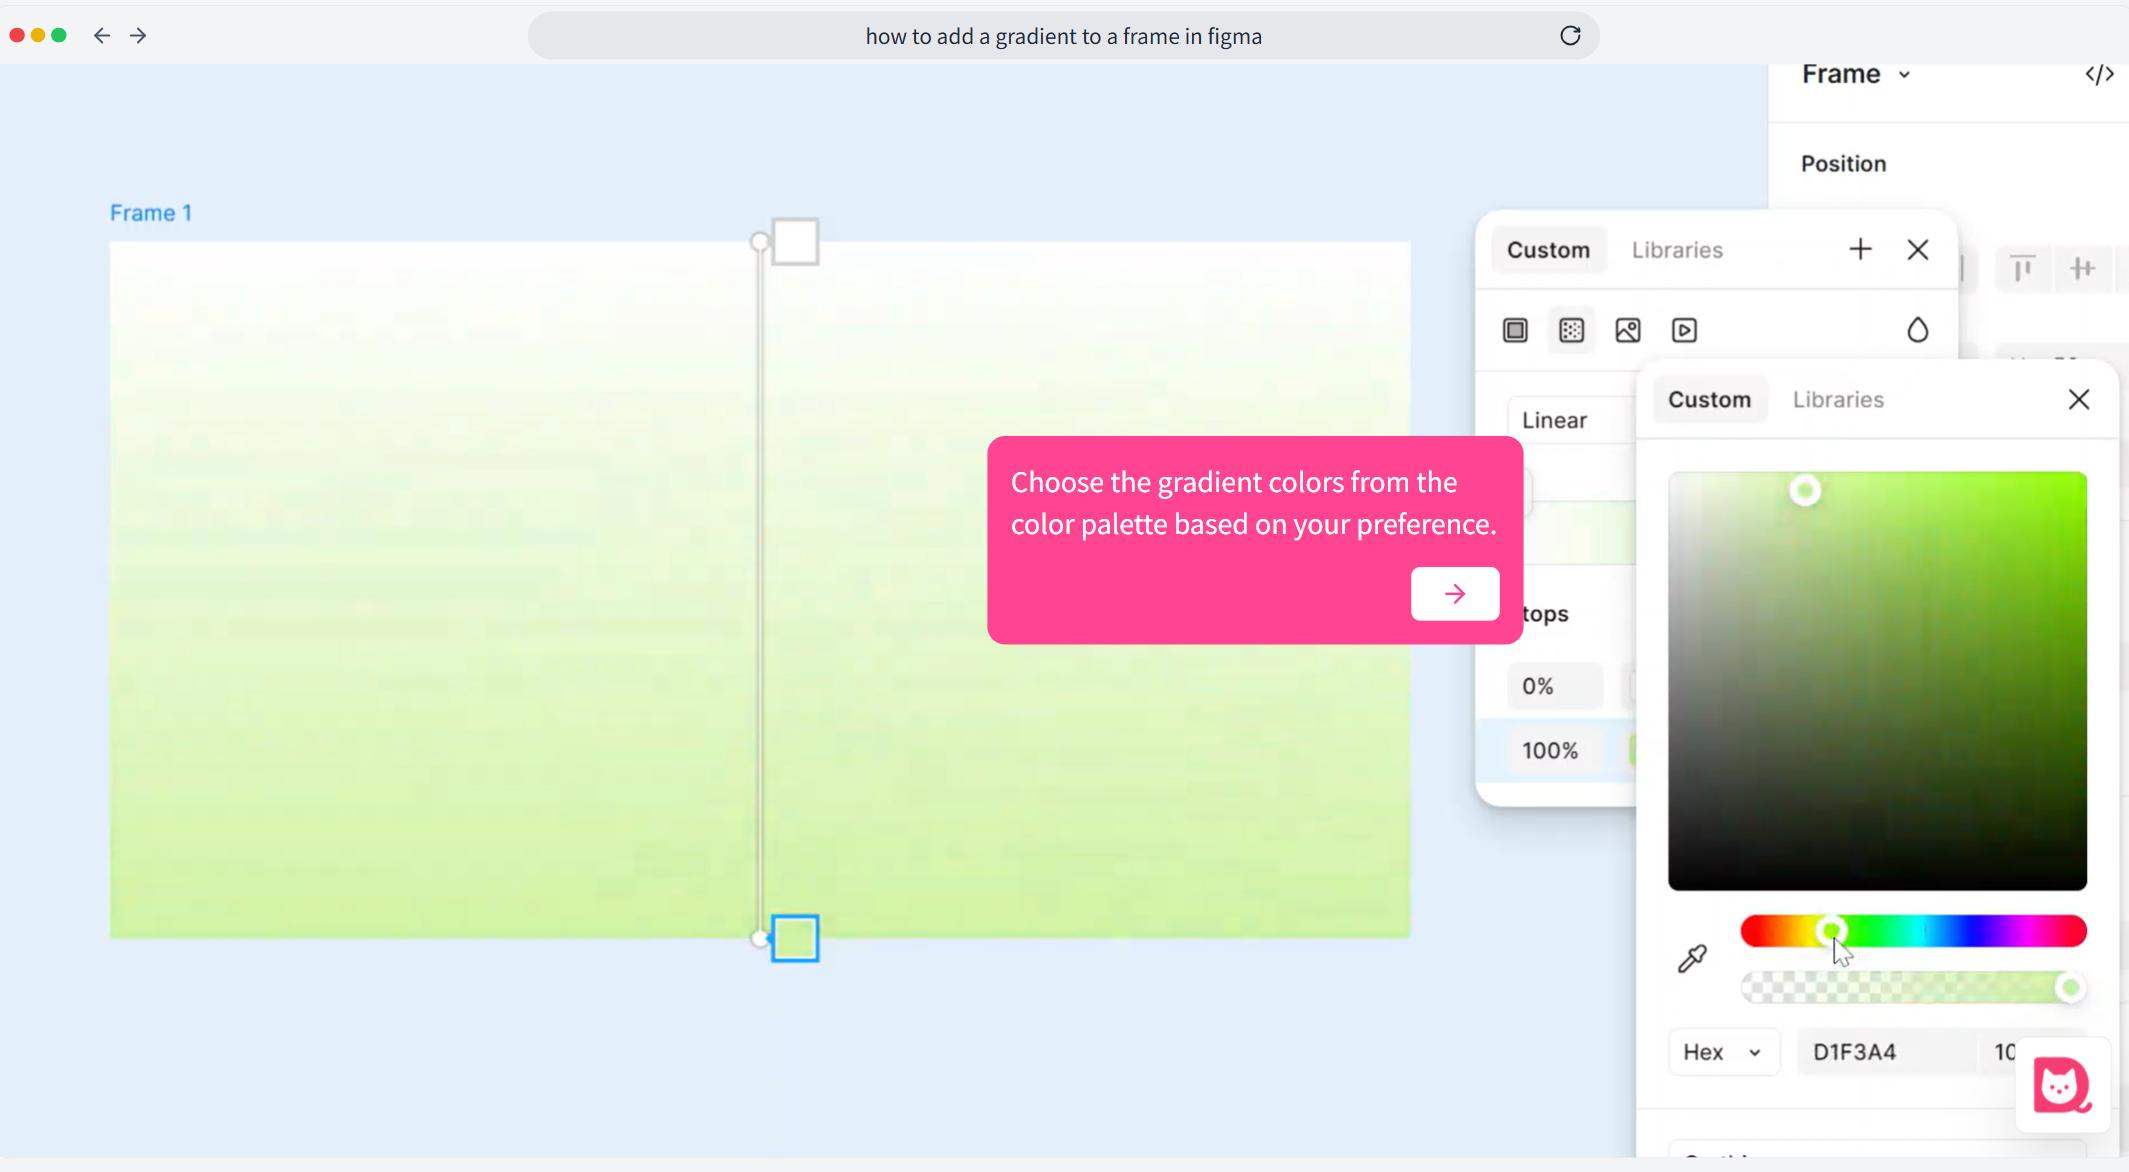
🟦 Step 4: Modify the default gradient colors
Figma applies a default grey-to-white gradient. You can click on either of the color stops to change the colors using the color picker or input a hex value.
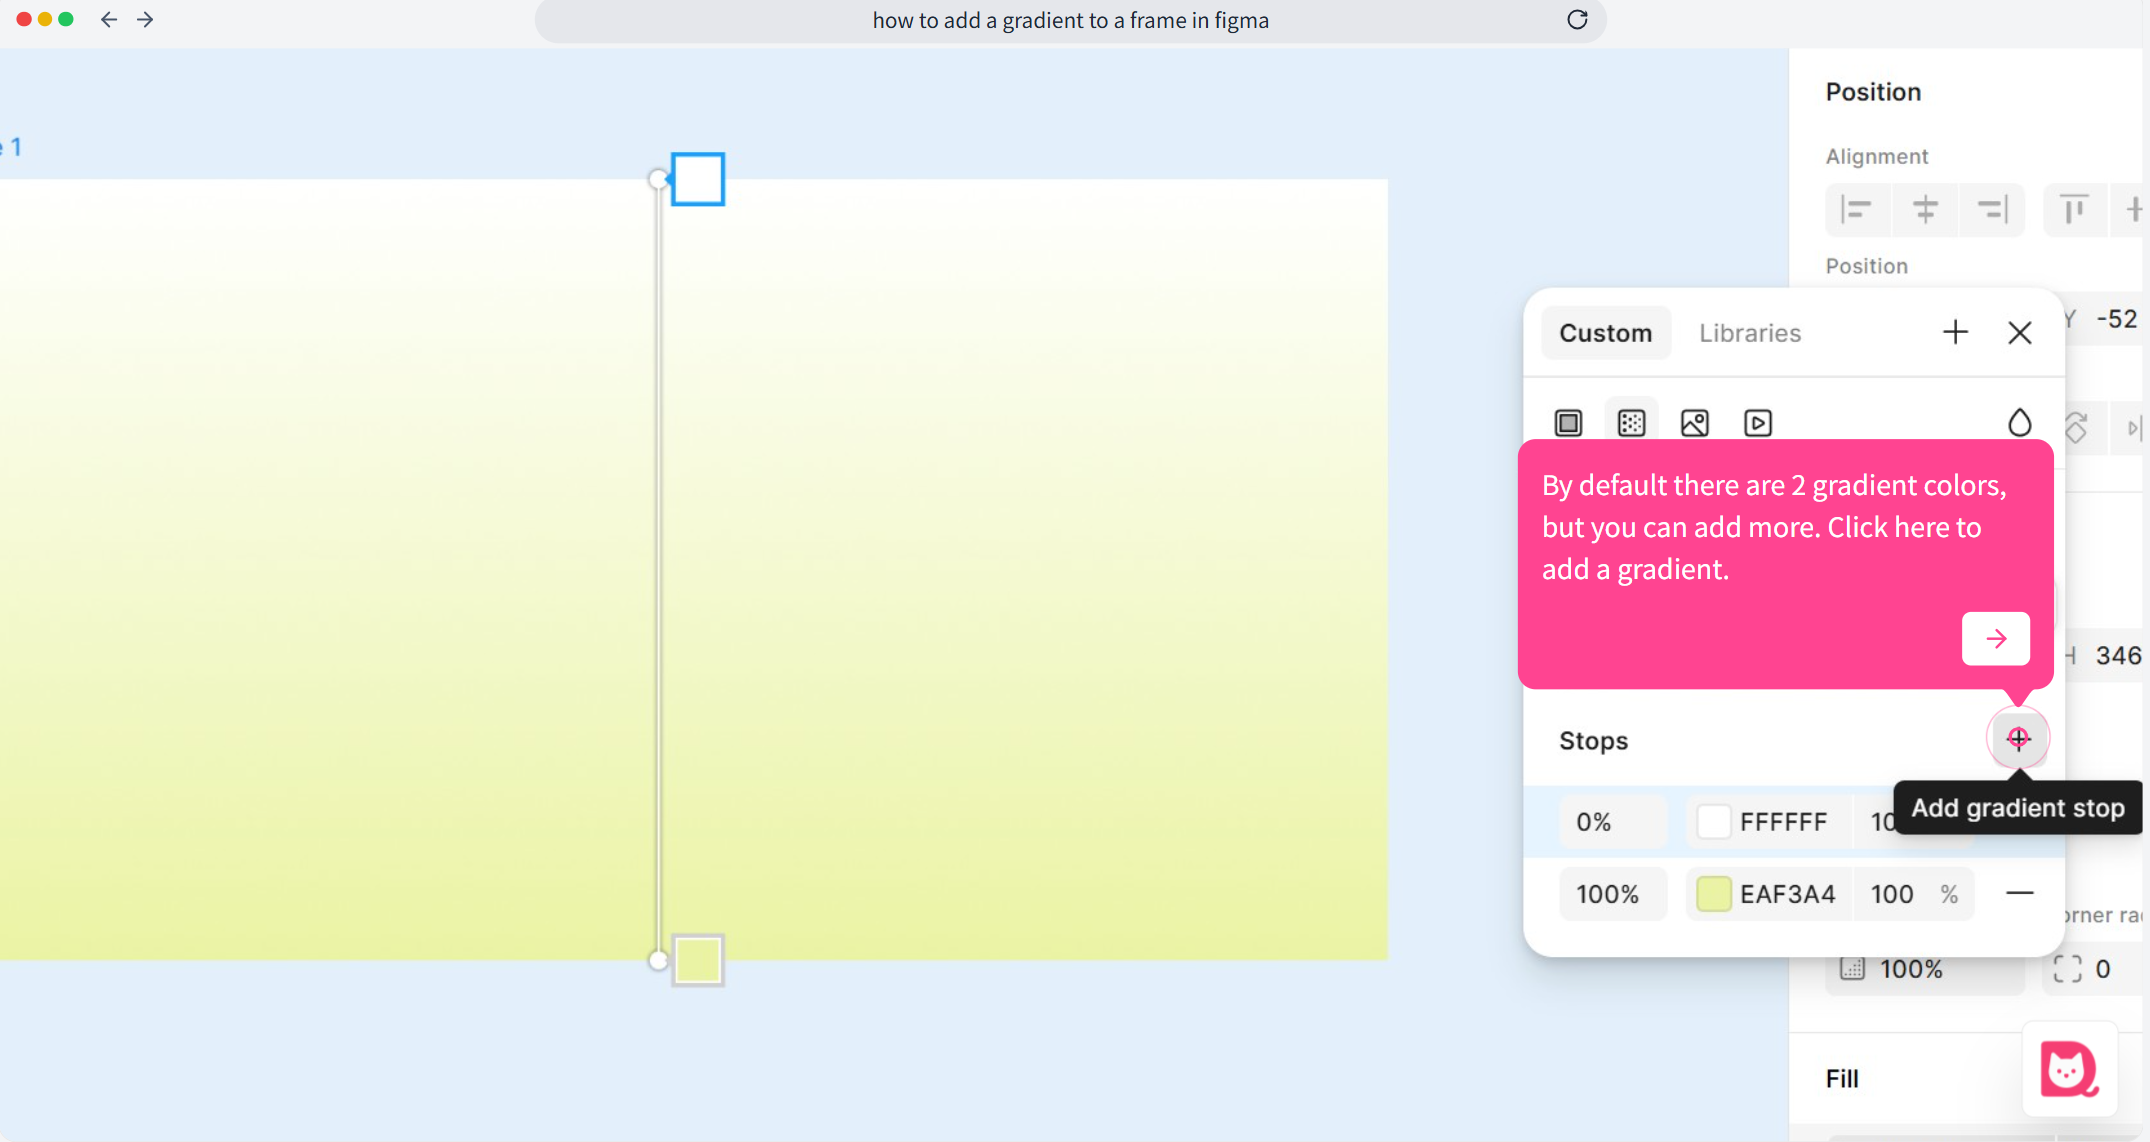
🟦 Step 5: Add more color stops
If you want more than two colors in your gradient, click the + icon next to the stop markers to add additional color stops.
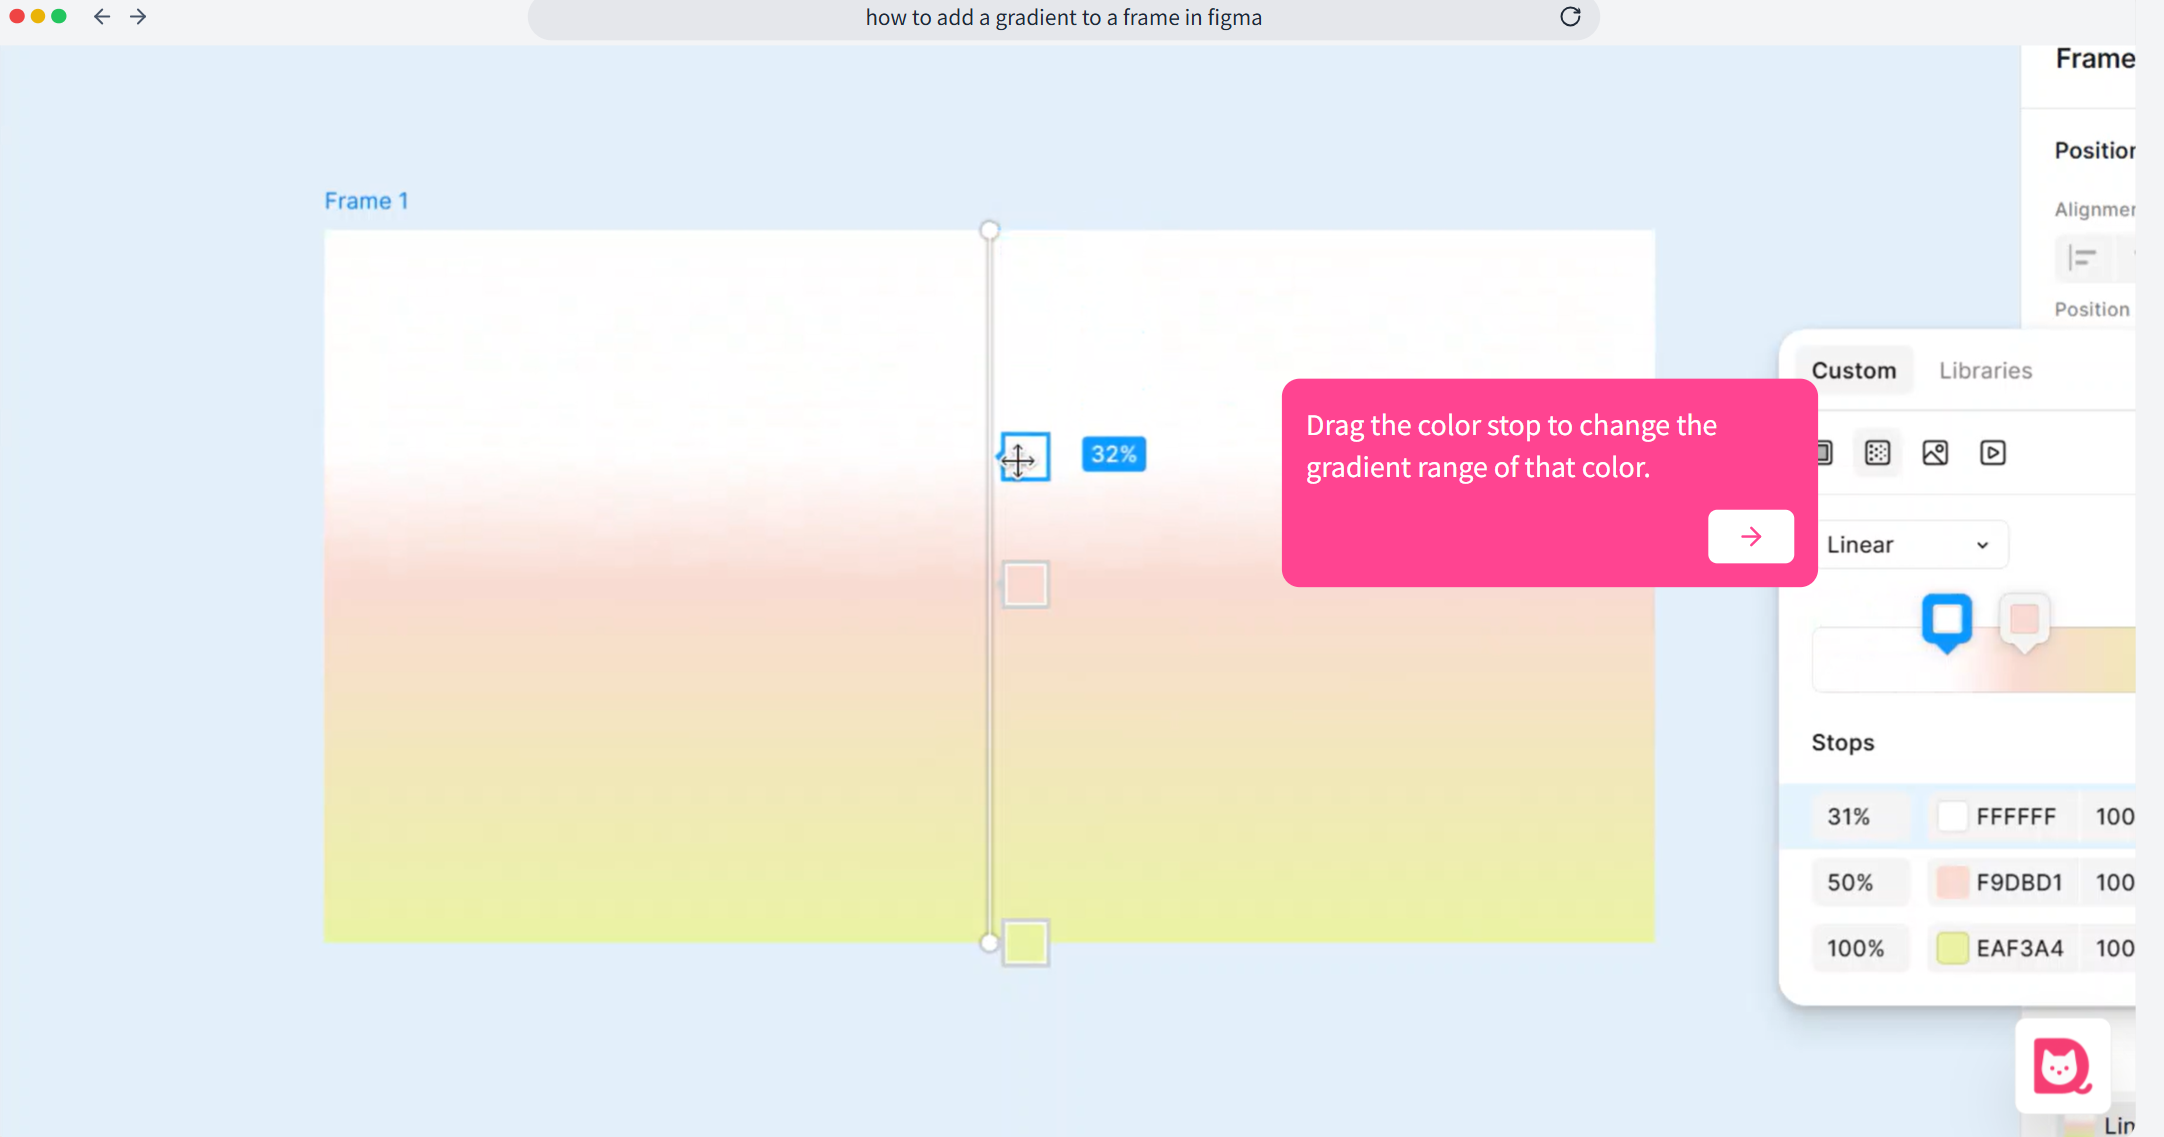
🟦 Step 6: Adjust the gradient range for each color
Each color stop can be repositioned on the gradient bar or directly on the canvas. Simply drag the small square to change how much space each color takes up.
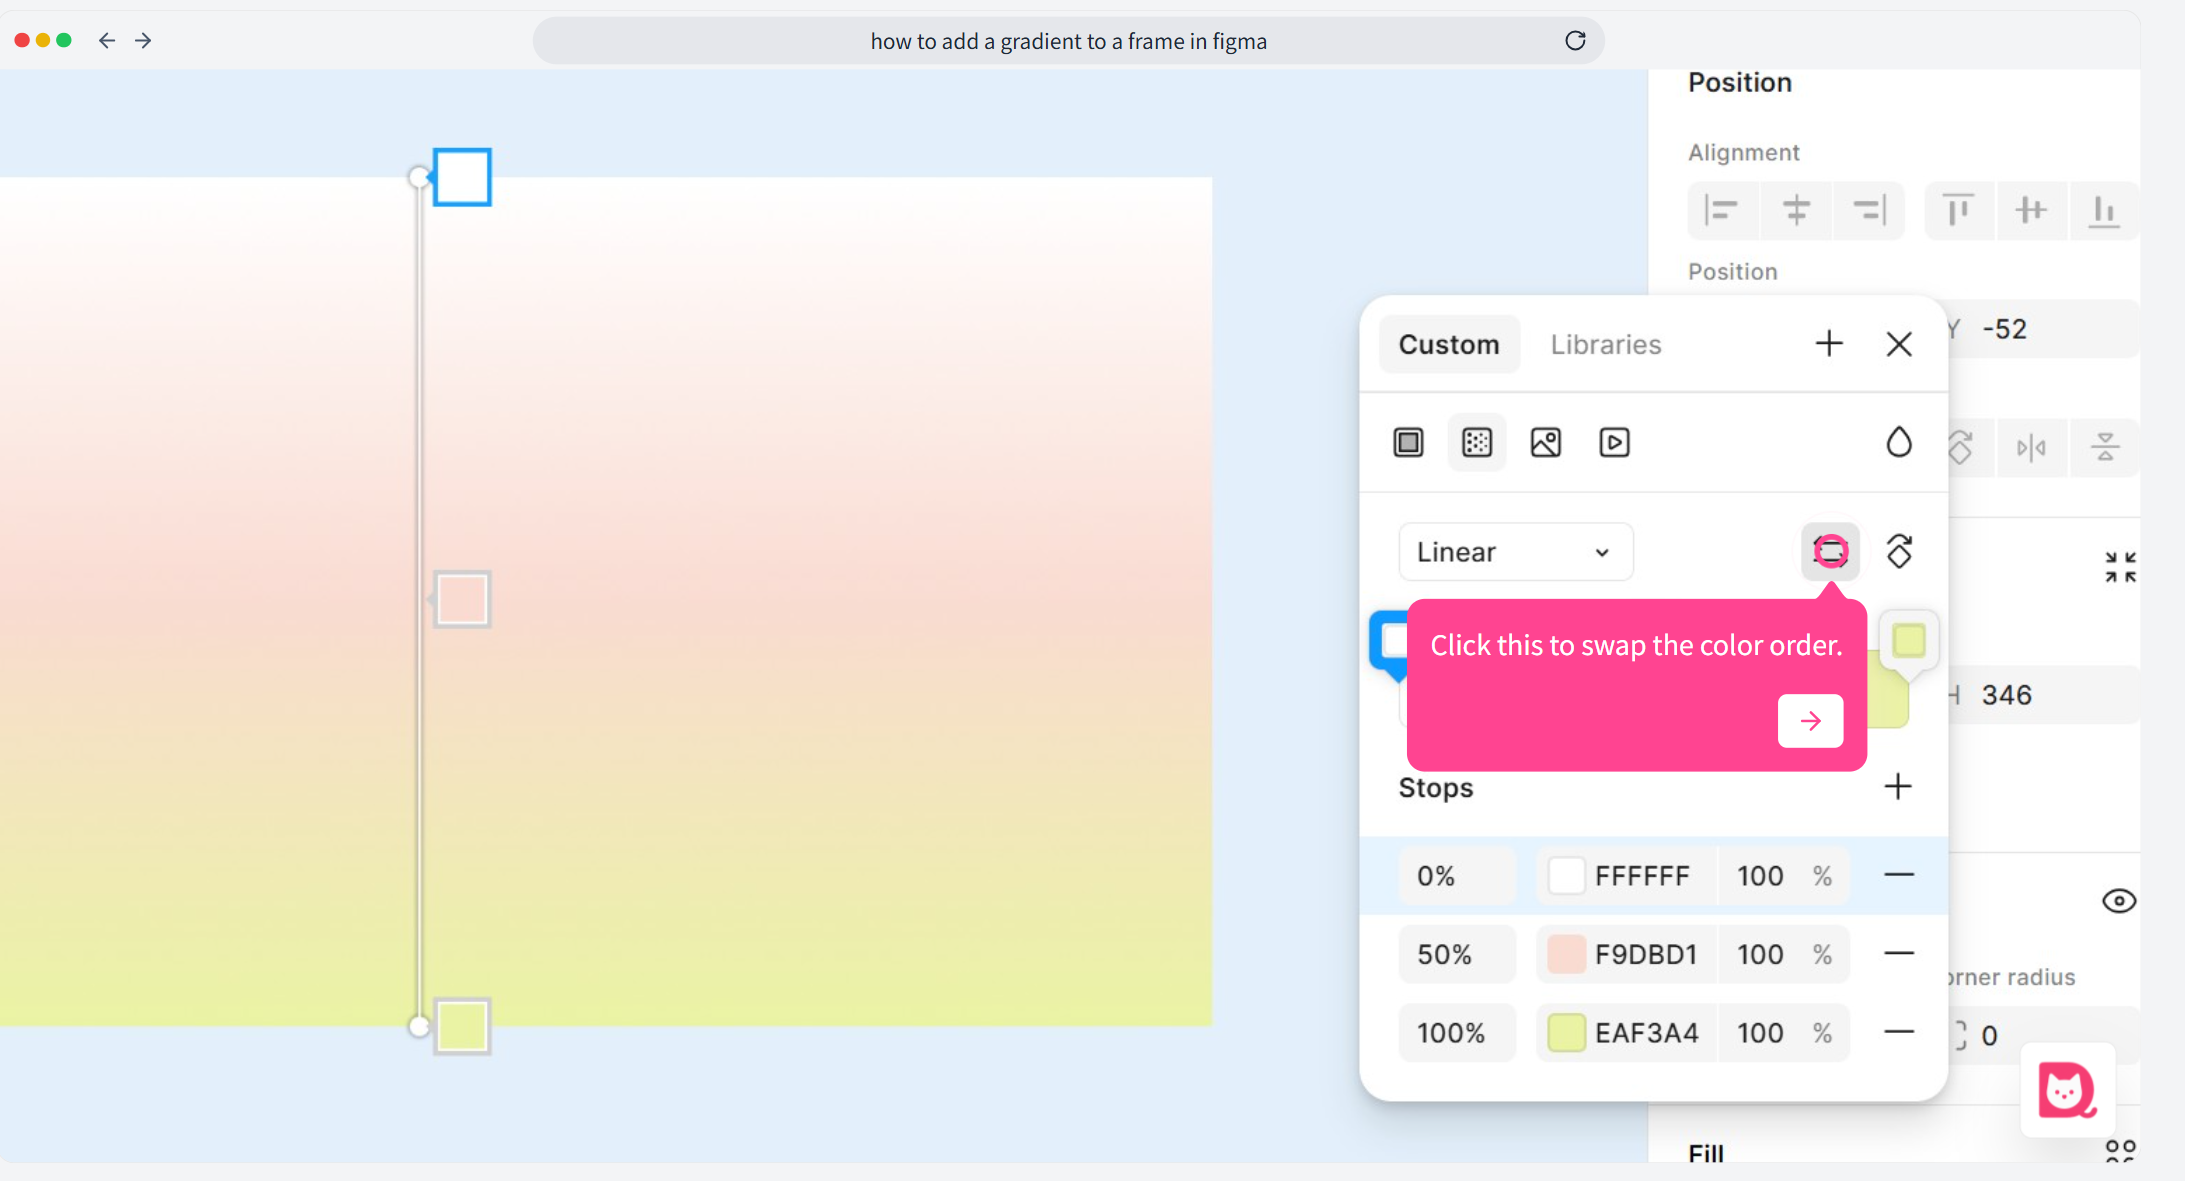
🟦 Step 7: Reverse the gradient direction
To quickly reverse the order of the gradient colors, click the “Swap gradient” icon.
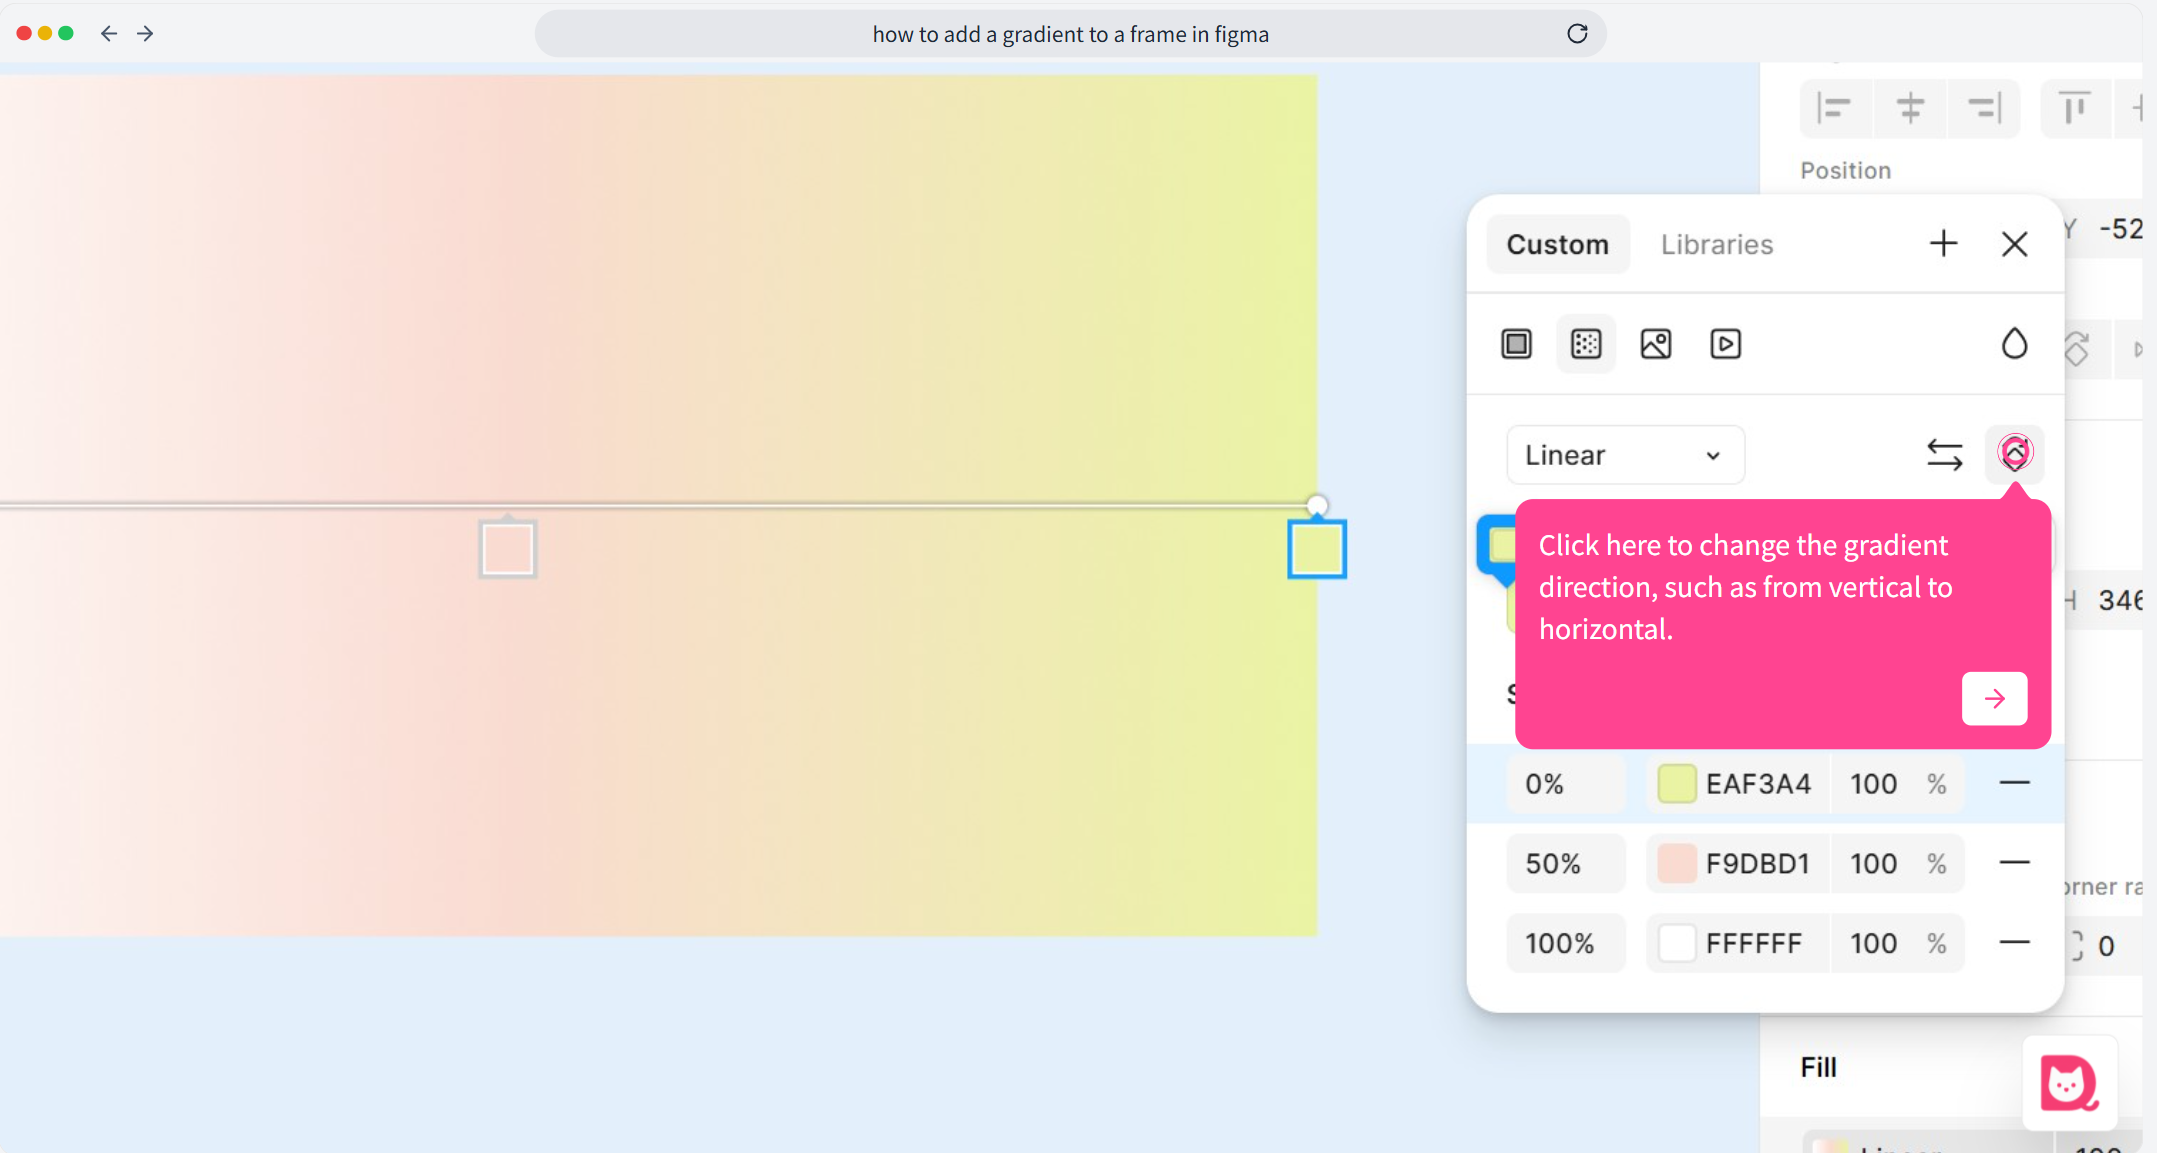
🟦 Step 8: Use preset gradient angles
You can also choose from preset gradient angles — such as horizontal, vertical, and diagonal — by clicking the direction icon.
🟦 Step 9: Manually adjust the gradient direction
For finer control, drag the endpoint handle of the gradient line (the cross icon on the canvas) to manually set the gradient angle.
